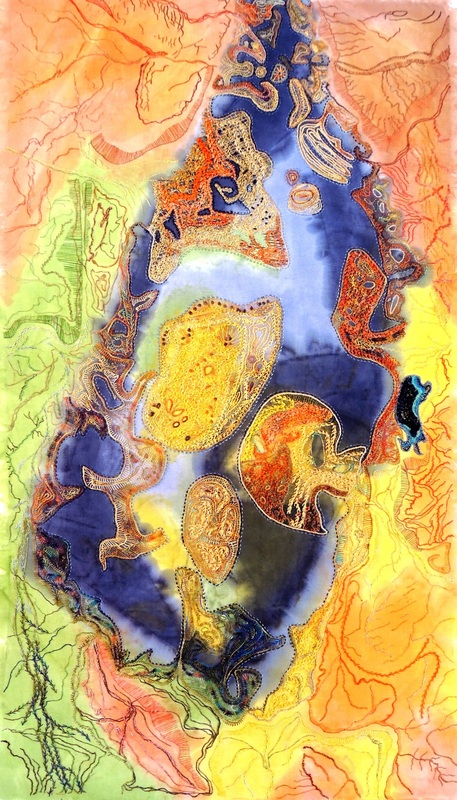
Lake Carnegie only holds water after torrential rains that occur only every 30 years or so. In between times it is marsh land. Of course, I have played with the colour, a lot! 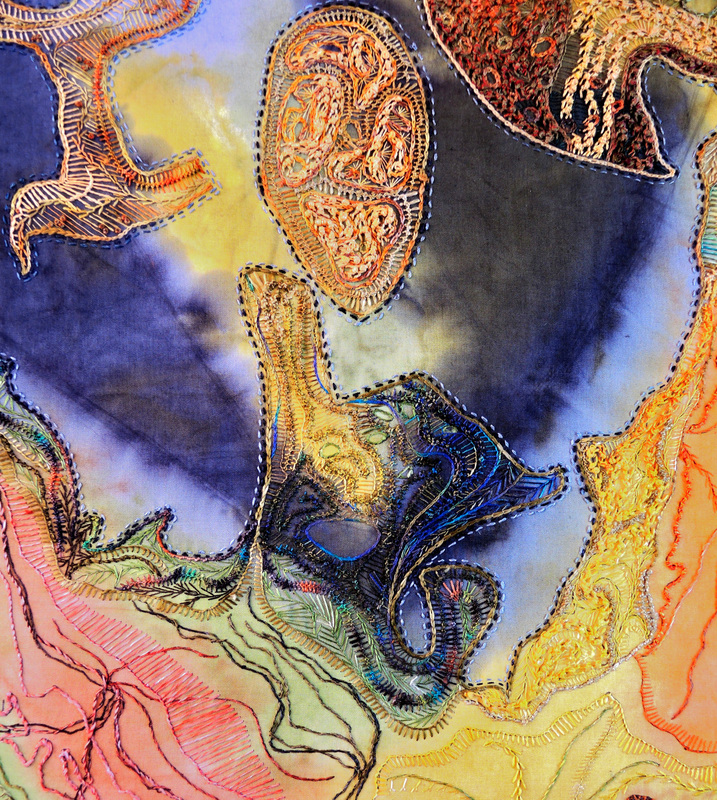 My aim in this piece was to accentuate the islands and land masses that project into the lake by using lots of raised texture. I did this with extensive use of mountmellick thorn stitch and palestrina stitch. (Don't forget that if you want a larger image you can double click on the image). 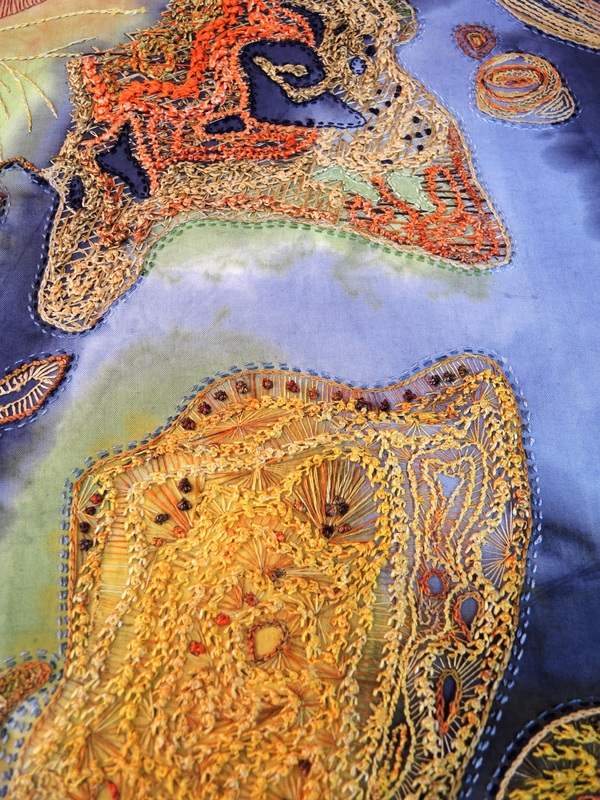 I filled the areas between the raised stitching with long stitches in varying orientations. 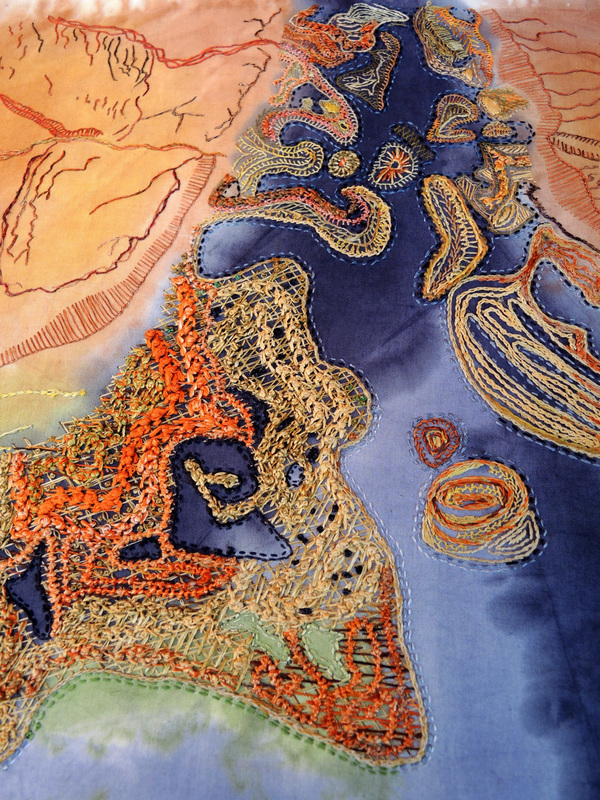 I deliberately kept the land areas surrounding the lake simple in stitch and colour, creating simple contours to describe the landscape and providing a simple framework for the more intensively worked lake lands. 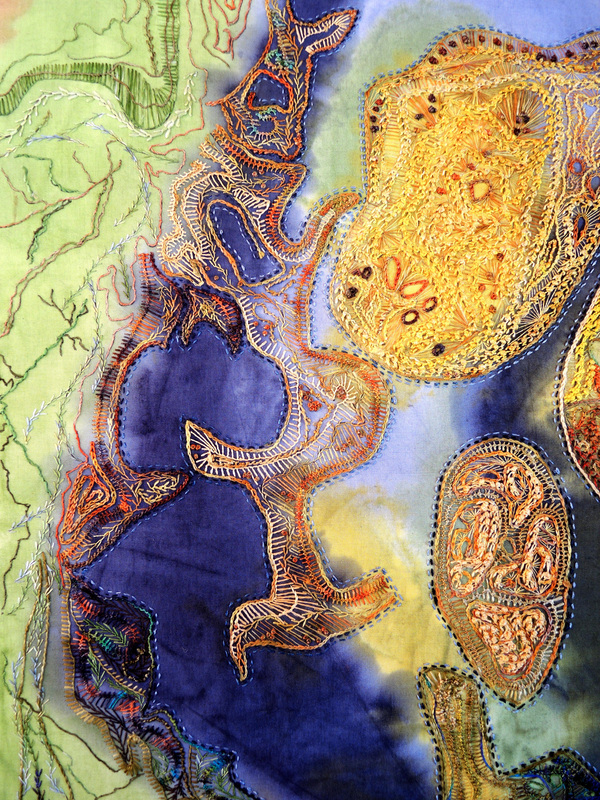 The lake waters are described entirely by the underdyeing, except for the double row of running stitches that defines the water around the land masses. 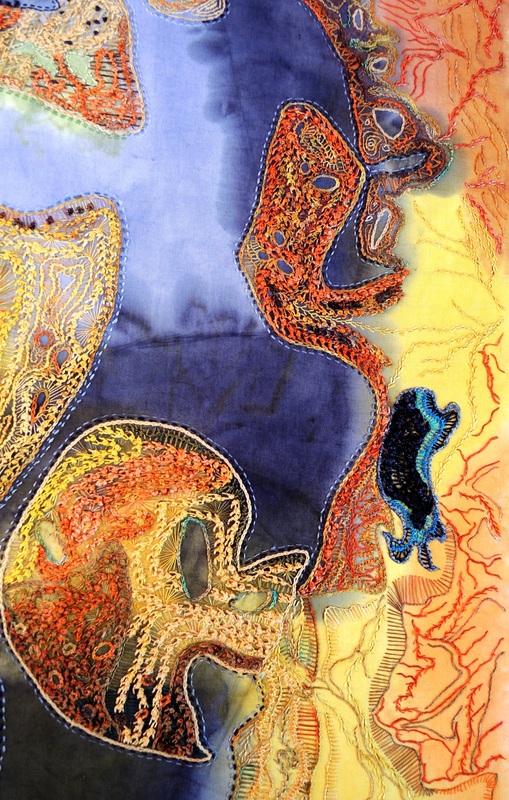 A single area of landlocked water is worked in the thickest threads used on the piece. Lushly textural it draws the eye to its singular form within the whole.
I hope you enjoyed looking at Ephemeral. If you are in Amsterdam between October 19 and 29 please come over and take a look. Thanks for dropping by...
11 Comments
It was nice to work on a lighter, more optimistic piece after finishing "Roads to Nowhere". This piece, titled The View from the Top, is based on a satellite image of the Himalayas. From space it appears as a complex web of snow capped peaks and valleys dissected by river beds. To try to reproduce every detail would have resulted in a dead composition that would not have come close to capturing its breathtaking beauty. Instead I paired it down to the bare essential lines and textures. I wanted the piece to be expansive, to give a sense of quietude, to breathe. 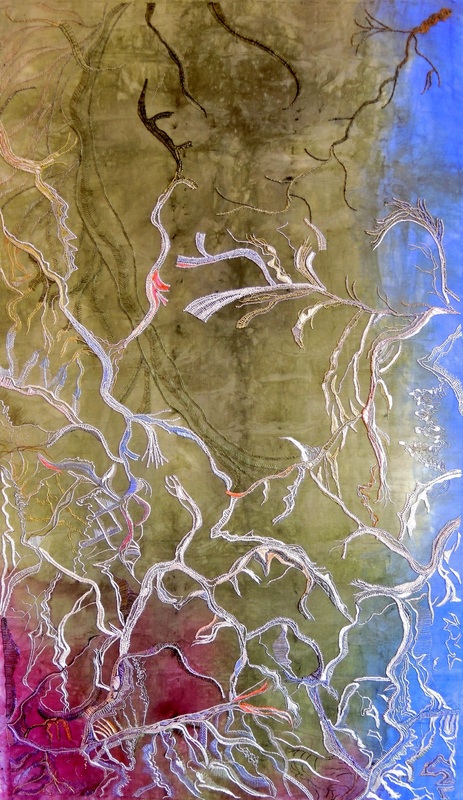 At 100cm x 65 cm this is the largest piece I have worked so far. I used fine chinese filature silk to get maximum shine and reflectivity from the stitching. 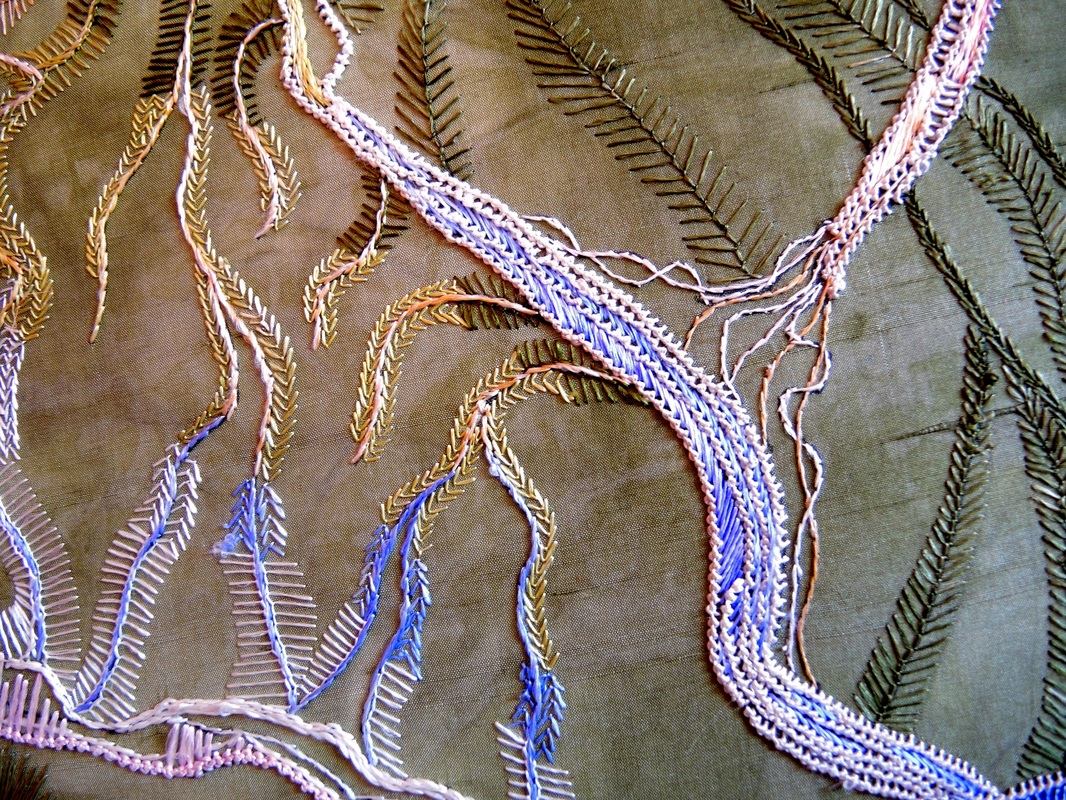 The stitching is very fine, but there is a lot of texture provided through the use of various stitches, with palestrina stitch featuring along all of the knobby "ridge lines". 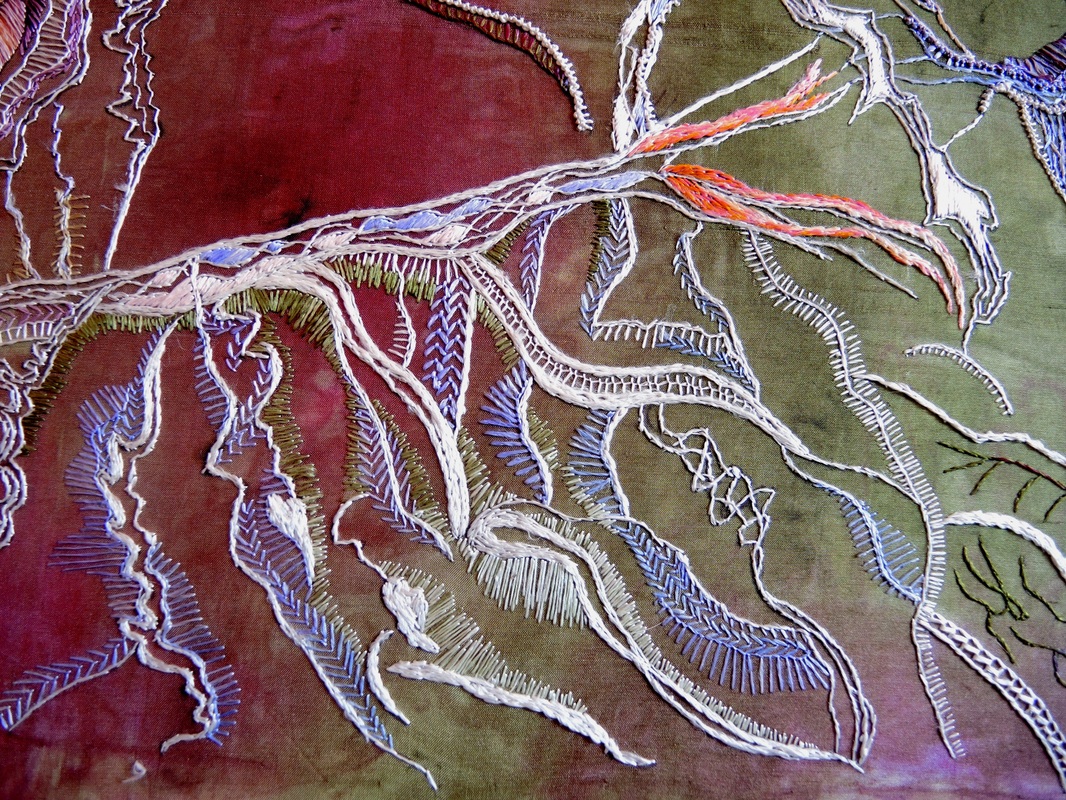 From a distance the stitching appears largely white, but up close delicate colour plays up the details. 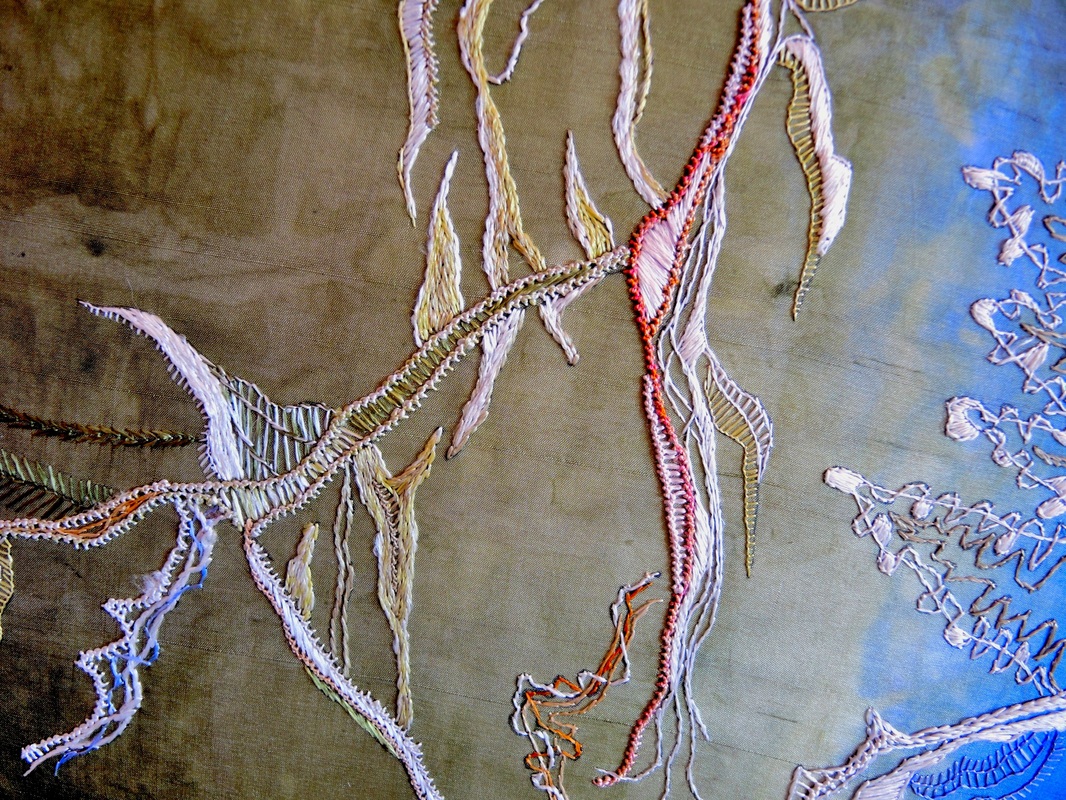 ...and here's a whole lot more close ups.....  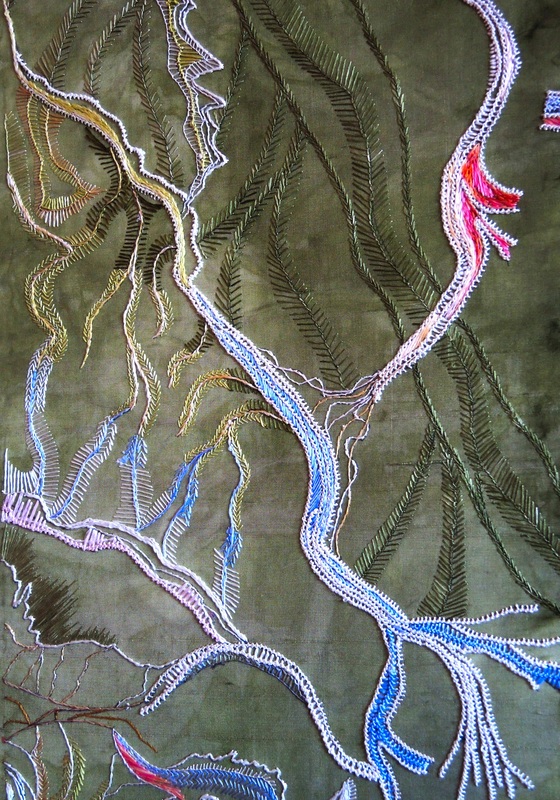 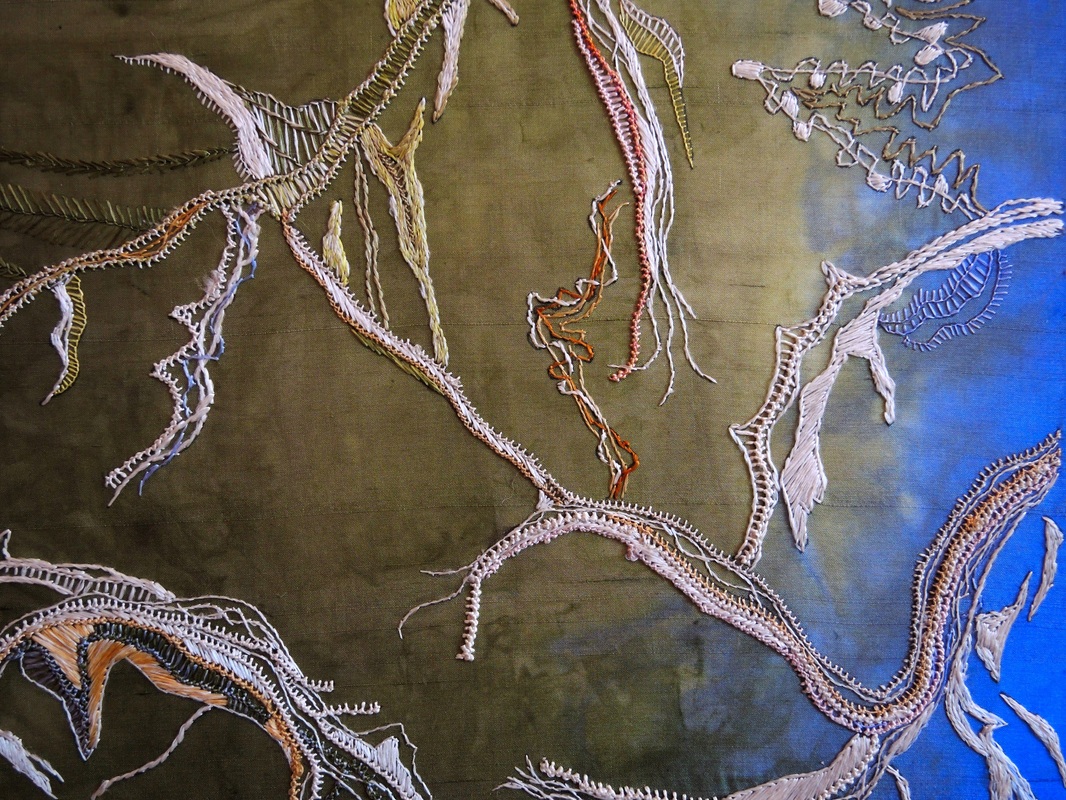 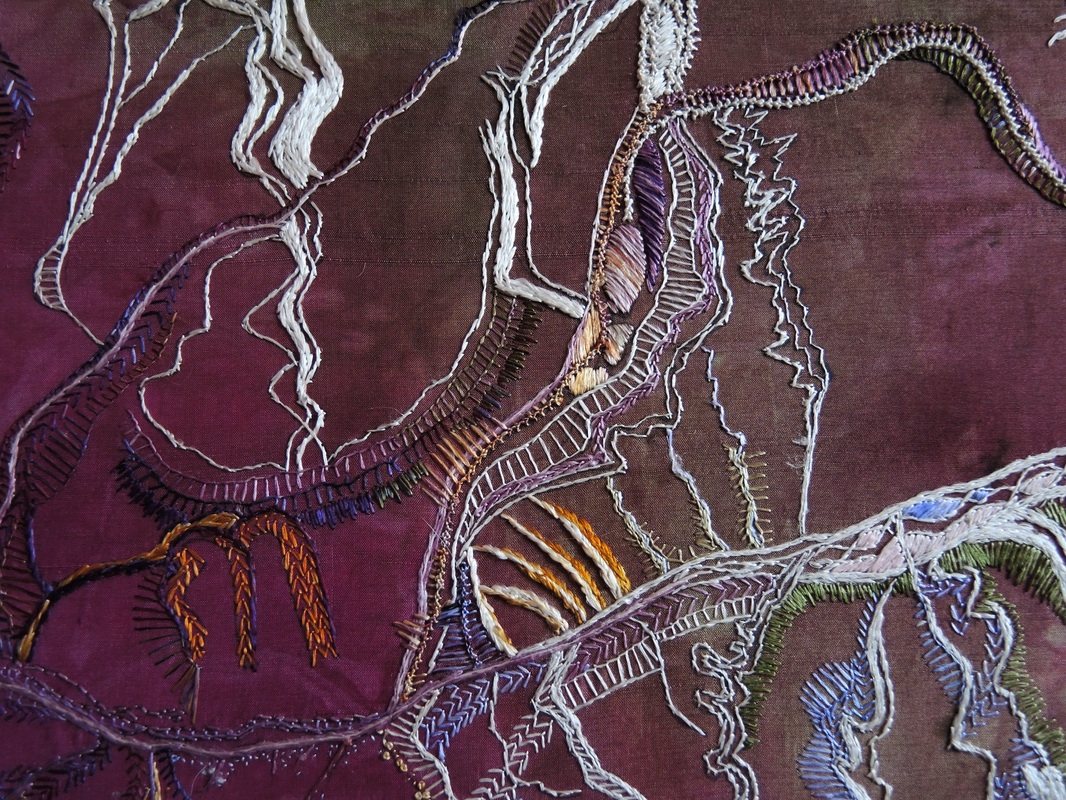 ...thanks for stopping by.
This is a piece I finished in March called Roads to Nowhere. It's another work in my Heaven and Earth series. The work measures 70 cm x 70 cm and is based on a satellite image of a military encampment in Iraq. What fascinated me was the geometry of the roads imposed on this sparse landscape, roads that are almost devoid of buildings, roads that are built not to service a community,but to transport military arms and personnel. 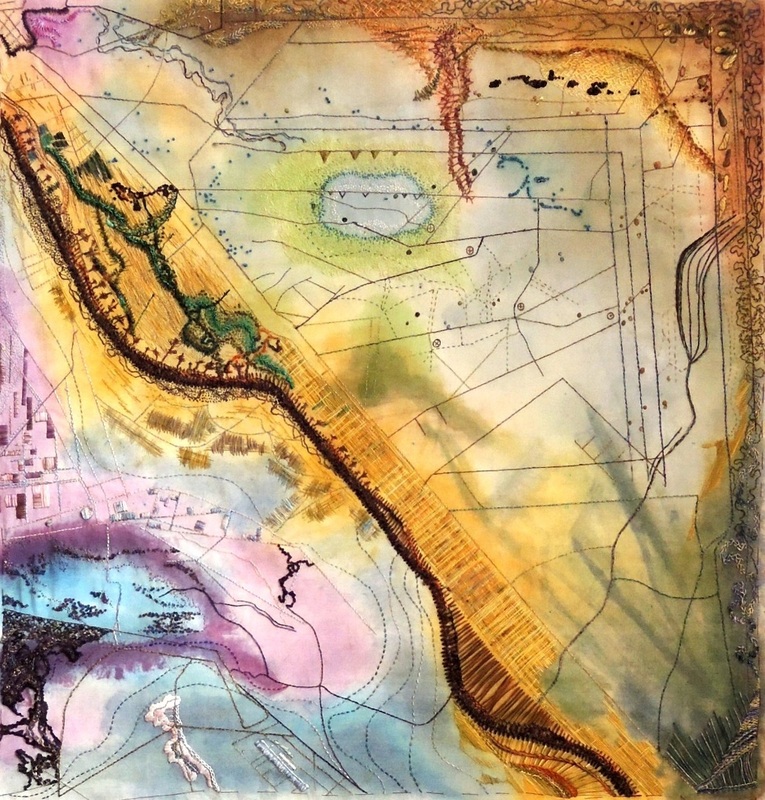 I have to admit that this was the most difficult piece I have ever done. I agonised over how to interpret this image that had so little in the way of structure or texture to work with. The whole time I worked on it I felt decidedly ill at ease. As I worked it I struggled over how to unite the various disparate elements of the design. i'd finish one part and think "that works" and then I'd finish the next and think "that works" and each part seemed to work with that adjacent to it, but the image still disturbed me. "But if all the bits work, and if they work with the adjacent bits, then the whole thing should work" i thought. And yet, at the end, I wasn't sure how I felt, or rather it still made me uneasy. "OK, maybe you just have to live with it a while". So I did. I had it on the floor next to my worktable for a couple of months and over time I came to feel better and better about it. I think the difficulty I had in creating the work was clouding my judgement of and emotions towards the finished product.  I started work along the top and top right edges. Whenever I got stuck on how to work the next part I took a break and stitched in some of the roads.  There were some elements unique to this image that I have never seen before in a satellite image. For example the well defined triangular forms and the circles with crosses in them that you can see in the image above. I have no idea what the triangles are, but I'm guessing that the circles with crosses are helicopter landing sites or perhaps targets for airforce exercises. 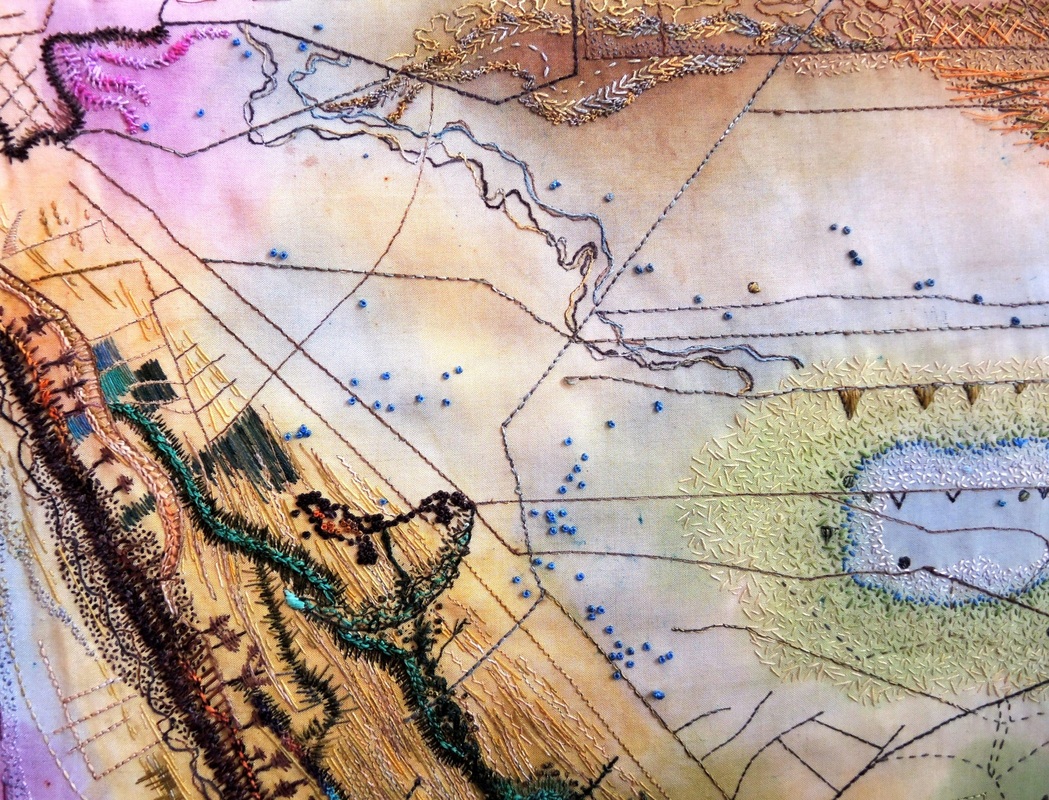 Above: Top left hand corner 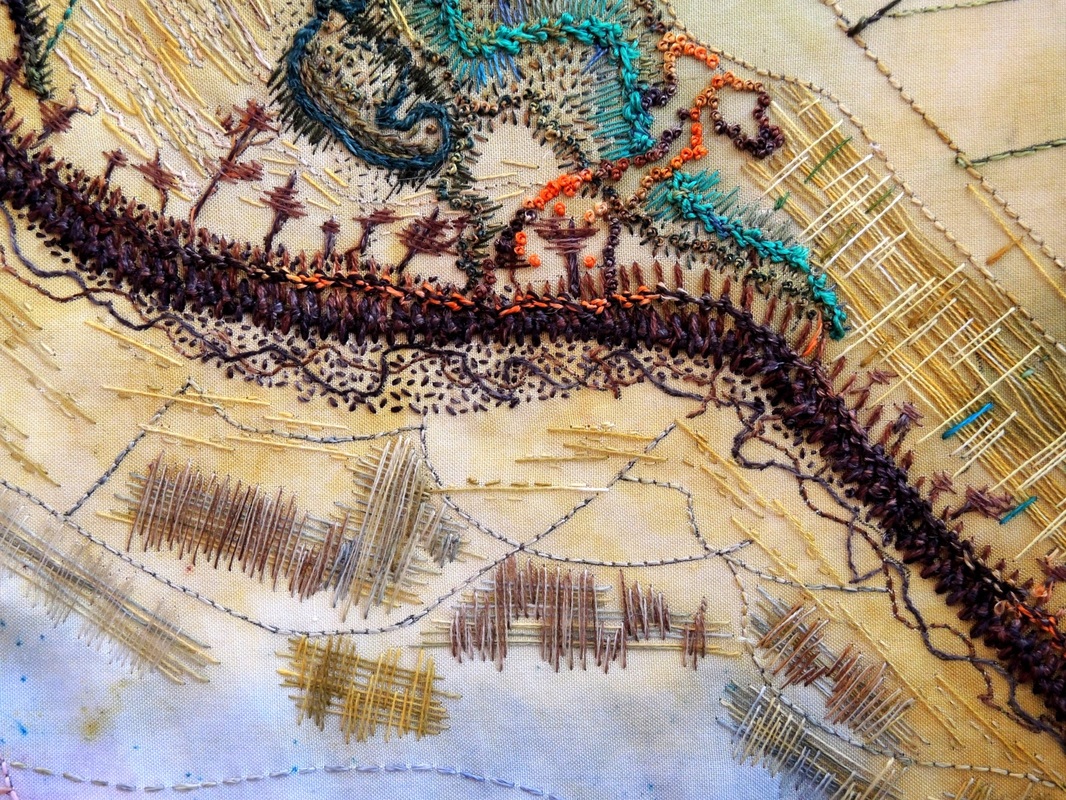 Random cross hatchings in variegated thread and detail of the river bed that bisects the image diagonally. 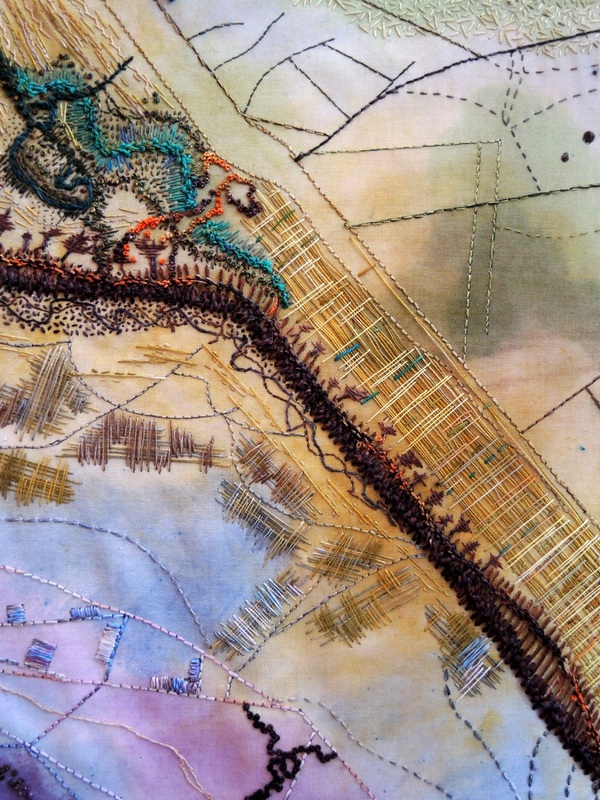 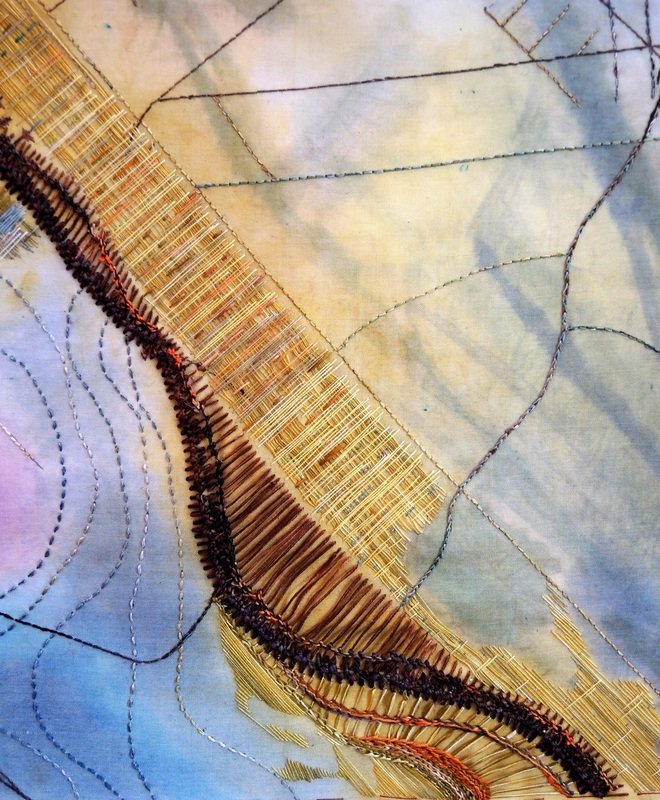 The river flat (detail above) is worked with long laid vertical threads and shorter couching threads of varying lengths. Although here the threads look lax, they will sit tight and flat when the work is mounted on foam core. 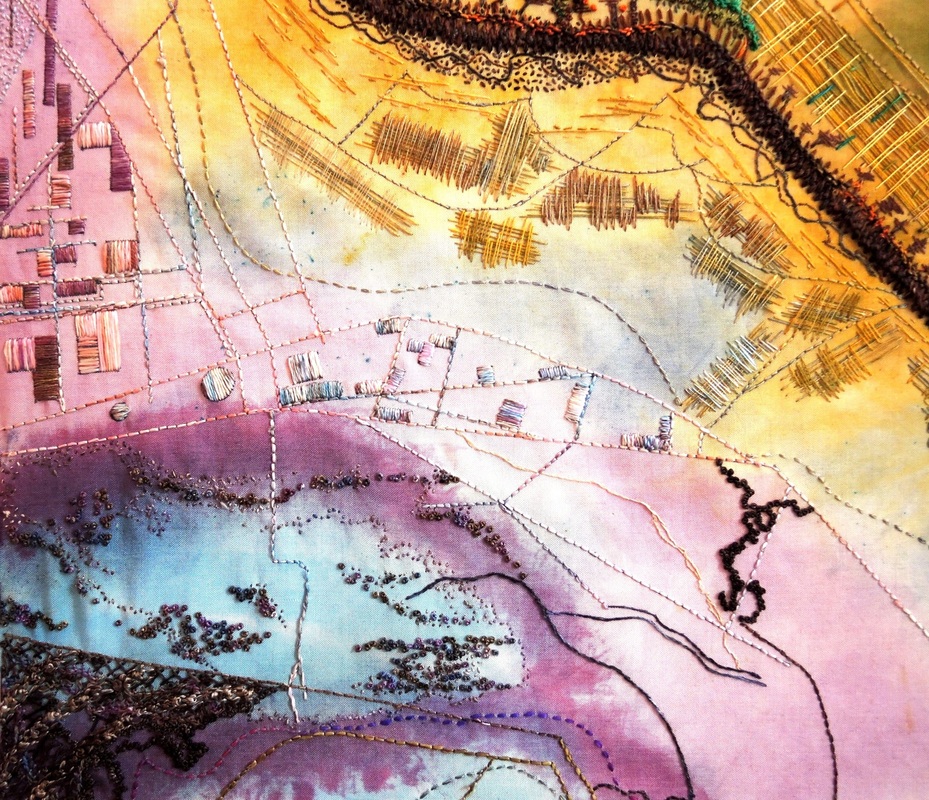 Here, the rectangular forms of buildings make some sense of the roads. 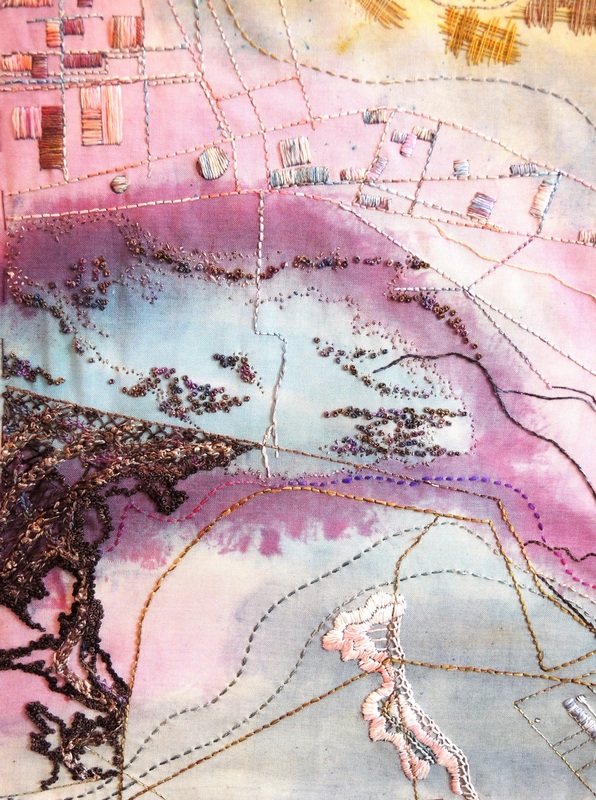 I am very happy with the colour and texture I managed to incorporate into the "brown" area on the left which appeared as a flat brown area on the reference image. Unfortunately I just could not get a good macro shot of the area but you can see something of the variety of textured stitches used. The french knots worked with variegated thread look like little glass seed beads. I love stitching french knots. They always look great and are so versatile.
Thanks for stopping by. How do you feel when looking at this work? The latest in my Shapes of Life series, "One Too Many" is about how we constantly add to our burdens and obligations. Normally we can keep them suspended, under control and even when we can't we have an "umbrella" that shields us from the deluge. But sometimes we add just that one thing too many and it comes down on us with such force that our umbrella cannot hold it back. 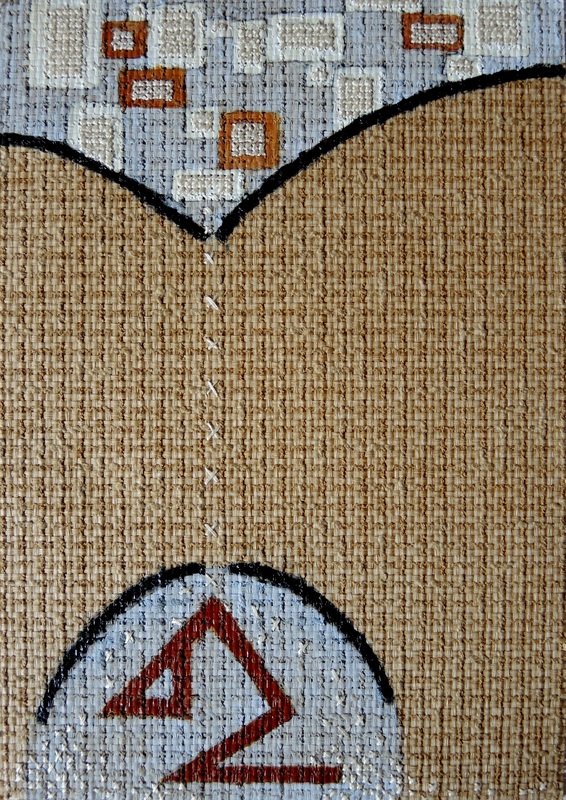 Some people can get under shelter before even getting wet while others have to be close to drowning before they realise that beating the same old path is untenable.
I was once close to drowning. It wasn't fun. I've since swum free and dried off. Life is much more fun now. Back from 10 weeks away in Lugano, Switzerland and New York City and I was buzzing with creative drive. I went to my studio, not sure what I would do, just thinking of doing some drawing, exploring a few ideas. Three hours later and I had designed the next in my Shapes of Life Series. 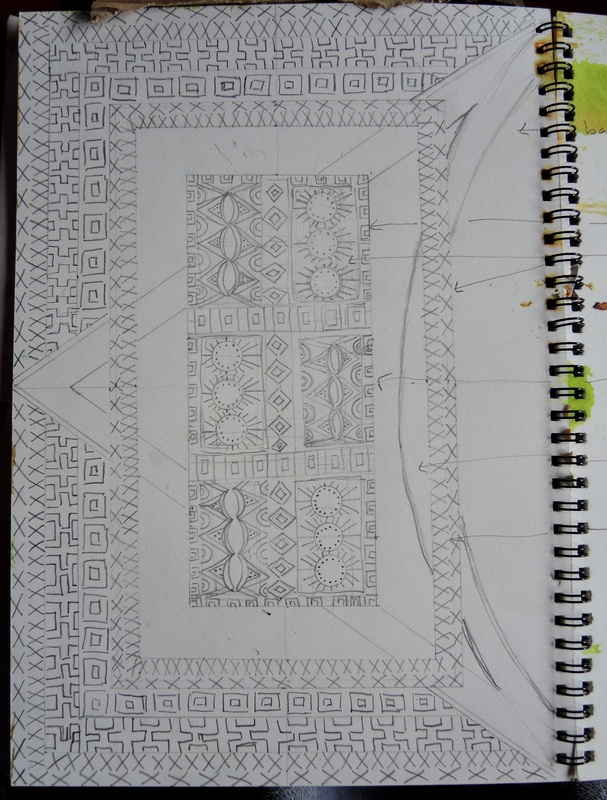 Above is the initial sketch of the work. I started with a basic layout of a central element with a border. Then I fleshed out the central portion. I knew I wanted the outer border to be heavily stitched, but not all the way around. I took half of the diamond shaped motif (see top left, centre panel) and enlarged it so that it intersected the entire page. Yep, that was going to work. 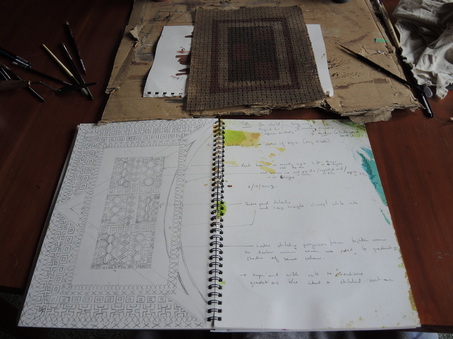 You can see that my journal is not of the glorious-artist-journal-as-artwork type. My sketches are messy and on the right page you can see my thoughts on how each section should be worked pencilled in roughly. Above the journal and in the photo below is the first painted stage of the work. 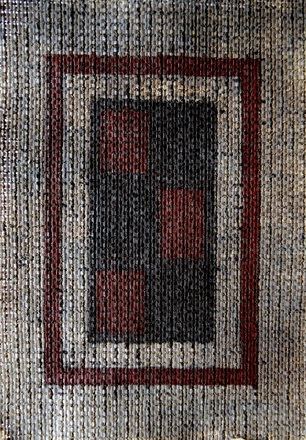 The paper colour is darkened with a light wash of sepia ink and then the major structural elements have been painted in with numerous layers of ink. 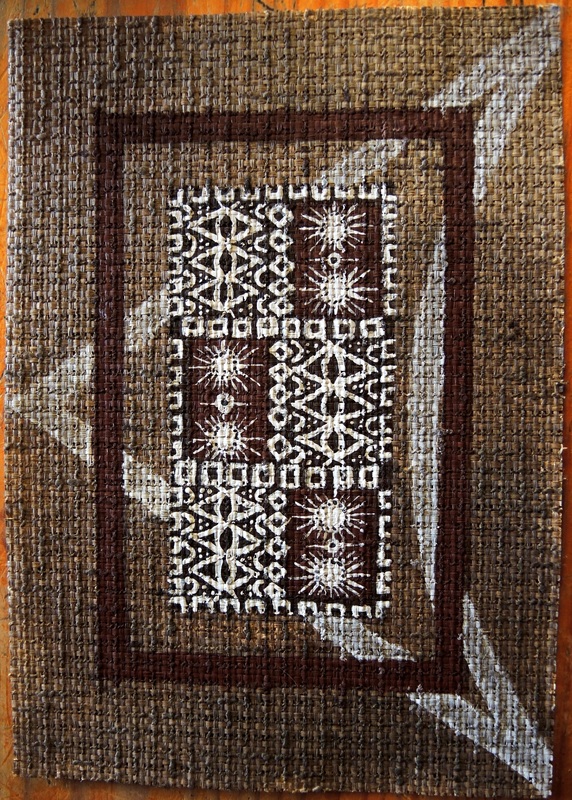 After leaving the work to dry overnight the white details were painted in. I had to mix the white ink with a bit of acrylic paint to get the level of detail required in the centre panel. The ink alone was too watery and soaked into the fibres blurring the lines of the design. 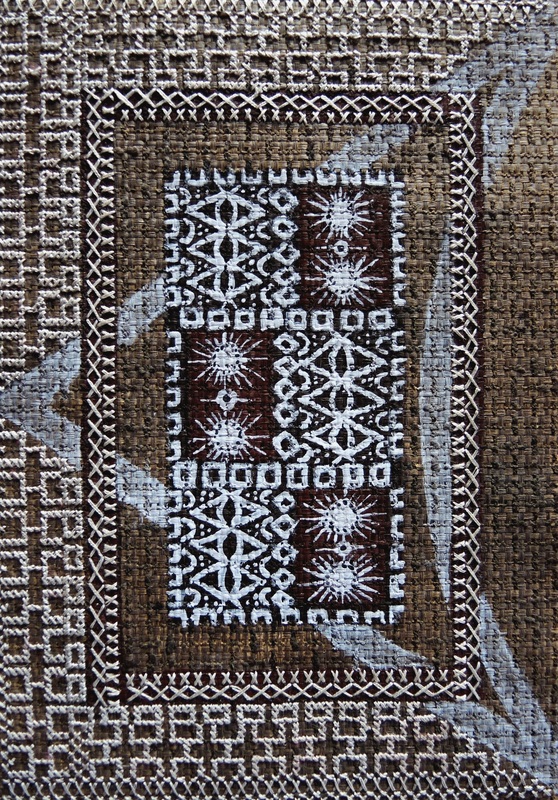 This is the finished work. The colours in this image most closely resemble the actual colours. The title "One World" came to me while stitching. I kept thinking about how it looked at once similar to a bark painting and a persian rug. The triangular motif cutting across the work reminded me (after painting it) of the Star Trek symbol for the federation of planets and that I had used it to unify the work seemed most fitting for a work that is influenced by so many elements used across cultures. And so the title "One World" came to mind.
I'm loving working on this series. So many ideas. It's a good thing I bought lots of this paper! Here is the latest in my Shapes of Life series. It's called "A Day in the Life" because it contains so many elements that butt up against each other, sometimes smoothly, sometimes not so smoothly, just like pretty much every day of my life. 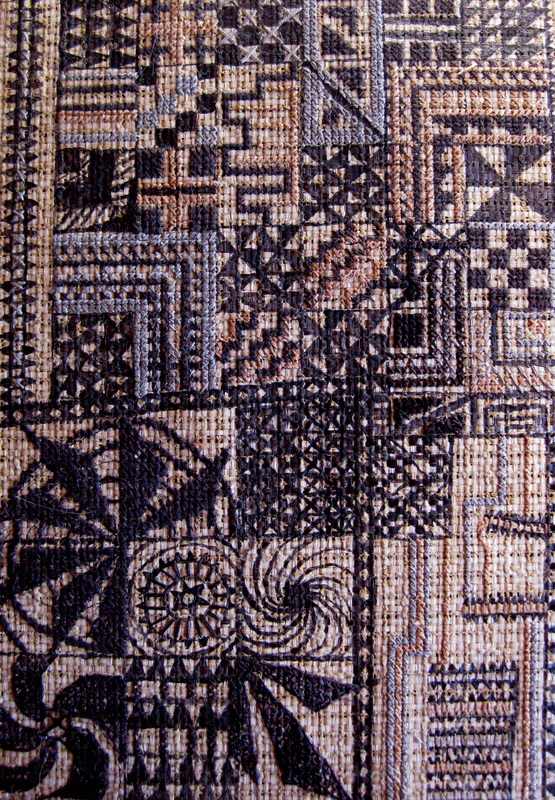
There is a lot of stitching in this piece and a lot of drawing in ink too. Although not as apparent in photographs, the difference between the two mediums provides a lot of texture in this work. 
It could be a patchwork quilt, or a bark painting, or a doodle page in a sketchbook. It's any and all of these things. 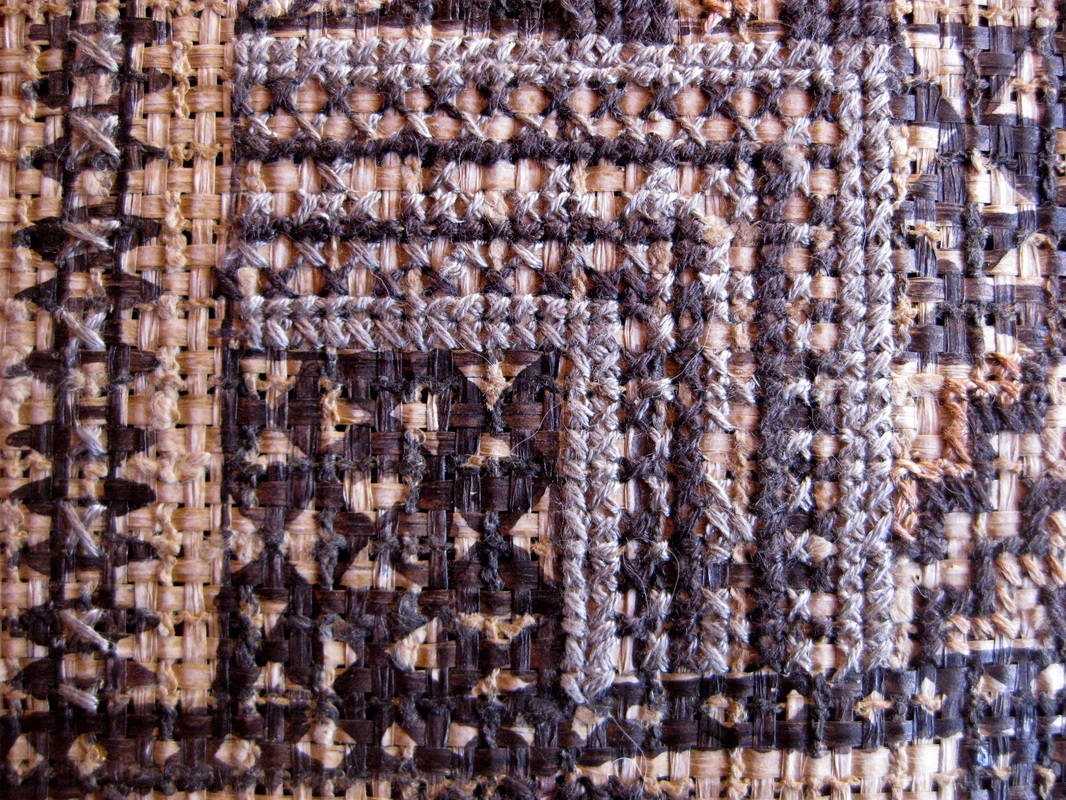
The muted palette allows pattern and texture to predominate. 
The geometry is sometimes straight, sometimes bent and skewed, just like life. 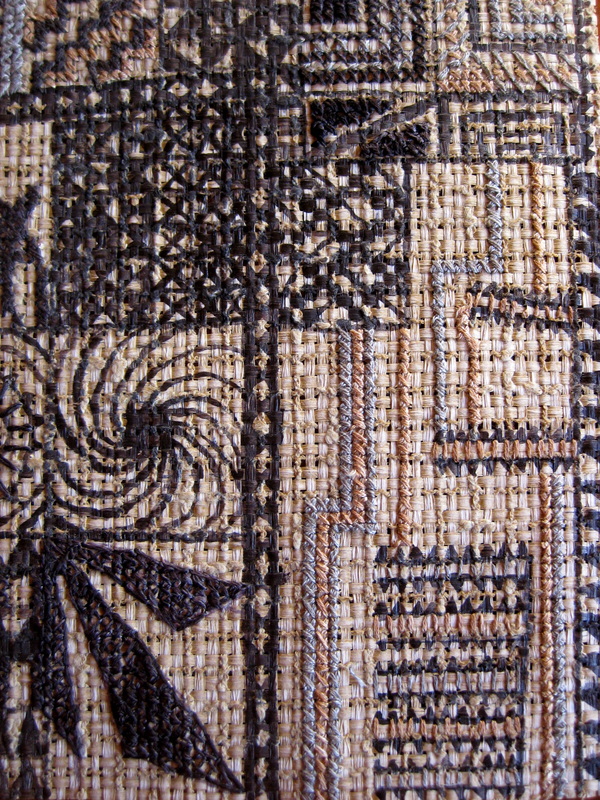
Let me know if this speaks to you.
I was shocked to see my last blog entry was in July! Must start to show my blog more TLC. In my defence, I was busy finishing my latest work and wasted a lot of time through illness (such a bore). This work is based on a satellite image of Saudi Arabia where agriculture is concentrated around oases that provide the irrigation necessary to farm in the desert. So, here it is.... (don't forget that if you click on the photos you can see larger images). 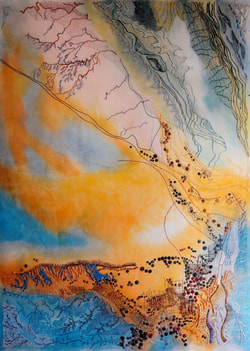 At approximately 80 cm x 55 cm this is the largest work I have done to date. When I started this work I was determined to challenge myself, to experiment with stitch and colour in ways I had not done before. I decided that this concept required a large canvas and I'm glad I chose to go that way. There is a lot of fine detail and contrasting colours and textures in this piece and a smaller format would have resulted in less diversity and a cluttered feel.  The photo above gives you some idea of the scale. My worktable there is 180 cm square.  This is the bottom third of the work where all the busy-ness is concentrated. I'm including a few detail images below, but for those who want to see more you can check out my previous blog post here.  ..a little closer... 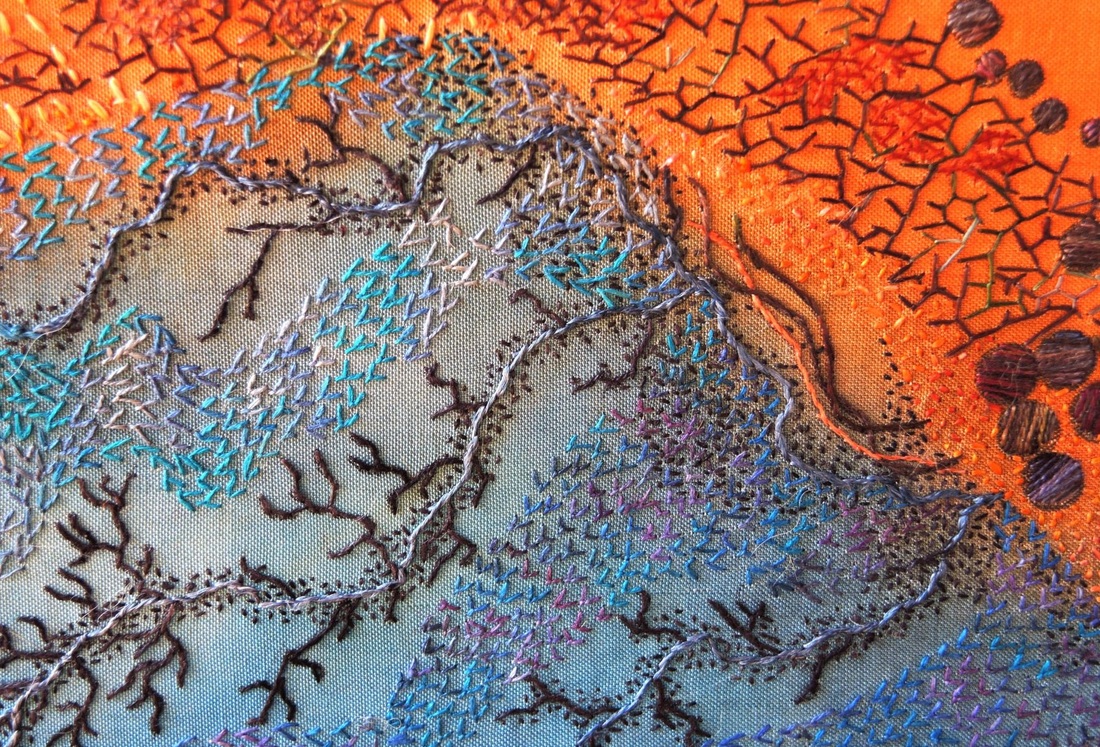 ..and closer still. River beds defined using fly stitch, stem stitch and seed stitches. 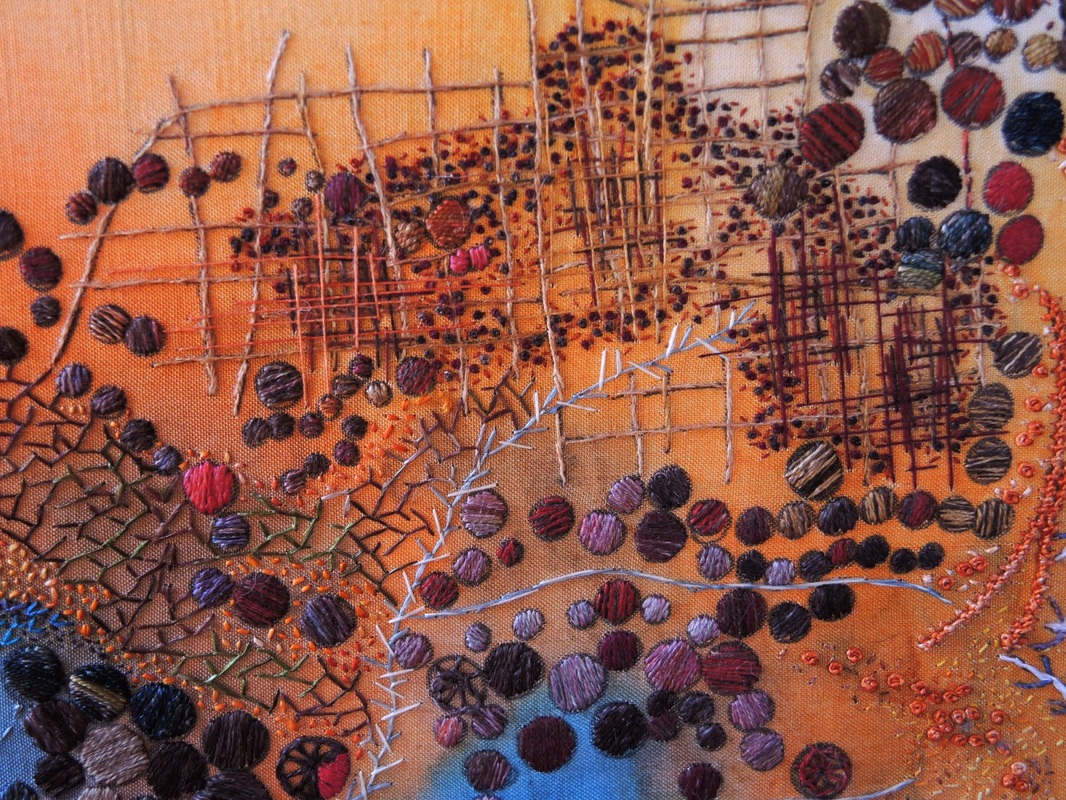 The circles represent irrigated areas, the cross-hatched areas depict roads and human settlements.  So much going on in just a couple of square centimetres. 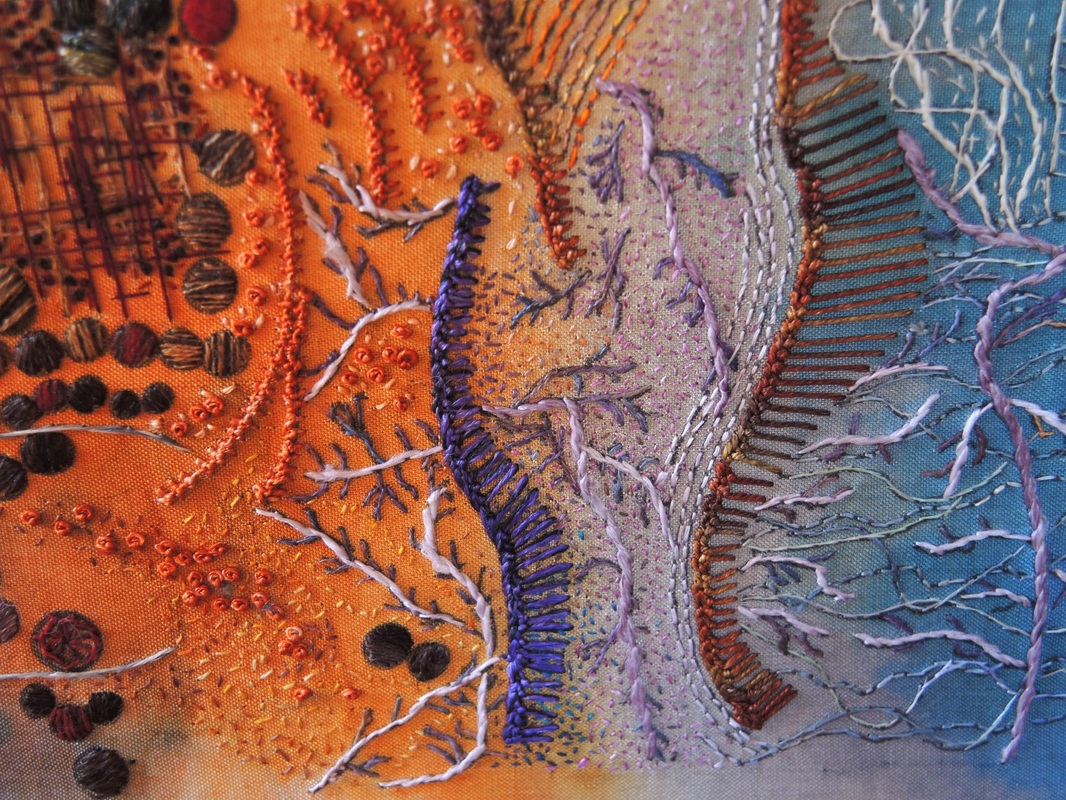 The biggest challenge face by an embroiderer: how to stitch a curved line when you can only make straight stitches. 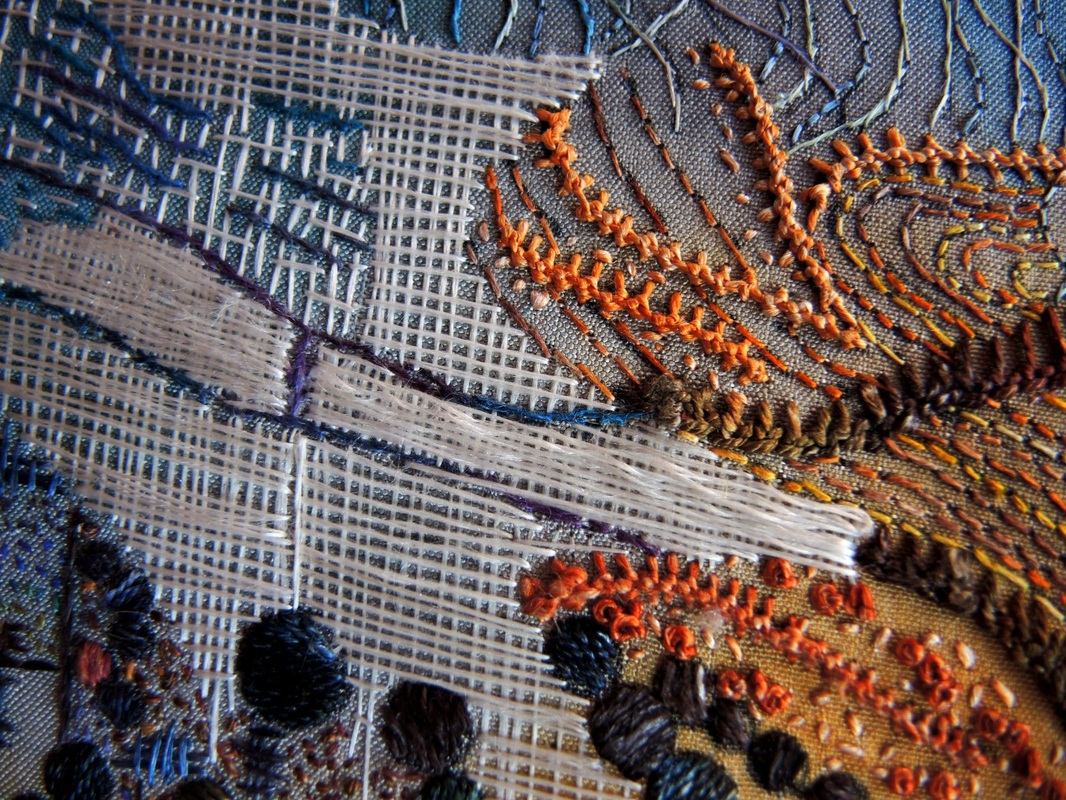 Here I have laid long stitches in a cross-hatch pattern without couching down the intersections. By doing this the light reflects in perpendicular orientations depending on how the work is viewed. I have never tried this before and it is only practical because I stretch my work very tightly onto foam core so the stitches are held taught. 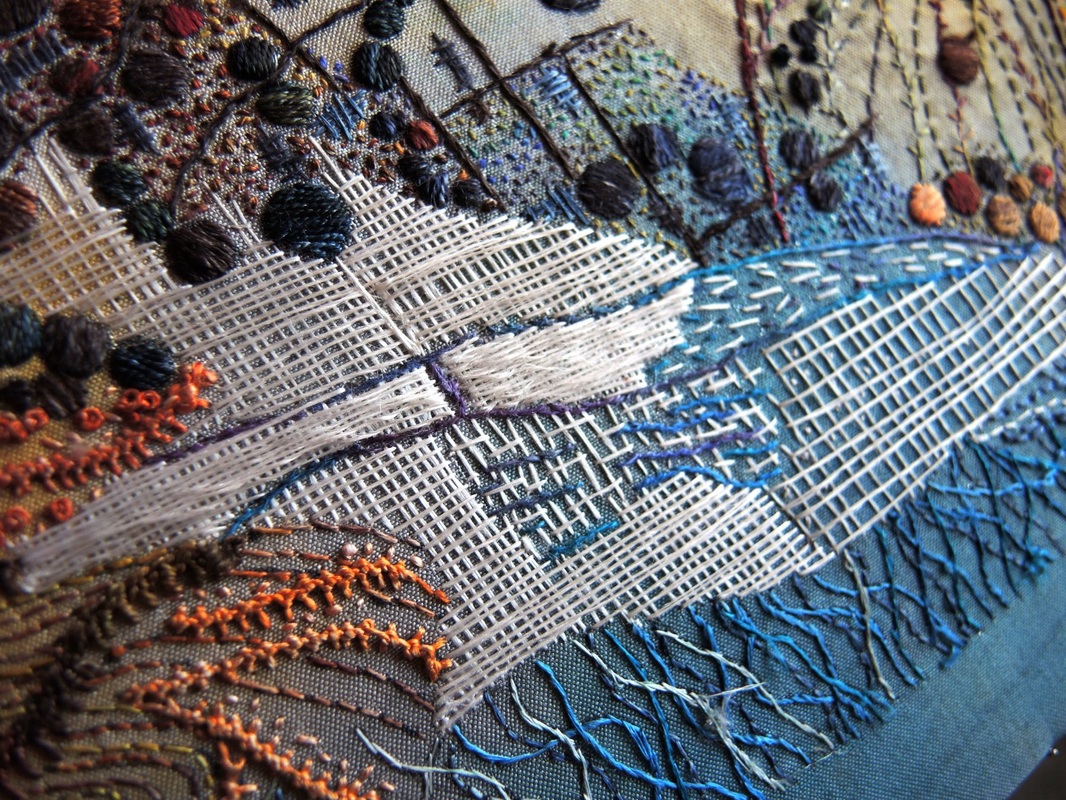 When viewed from some angles the cross-hatch pattern is almost lost and yields a flat area of white that contrasts perfectly with the surrounding abundance of colour and texture. 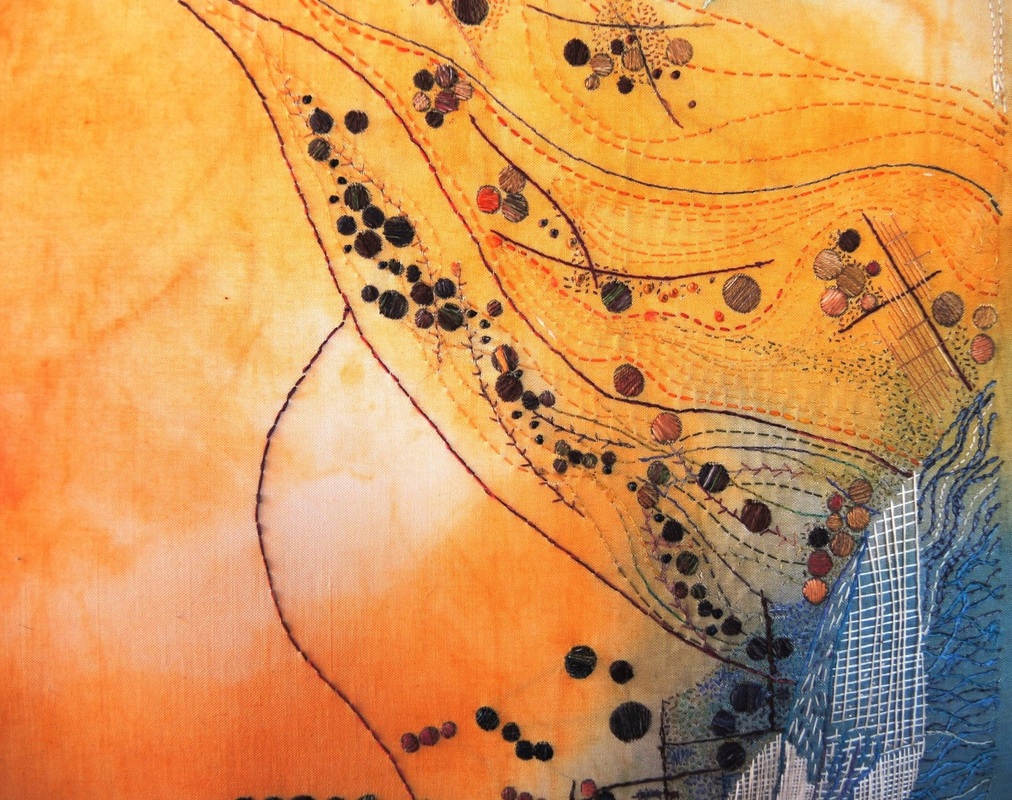 This is the intermediate area that links the top and bottom halves of the work. The challenge here was to provide a transition that did not compete with the complexity of the lower half and yet had enough movement and visual interest to lead the eye to the top of the work and not get lost in the negative space to the left. In a design sense, it was the most difficult and possibly most crucial part of the work. 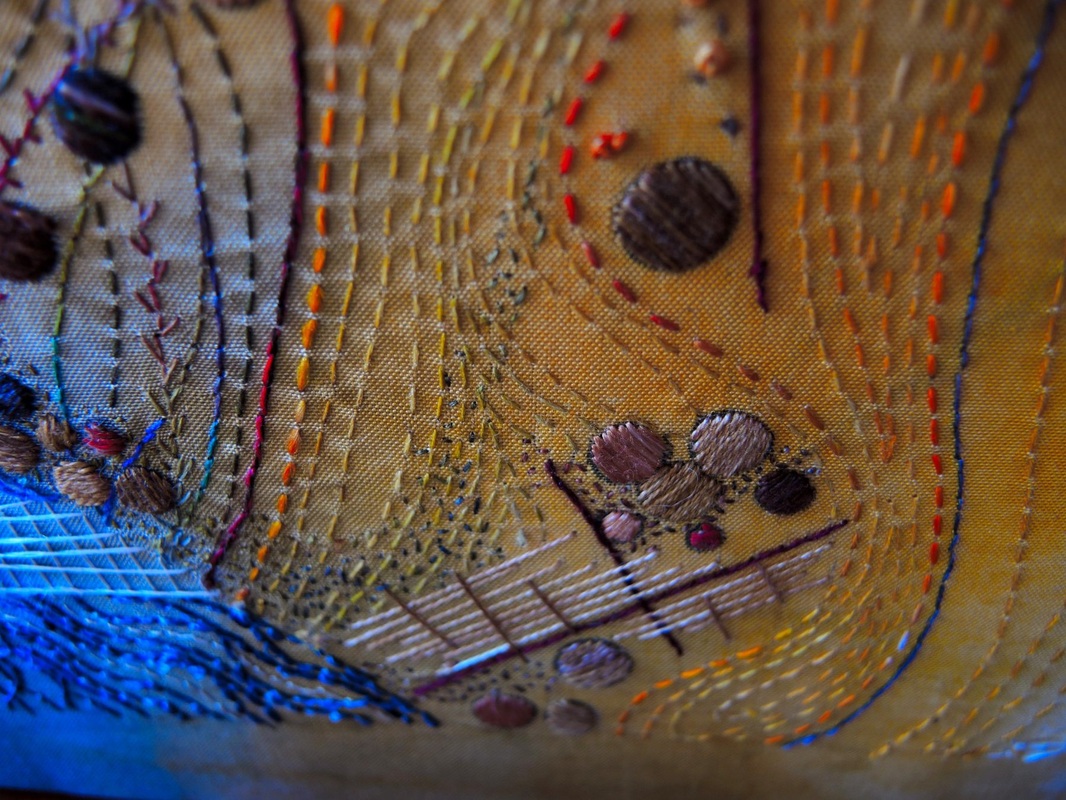 Here's the bottom part of the "linking" section. I was having trouble capturing the "feel" of the work in photographs but when I started photographing at strange angles I found the results more satisfying, more like looking at the work directly.  ..top right corner...the more monochromatic the palette becomes, the more important texture and directionality becomes.. 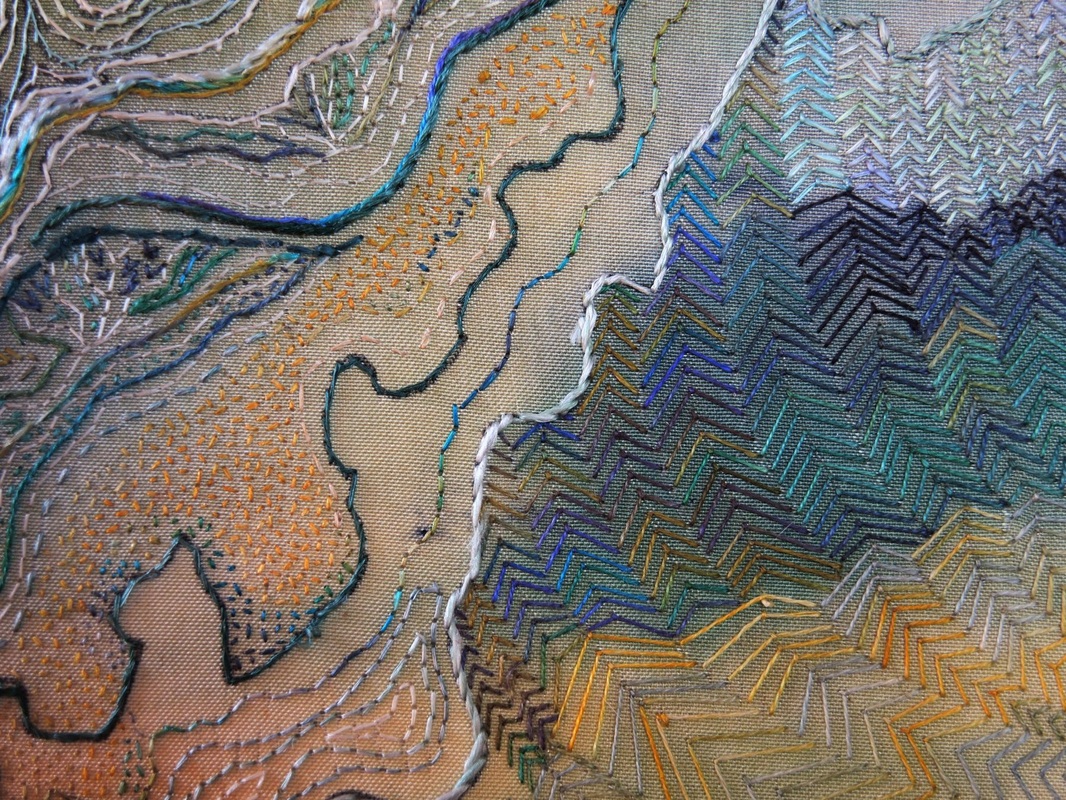  ..top left corner...  ..had to work in tiny, tiny stem stitches to achieve the detail in these motifs.  ...seed stitches in thick and thin threads for shading and depth of field..  ...lots and lots and lots of tiny stitches....  ..multiple variegated threads add sparkle to the twisting natural lines.. 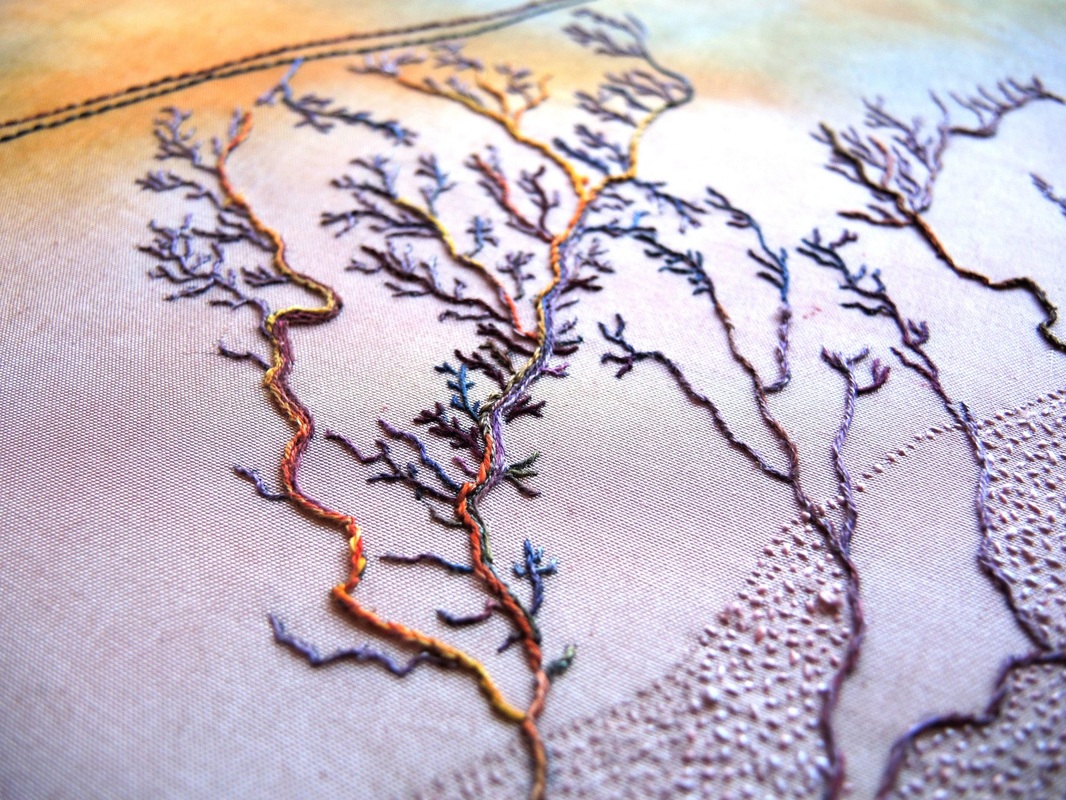 ..sometimes it's what you leave out that counts the most...  ..and now some angled shots that really draw you into the work...gives more of a feeling of the scale of the work..  ..the texture comes alive in this shot..  ..see..I told you it was big... 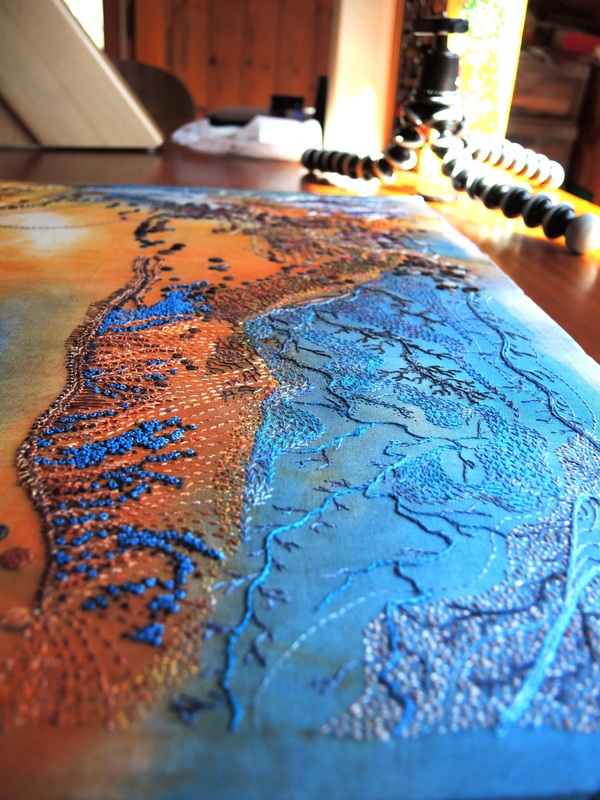 ...thanks for stopping by.
I have started a new work in my Heaven and Earth series. It began, as all my works do, with a pile of undyed silk and silk thread. First I constructed my base palette. 
Here it all is looking pretty on the clothes horse. 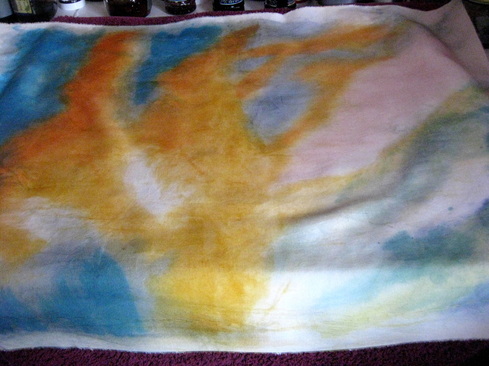
This is the entire fabric. It is quite big at 70 cm x 55 cm. At this point it kind of looks a bit like the rag you use to wipe up spills while you are dyeing, however, remember my purpose is not to create a beautiful cloth in it's own right, but to create the base for the stitching that will cover it. Of all the photos you will see, this one gives the closest approximation of the true colour. To orient yourself for the following photos, I started work at the left edge and the work will be oriented vertically. 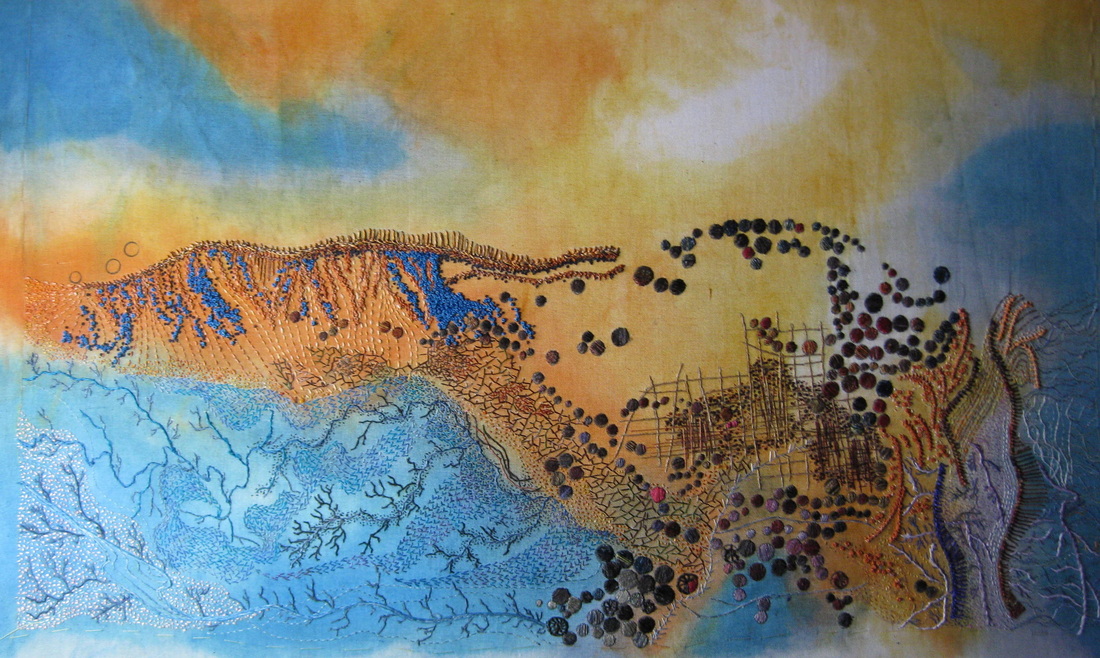
So, here's where I'm at after about 50 hours of stitching. (If you want to see bigger images, just click on the photos.) The stitched area is about 25 cm high x 55 cm wide, so I guess I'm already a little bit more than 1/4 of the way through. Like the other Earth works, this work is based on a false colour satellite image. 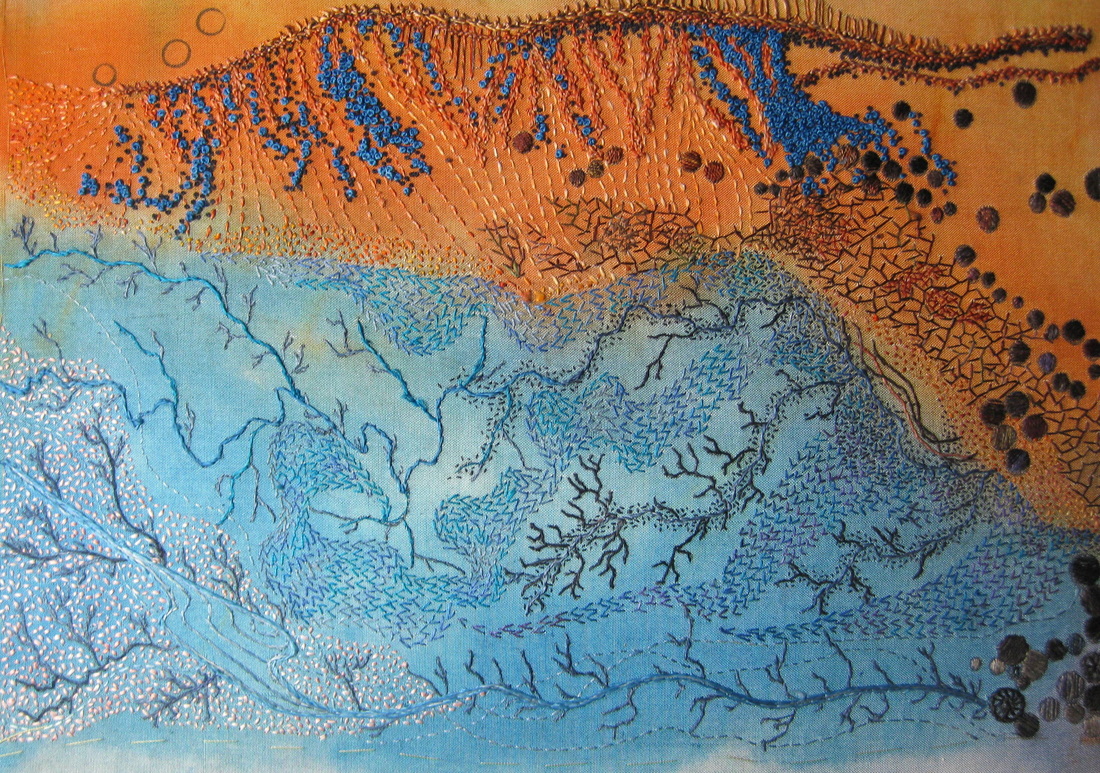
Let's take a little tour from left to right. The blue area depicts a river delta with forested valleys. The rivers are worked in stem stitch accented by seed stitches, while the wooded areas are represented by tiny fly stitches. I have never used fly stitch this way before, but I am well pleased with the effect, which is enhance by the gently variegated thread. 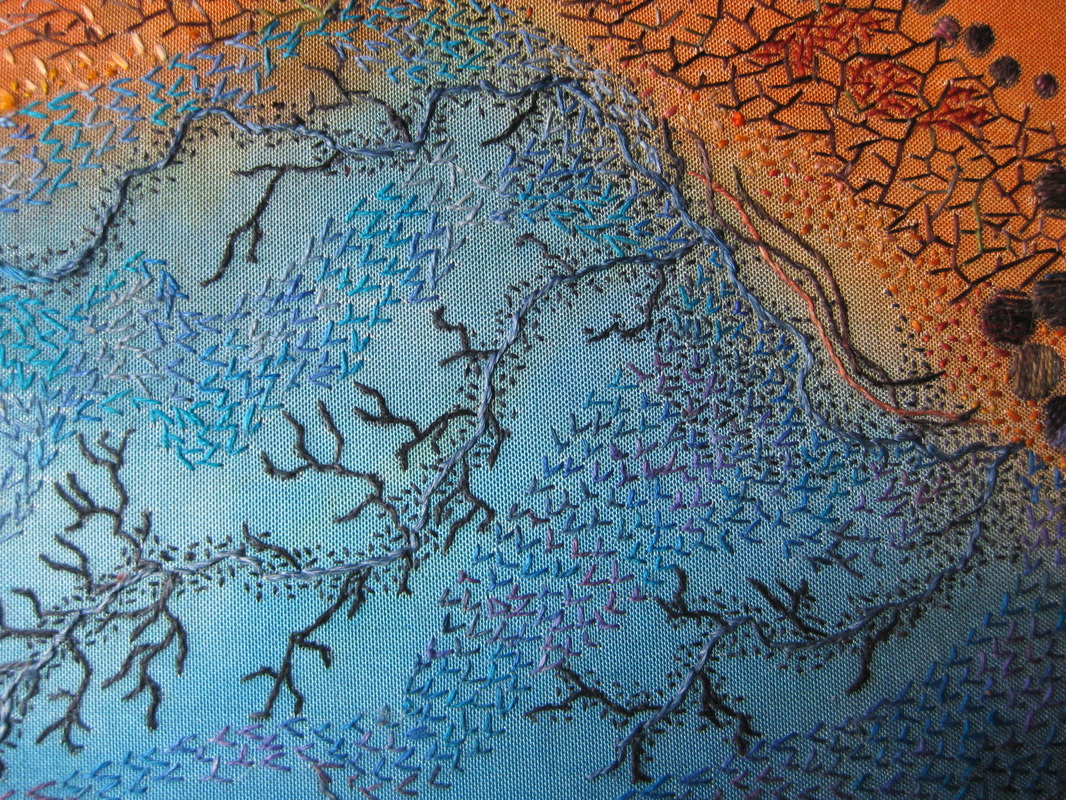
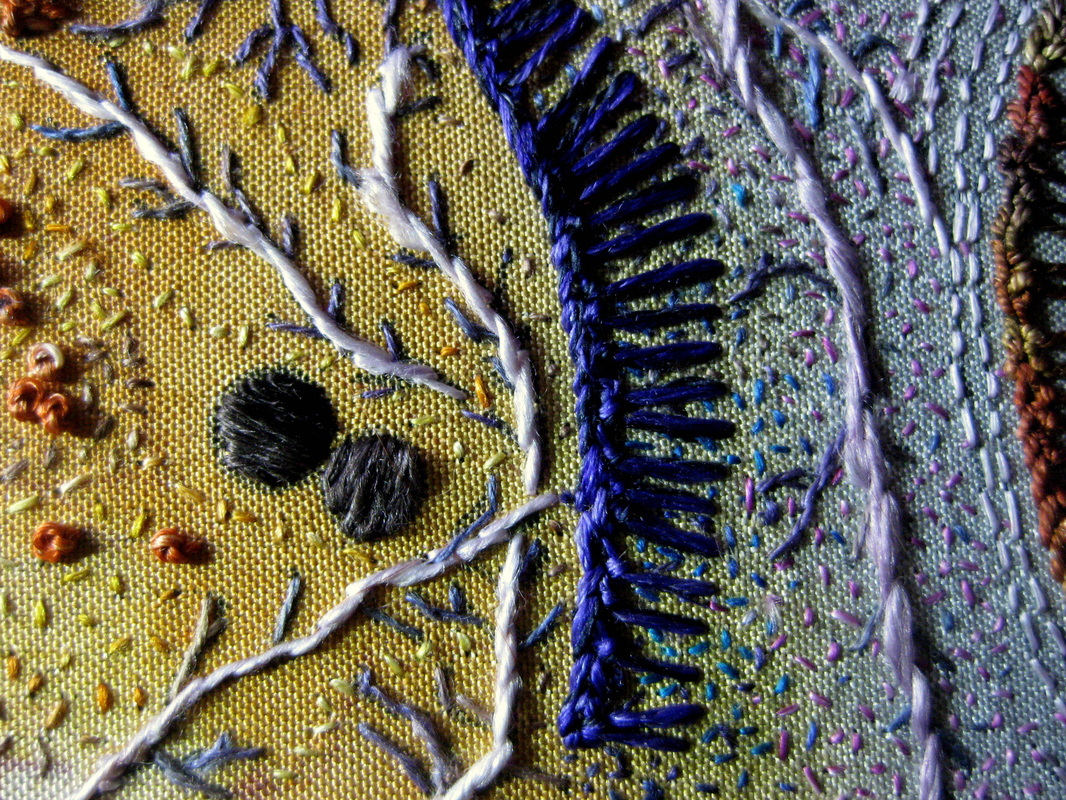
Seed stitches further emphasise the riverbeds. 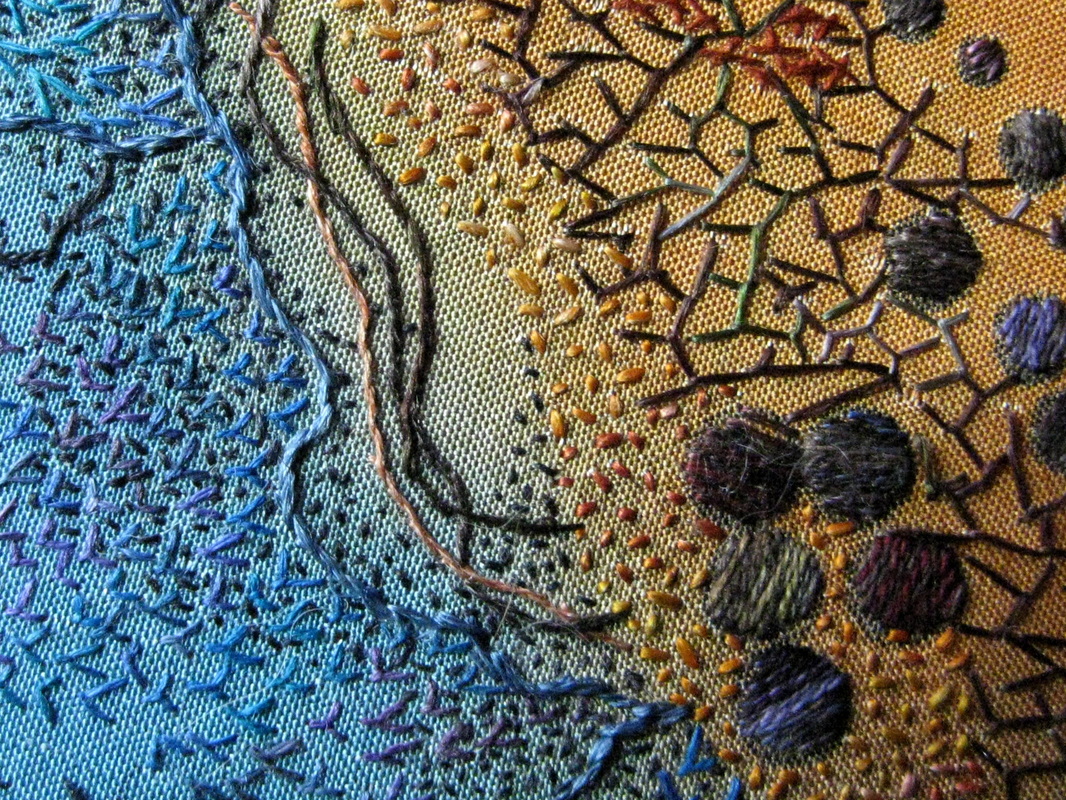
A closer look at those seed stitches. The base fabric is a very tightly woven silk twill. this area is about 2 cm square. 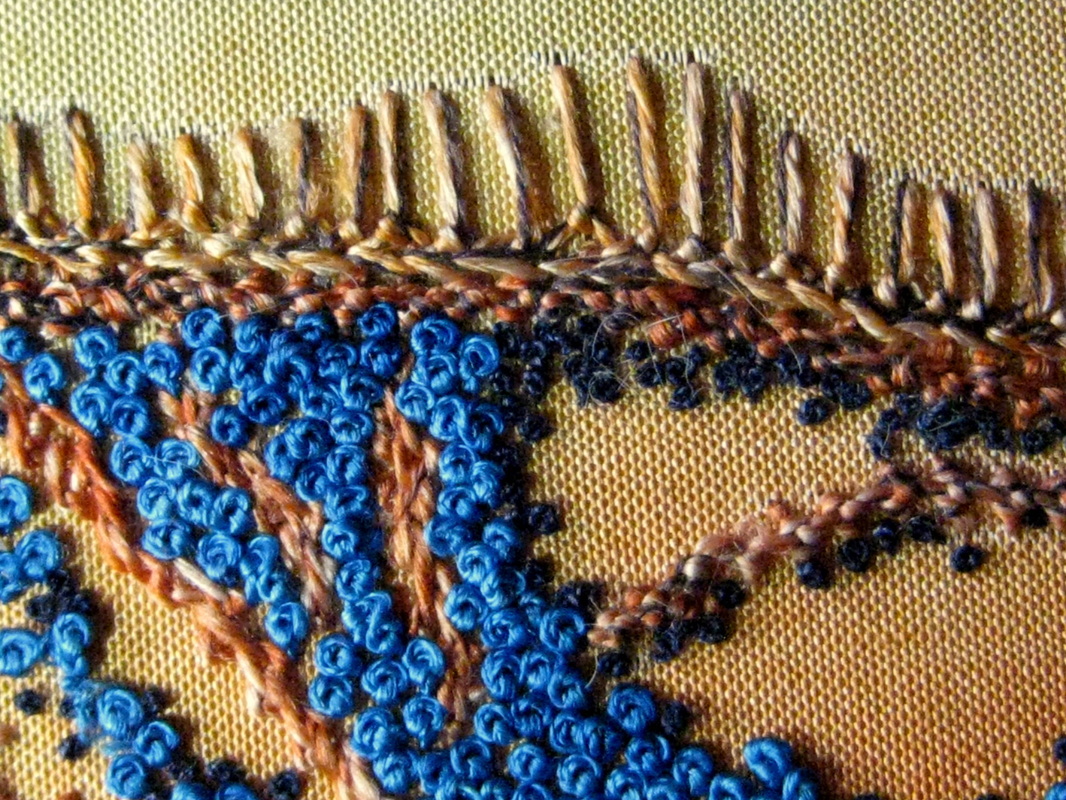
Topographical features of the upper desert region are defined by mountmellick stitch, palestrina stitch, knotted feather stitch and French knots worked if thick and thin threads. 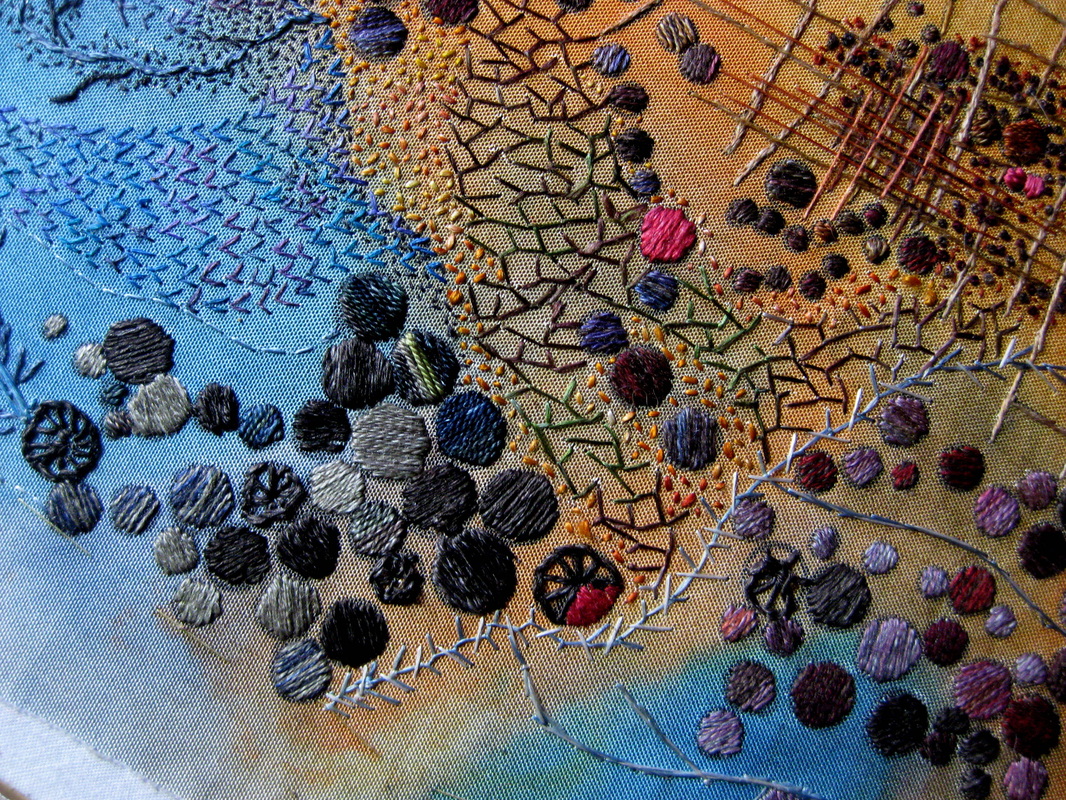
This is where nature and civilisation intersects. The round circles represent irrigated areas. 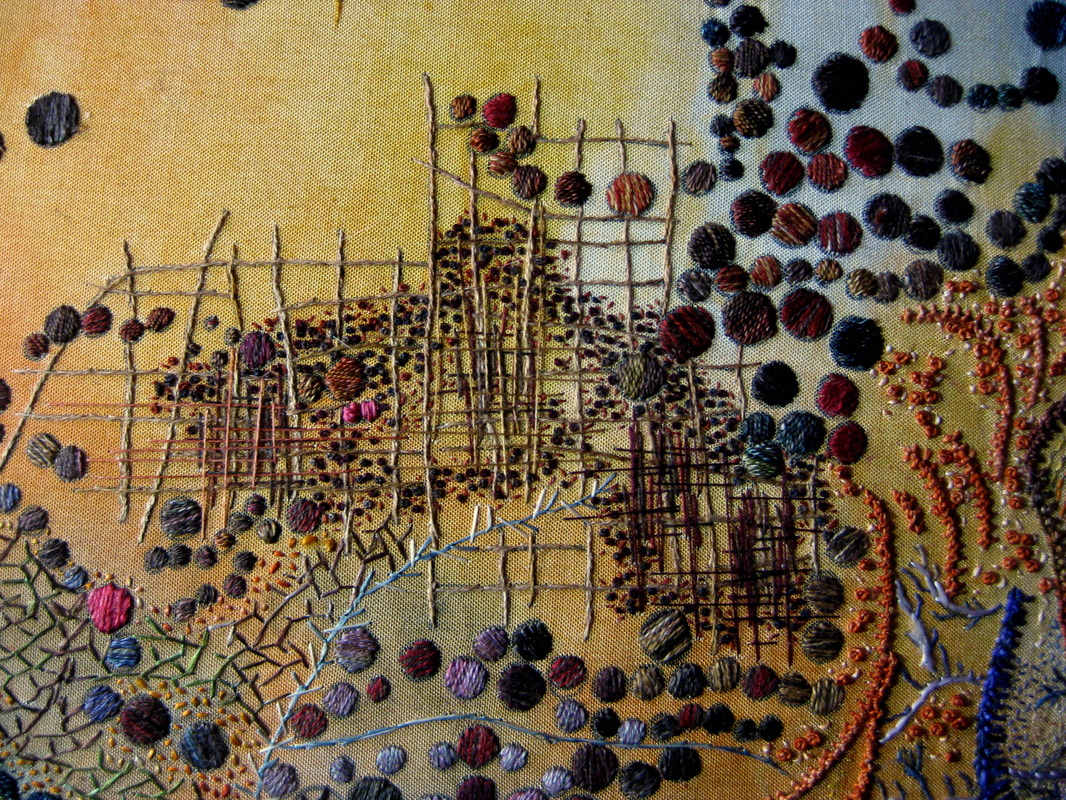
Roads and settlements abut pastoral land. 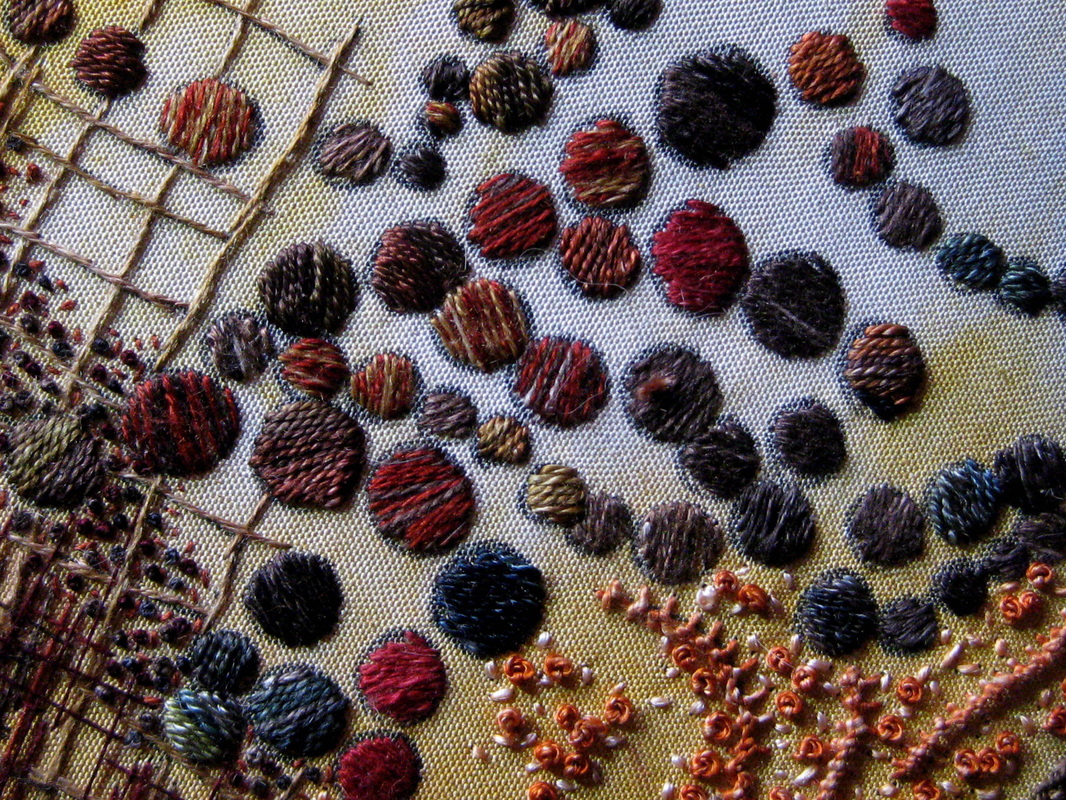
I totally raided my thread stash. In addition to the base colours that I dyed, I have used about 50 other threads, both single colour and variegated. 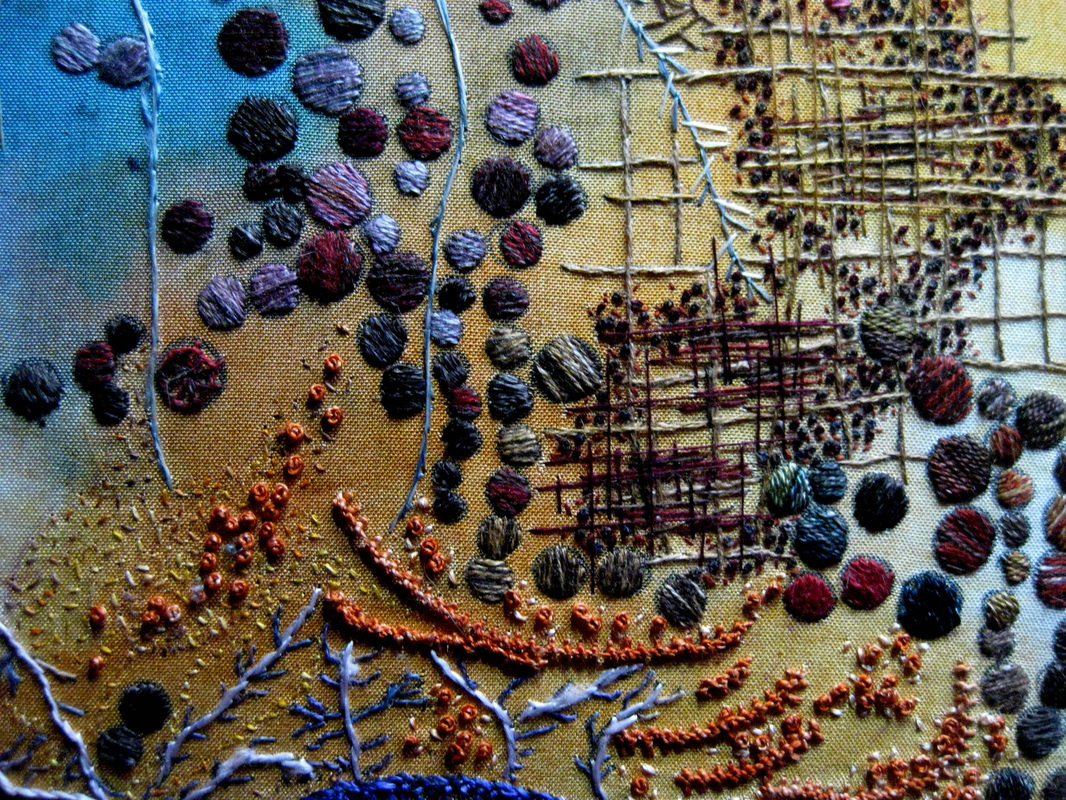
Photographed from a slightly oblique angle to capture all that lovely colour and texture variation. 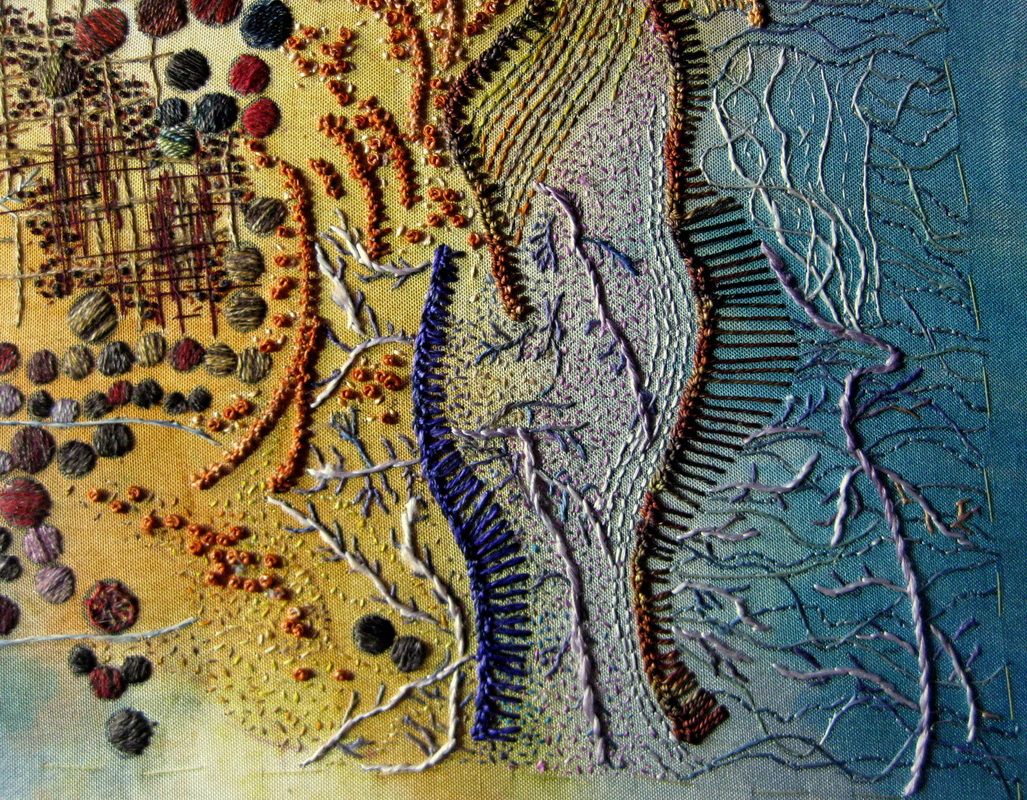
This is the far right edge. Again, mountmellick stitch is used to define the 2 main ridges. 
The photo above represents an area of about 2 cm square so you get a bit of an idea of how tiny the stitching is. 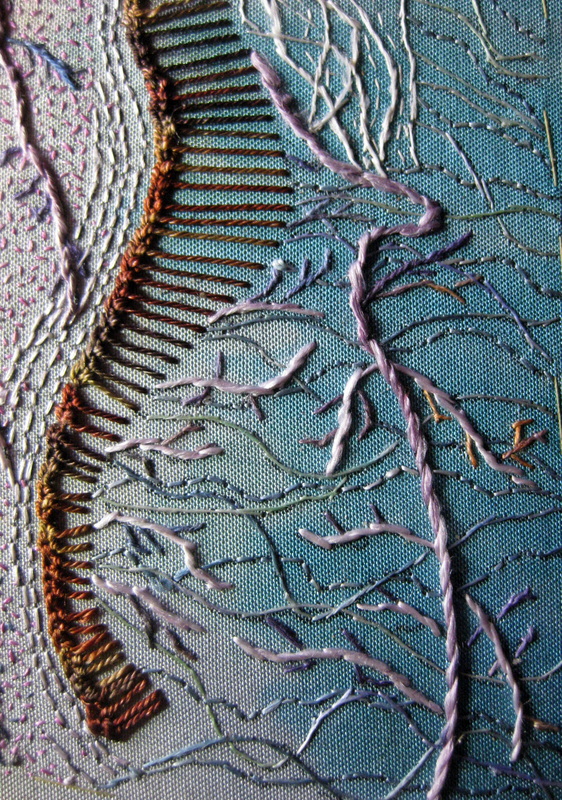
I think this work is off to a very promising start. I'm so excited by it that any time away from the studio seems like a torture. I hope you like it too.
I am pleased to announce that this very large goldwork piece is finally finished. (I blogged this work in progress here, here, here and here). This work is the second in a series of 3 (you can view the first work, "Who Watches the Child, here) and is approximately 55 cm long x 40 cm wide. Those of you who have attempted goldwork will appreciate just what a massive undertaking it is to make such a large work featuring this technique. I must admit that I found it rather arduous (and to be honest, tedious) work. As a result I walked away from it for a number of months, something that is uncharacteristic for me as I tend to only have one artwork on the go at any time. It turns out this was a good thing as I returned to it with renewed vigour and enthusiasm and was able to finish it in a sustained burst of activity over about 3 weeks. 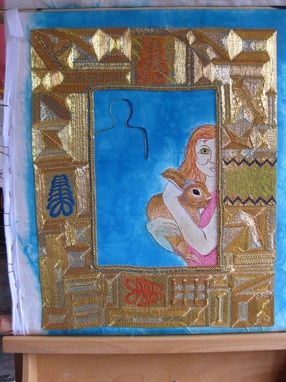
The girl who is a subject of all three works in the series is no longer a helpless baby, but is now a young girl of 10 years. The Shadow remains, but she is determined to resist him. These photographs were taken while the work was still on the frame. Much to my disappointment, the disparity between the width of the top edge and that of the bottom is not an optical illusion. I have since corrected this by adding in extra goldwork on the left side. 
The goldwork is geometric and textural and the appearance changes when viewed from different angles and depending on the direction and intensity of the light source. 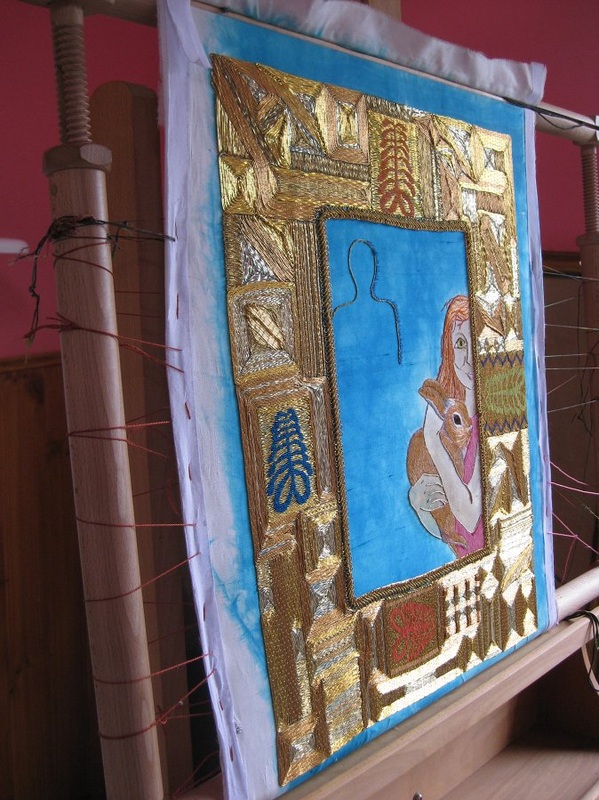
The 2 photos above show how different the work can look from different angles. 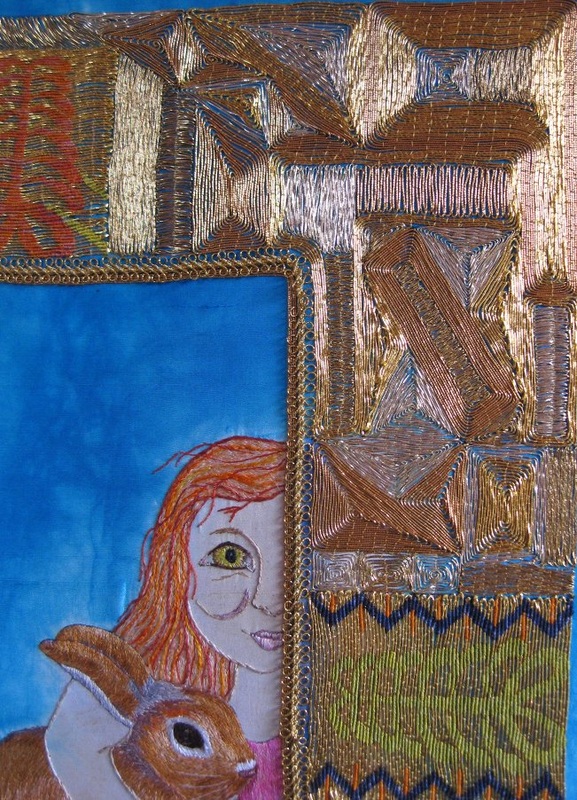
Various gold threads also add colour and textural variety. 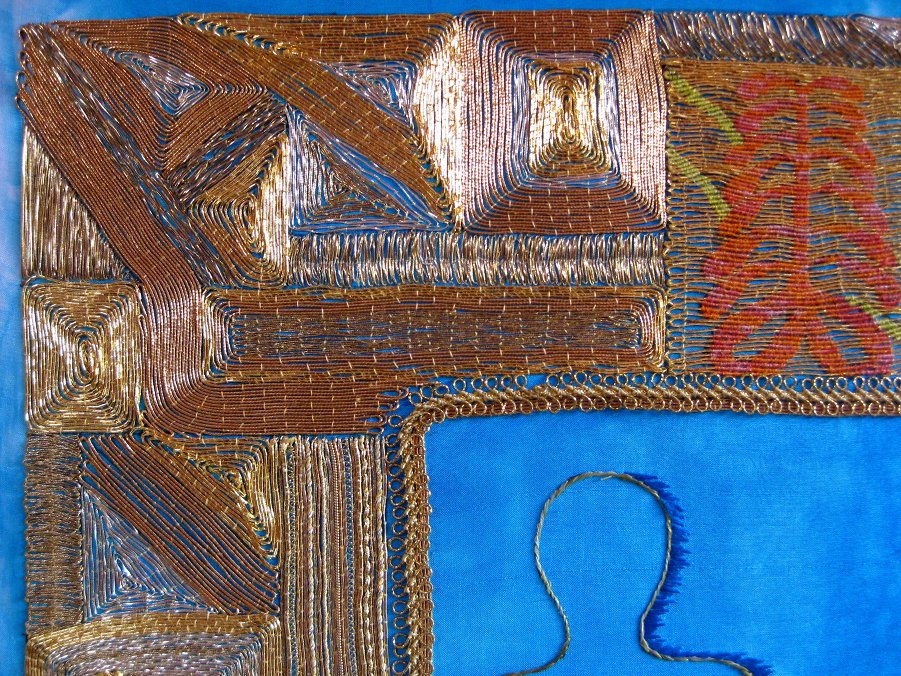
Notice the red motif in the upper right corner? This motif is present on each of the sides and is worked in Or Nue. This is the Adinkra symbol "Aya" or "Fern". It is the symbol of endurance and resourcefulness. According to the Adinkra Dictionary, "an individual who wears this symbol suggests that he has endured many adversities and outlasted much difficulty". Children should not be exposed to adversity and difficulty and yet so many are. This little girl is a tough cookie. She is haunted by the Shadow, but she has learned how to survive. She may not always be safe, but she is determined that no harm will come to her beloved pet rabbit. Despite the Shadow's best efforts to break her will and confidence she stands defiant and strong, burying her hurt in a deep and private place. 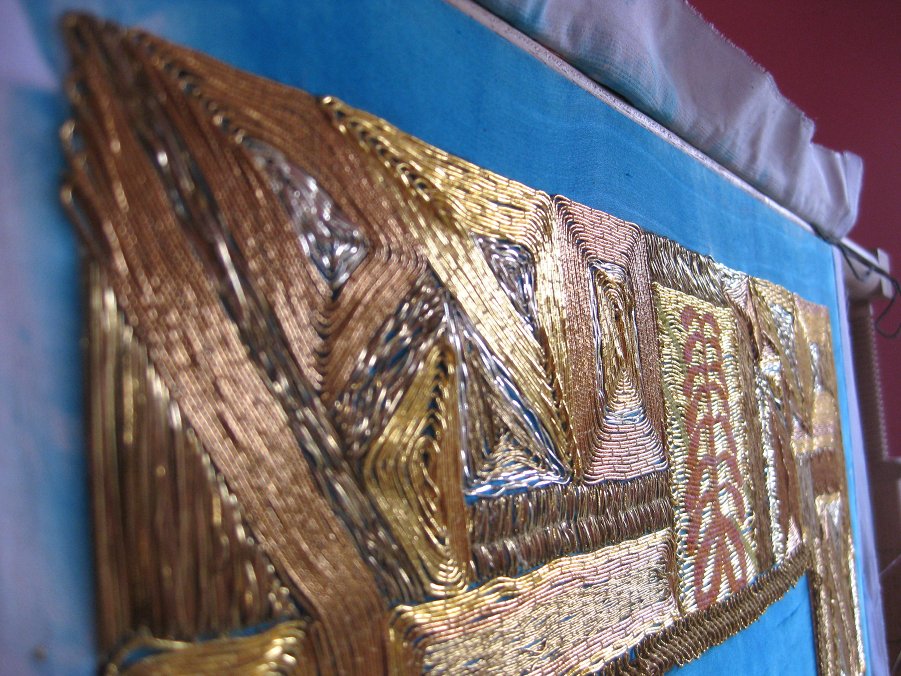
In these next photos you can see the different colours and types of gold threads used. 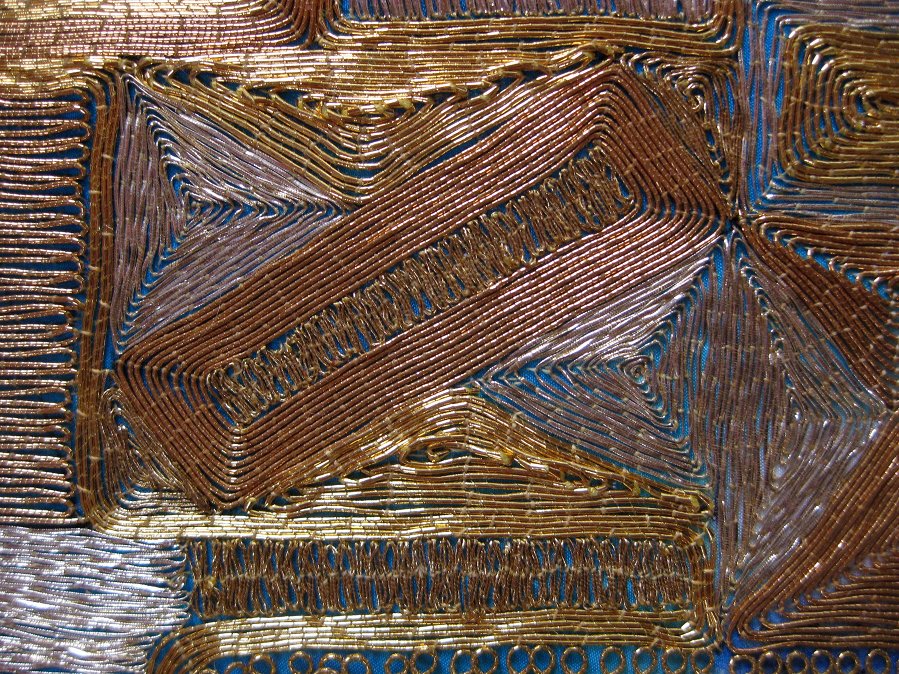

The gold threads really make the girl's eye sparkle. 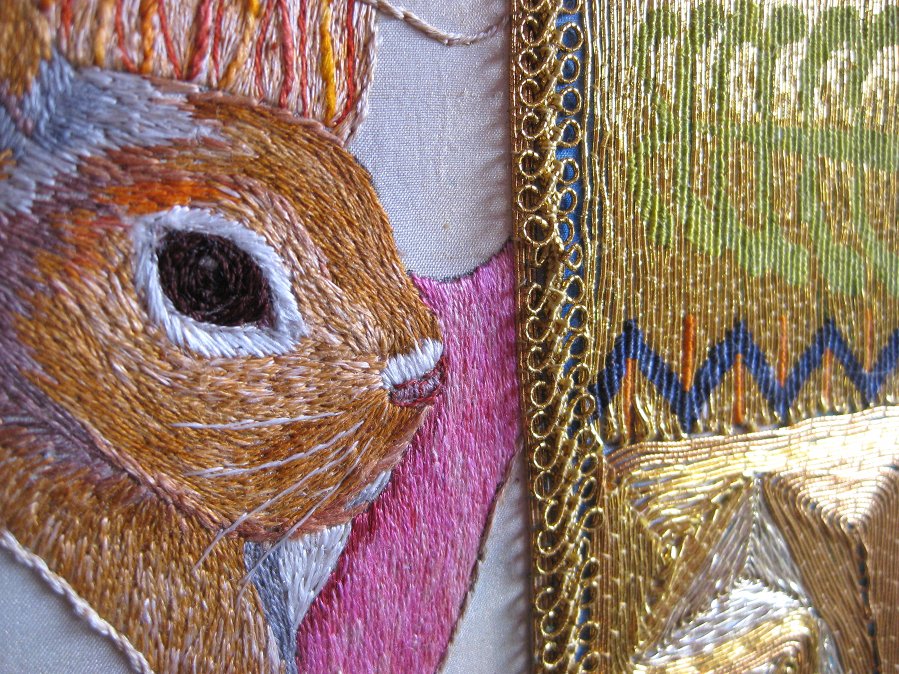
Bunny nestles safely in the girl's arms surrounded by golden opulence. 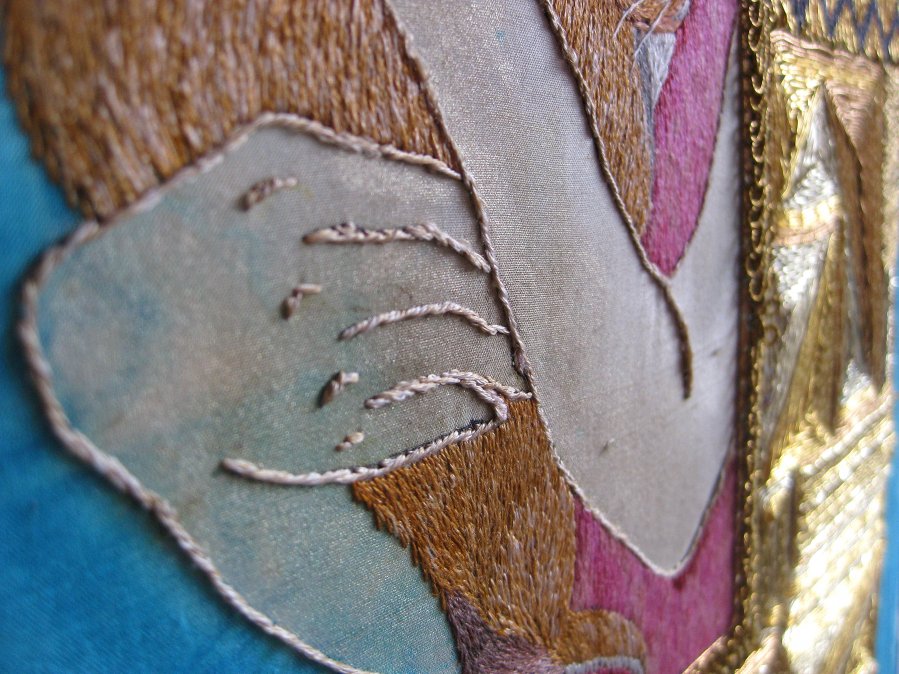
To me, the arms tell the story. Bunny is held close and safe. The gold frame proclaims loudly that they are both precious.
Life and its many dramas has got in the way of a number of things in my life being temporarily put on hold and one of them has been writing blog posts. It seems this year has thrown up one challenge or disaster after another and as a result studio time has been severely curtailed. What has held me back? Well sometimes I have just not being physically able to get to the studio because of other, more urgent matters that needed attending to. Sometimes I had no emotional space for sustained creativity. Despite all the crap going on I have managed to make some art. You'll remember that I started a new series of works on that amazing woven cotton paper (see here and here). Here are 2 new works in the series. 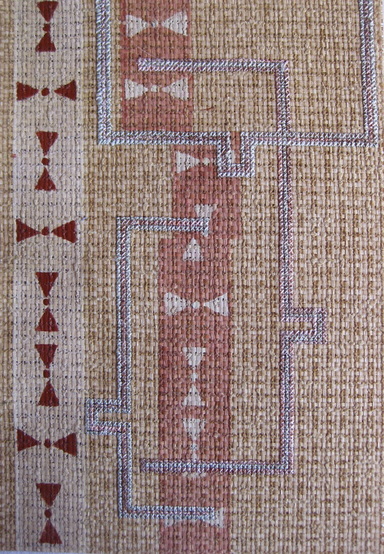
The title of this work is The Shape of Pain 1. I have to disclose right here, right now that the title and general idea for this work was shamelessly stolen from a friend . My friend, who for the purposes of anonymity I will call Sarah, is not an artist and so I don't think she'll mind that I stole her idea. Besides, everyone knows that's what artists do. We are gleaners, we gather ideas and turn them into something new. Some, such as Picasso, were bold enough to call it stealing. Yeah, he's probably right.
Sarah has a very dear friend who lost her husband when a helicopter he was travelling in crashed. She was telling me how she had seen her friend recently, about a year or so after the accident and that her friend had developed an unusual wrinkle in her forehead that had never been there before. It was a square-shaped wrinkle on her forehead that extended to another square wrinkle over her nose. Sarah went on to say that she had recently been thinking about the "shape" of pain and that her friend's newly developed wrinkle struck her as a stark example. In my work I have drawn the helicopter blades in ink. The right hand column is fractured, breaking the rotars apart. The "wrinkle" shapes, as interpreted by me from Sarah's description, are stitched over the top. |
This blog was previously at another site. To view older blog posts please click here.
AuthorI am a hand embroidery artist living and working in the rugged and wild Central HIghlands of Tasmania. Archives
October 2014
Categories
All
|
 RSS Feed