|
This is the third installment of the history of my progress as an embroiderer. You can the earlier posts here and here. This is my fourth embroidery. The concept for the design was mine, however at the time I did not have the confidence in my drawing skills to draw a unicorn and so the design was drawn by an artist friend. It was intended to be executed in the style of Medieval art and hence the flat perspective and broad areas of solid colour. 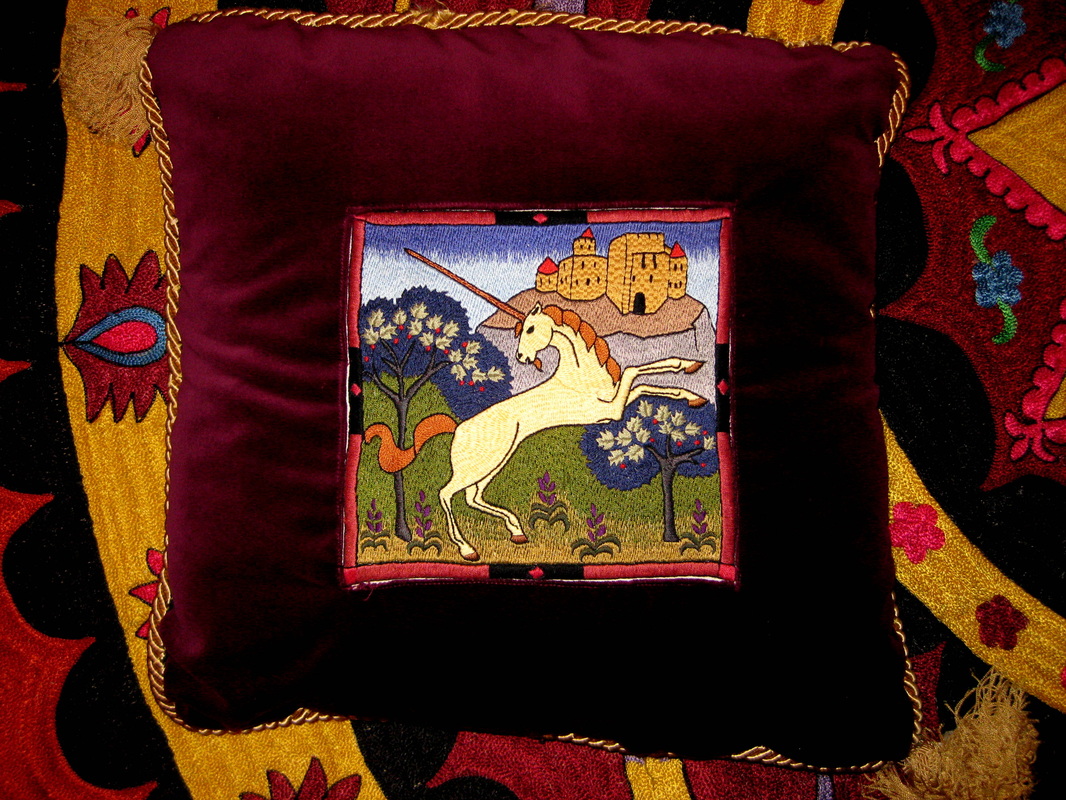
The embroidery forms the centre panel of a cotton velvet cushion bordered by commercial braid and embellished with two bought tassels placed on opposing corners. The braid is a little damaged along the top edge where my then pet rabbit, Merlin, having sneaked his way into the room where the cushion was, decided he would sit on it and eat the braid. That was more than 20 years ago. I've never bothered to change the braid and when I look at it it brings back fond memories of Merlin. 
Above you see the entire work. It is worked in two strands of DMC cotton floss. The ground fabric was an ordinary fine weave cotton fabric. The entire ground surface is covered, including a simple embroidered frame. At this stage I was still using an ordinary embroidery hoop, holding it in my hand and embroidering with one hand only. 
The castle is worked in, the appropriately named, brick stitch. The mane gets its movement from directional stem stitch used as a filling stitch. 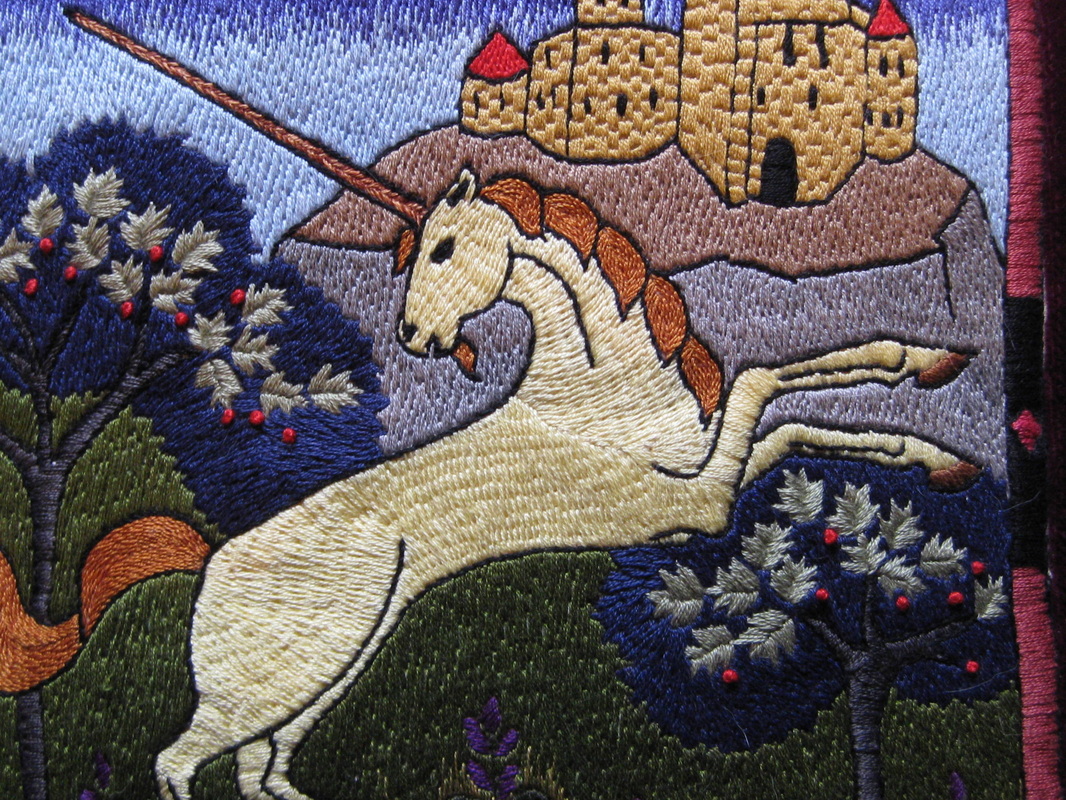
In keeping with the style of medieval art, almost all of the structures are defined by a black outline. 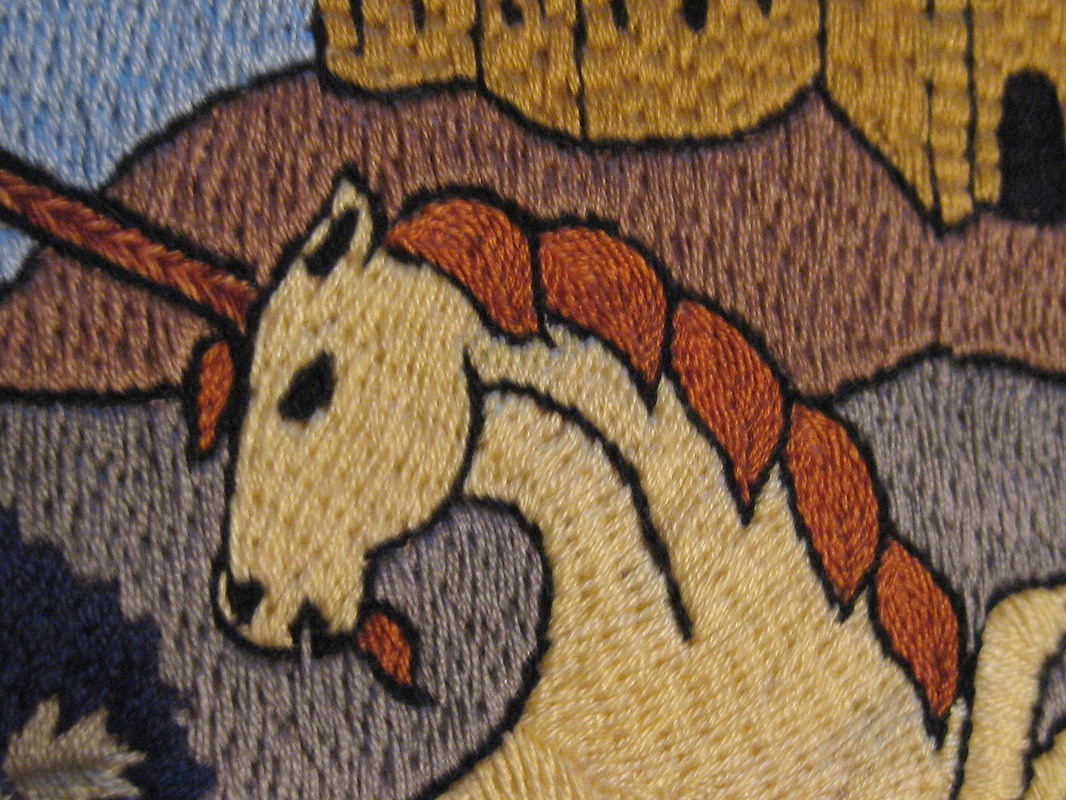
Unicorn's head in close up. (Apologies for the poor photo quality, but was the best I could get with my point and click camera). 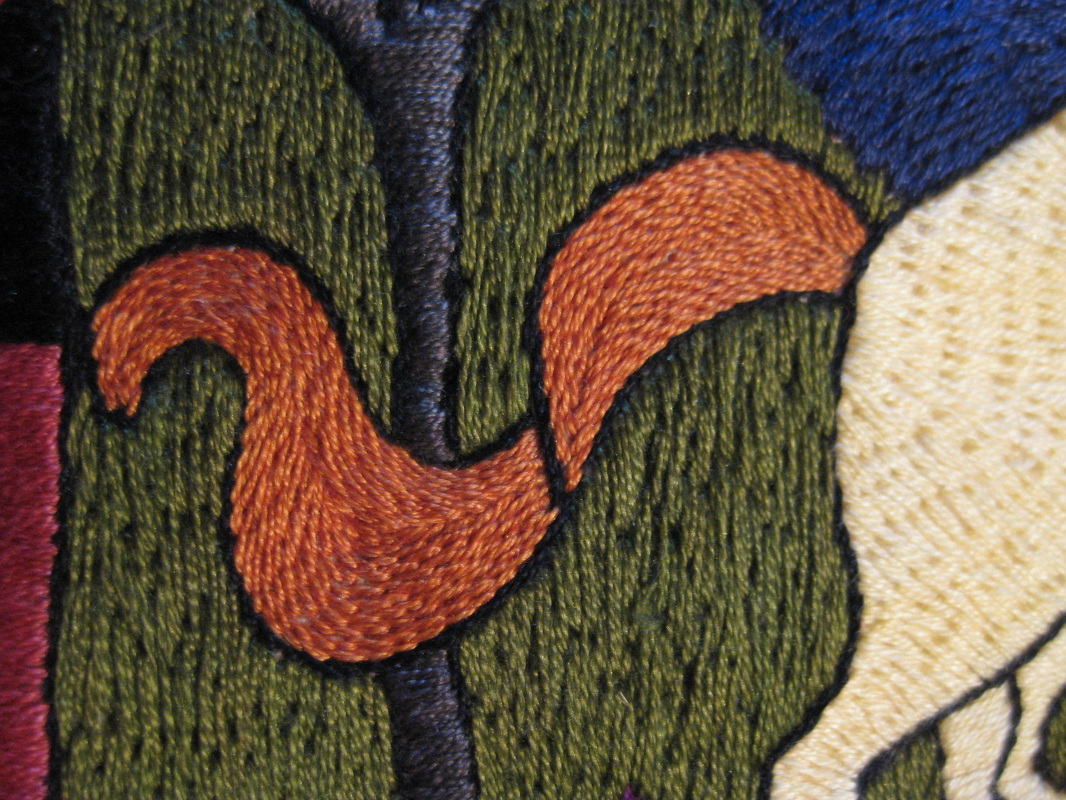
The stem stitch on the tail again gives the notion of movement and makes it distinct from the body of the unicorn. 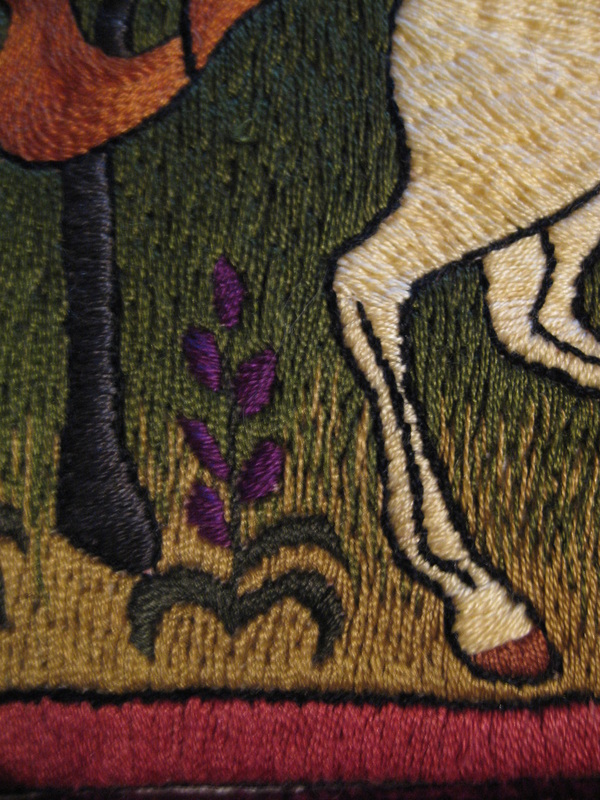
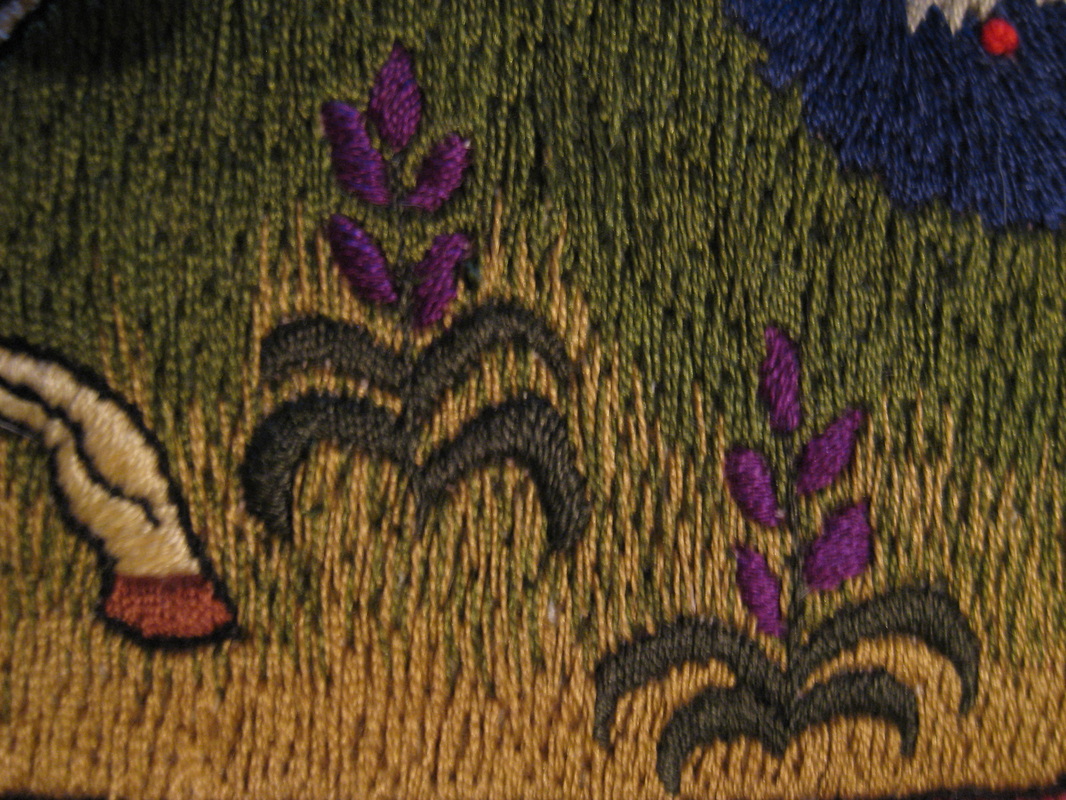
Small stylised flower motifs provide interest in the foreground.
This piece took me about two and a half months of stitching in my spare time and represents a big leap forward in my technical competence. I am so fond of this piece and the cushion looks marvellous sitting on the Uzbek embroidery on the bed in our spare room.
0 Comments
I have made a start on the second work in my current series (for which I still don't have a name, but I'm thinking!). For this work I have decided to do a day by day summary of my progress. No, don't worry, there won't be a million posts about it as I will be grouping several days of progress at a time into each post. DAY 1: I did the sketch for this work some time ago, but I was not happy with the face. I had done about 6 versions and none of them seemed right. On Day 1 I redrew the face and partially coloured the sketch. 
A young girl holds her pet bunny, but again, Mr Shadow is lurking in the background. Compared to the previous work he is further away and less tangible. I'll talk more about why he's there when I'm close to finishing. I have used Koh-i-Noor watercolours and Progresso coloured pencils on medium tooth A3 200gsm paper. 
Next the image was transferred to the fabric (25 momie fine dupioni silk) using tracing paper and dress makers carbon paper. Usually I transfer the image after dyeing, however, because I needed to keep the blue off the girl, I needed to have everything in place beforehand. I ironed the transferred image to make it permanent before dyeing. I then traced around the outer edge of the girl and rabbit with a white crayon so that it would form a resist preventing the turquoise from spreading into the white area. For my purposes it worked well enough. The fabric was laid flat on a layer of cling film and the dye was painted on. (I use Landscapes dyes because they have a very low toxicity, are easy to use and dye silk beautifully.) The fabric was then covered with another layer of cling film, carefully folded into four and microwaved for 45 seconds. The fabric was rinsed and ironed dry. I ironed a fusible light, open weave cotton fabric on the back for extra support, which will be important to support the heavy gold work later. I traced over some of the lines with a black pen to make them more visible. To make the skin look more realistic, I painted on some contours using a Shiva pearlescent oil stick that was then ironed to make it permanent. The fabric was stretched on the frame. END DAY 1 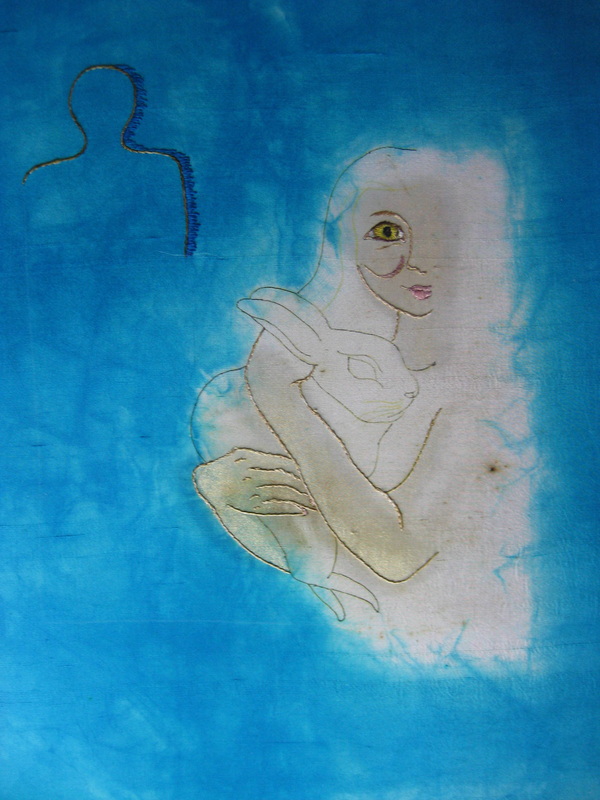
DAY 2: Normally I would spend a full day dyeing threads for a particular project, but in this case I was lucky enough to have all I needed already in my stash, so I could get straight into stitching. The photo above shows my progress on Day 2. Shadow man is finished and I outlined the arms and finished the face 
Here's a close up of the face. I always intended for the face to be defined in outline only, but with the eyes and lips worked fully to draw the focus of attention. I have used 5 different thread types of varying thicknesses. 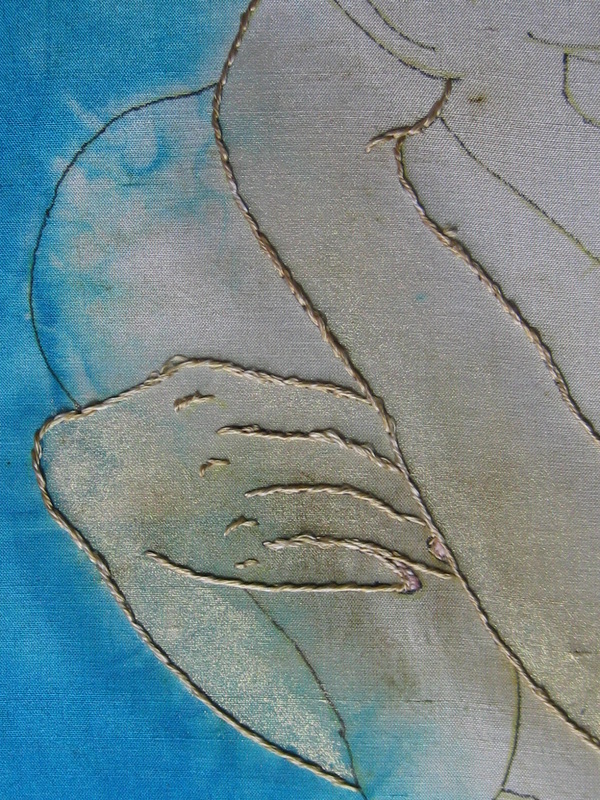
All the outlining is done in stem stitch. I've never drawn hands and arms before and I must say I found it challenging. In this photo you can see the pearlescent oil paint providing some contouring of the arms. END DAY 2 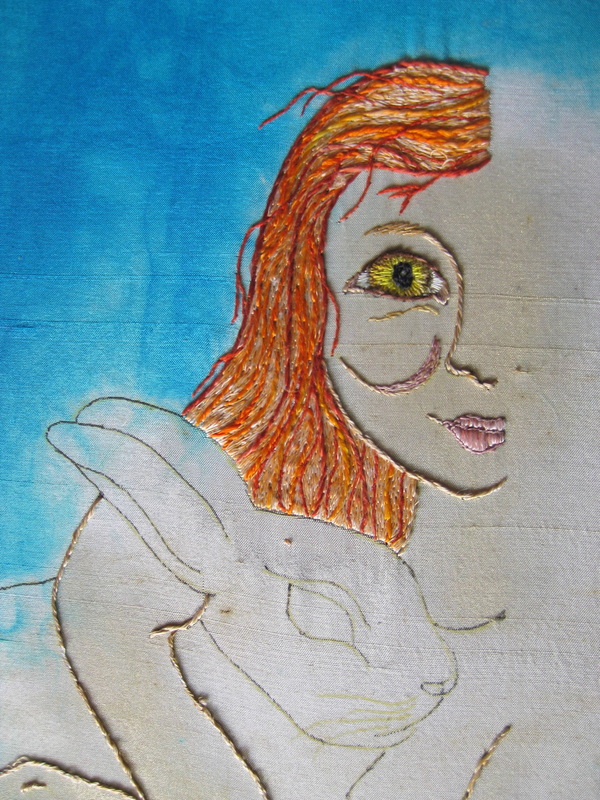
DAYS 3 and 4: It took all of Day 3 to stitch the darker lines of the hair and fill a little in between. On Day 4 I finished off the hair and made a start on the rabbit. 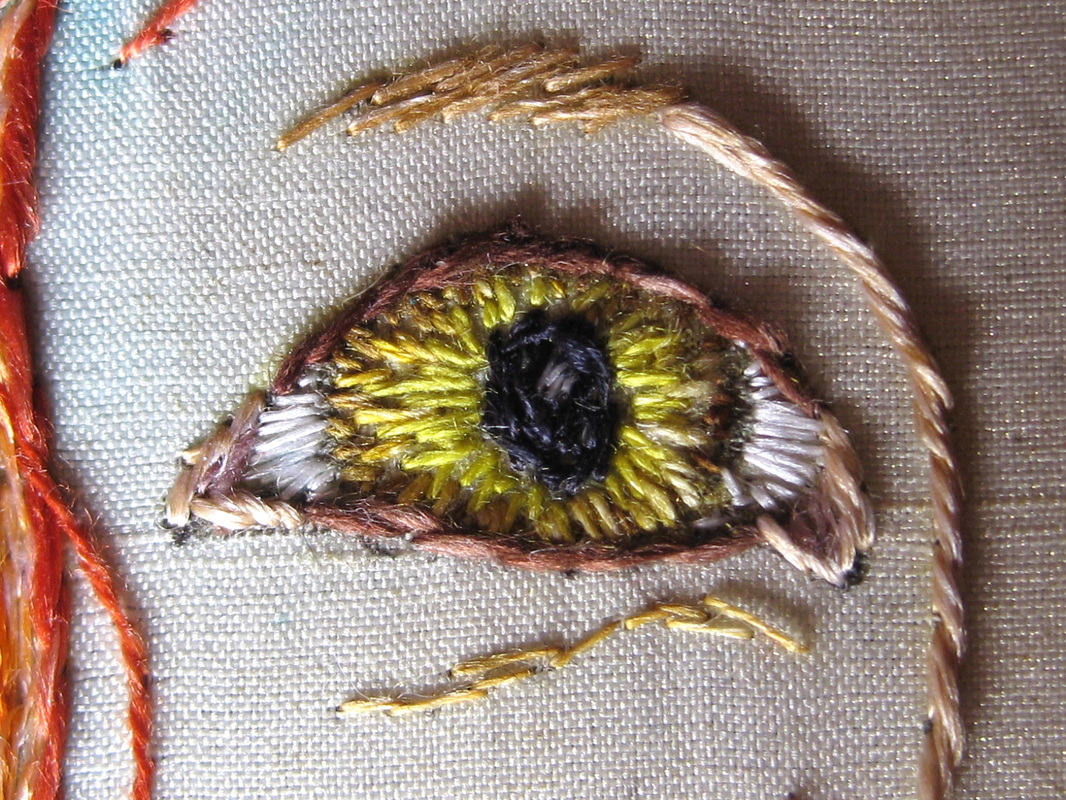
Here's a close up of the eye (if you click on the image you will get a much larger photo). Four different green threads were used for the iris. 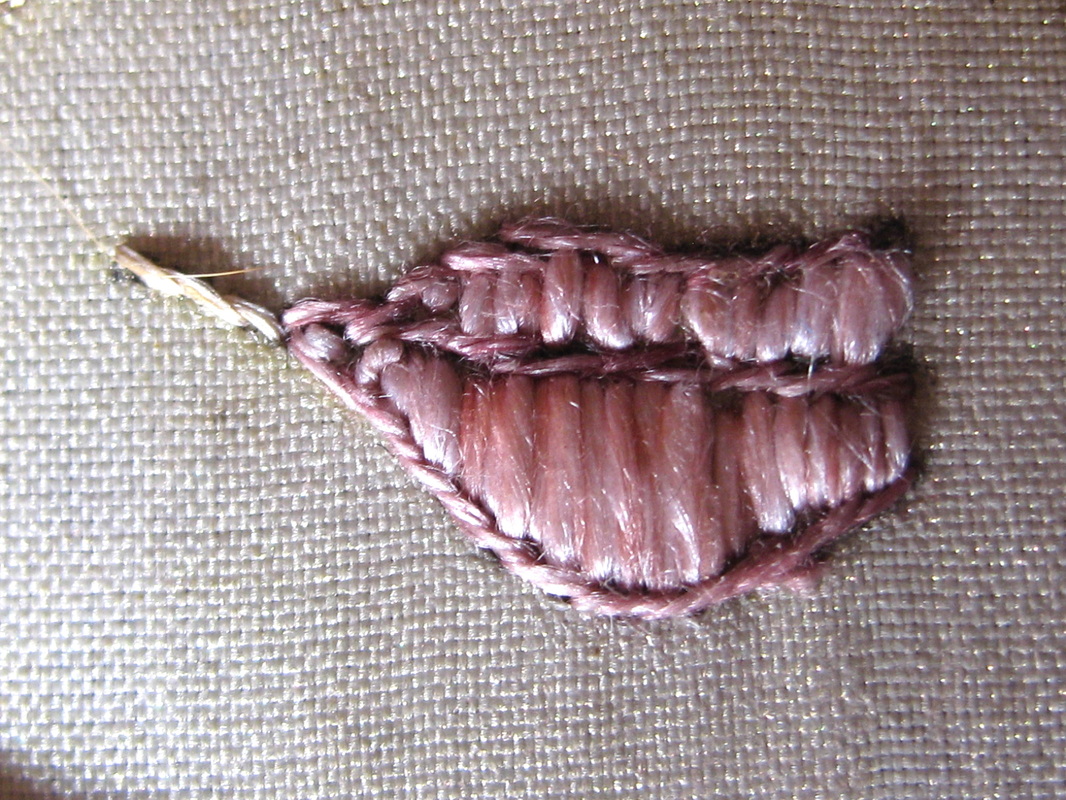
The lips in close up. I have used a darker pink, thinner thread for the outlines with a thick filature silk for the filling. 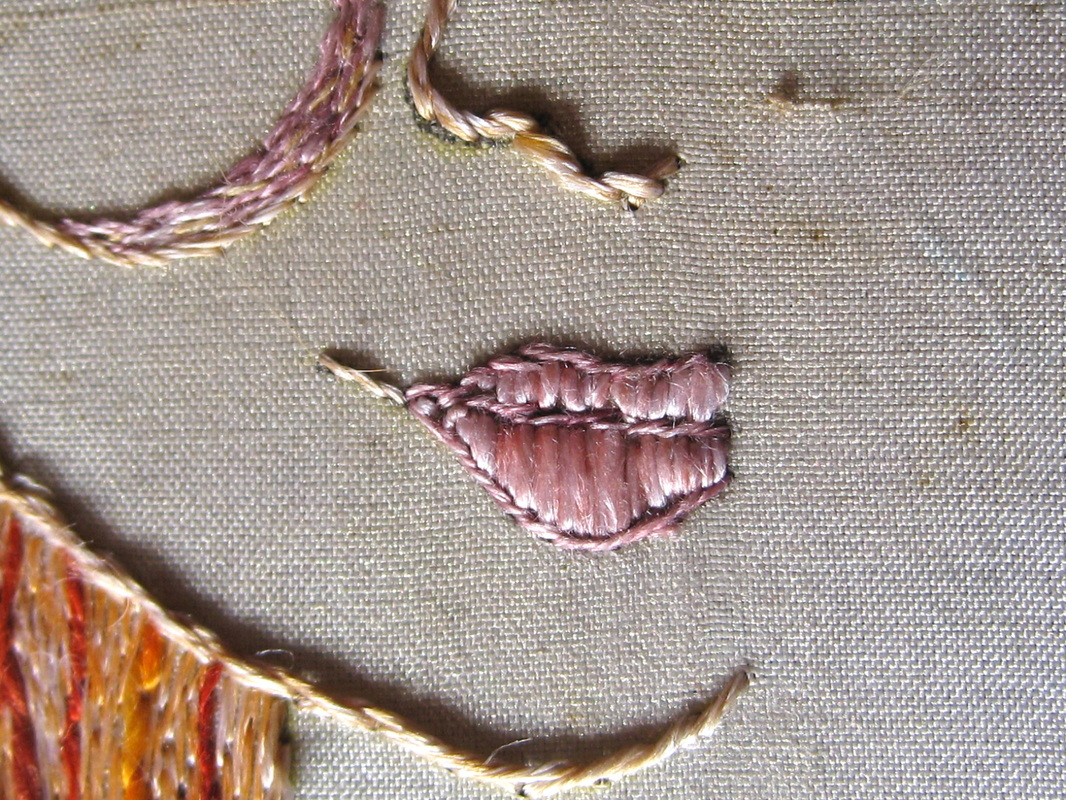
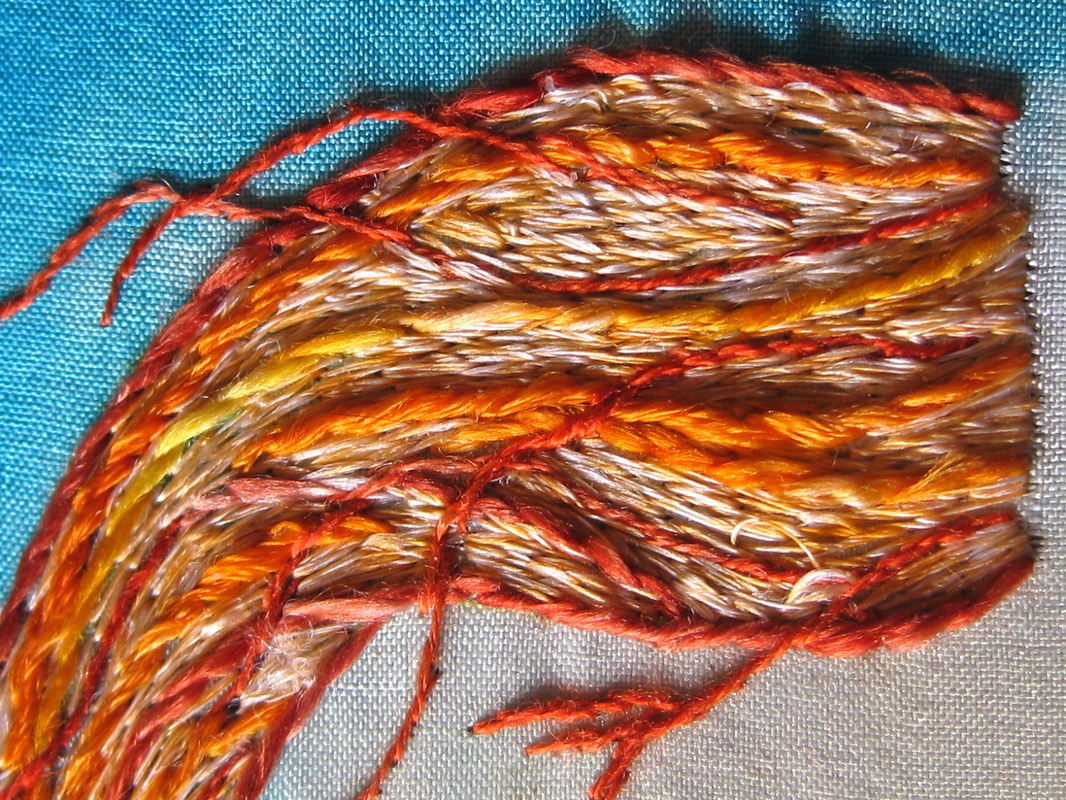
It was a challenge to stitch the hair so that it had the movement and texture of real hair without being a literal representation, which, to my mind, would be far less interesting and dynamic. Little wisps of flyaway hair give an air of informality. 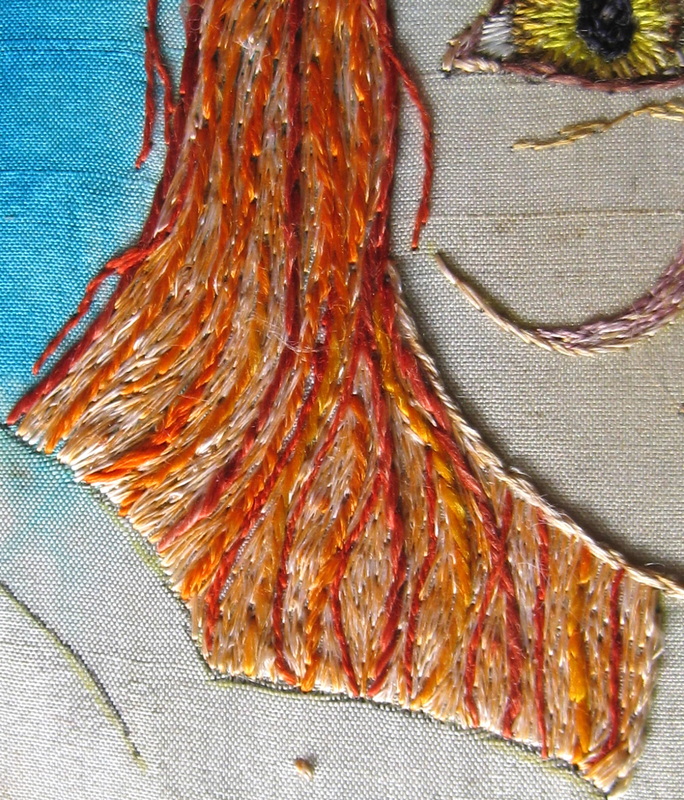
The hair frames the face and the colour plays off dramatically against the green of the eye. 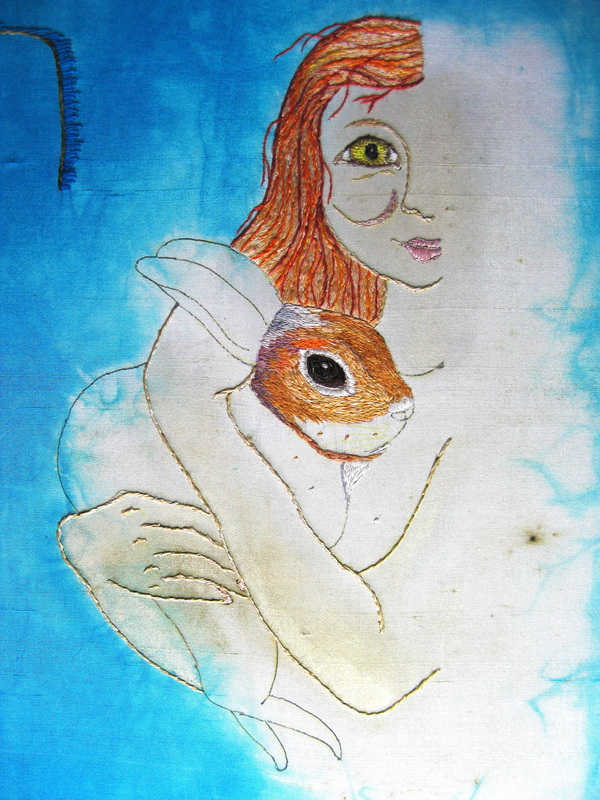
This is as far as I got with bunny. At this stage he looks as though he is wearing a strange sort of mask, but fear not, all will be well when it is complete. It's been a while since I used my needle painting skills and I had quite a bit of fun stitching his face. 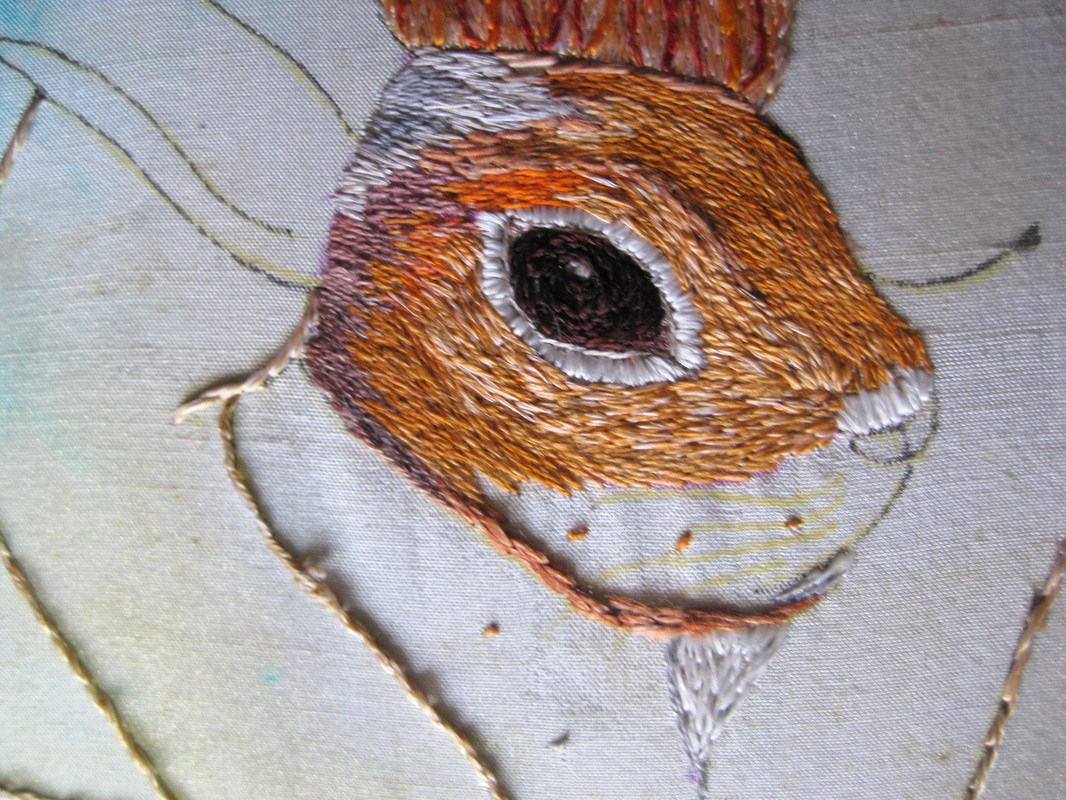
I started with the eye, stitching it in 2 browns using stem stitch starting around the circumference and working my way inwards. I then outlined the eye with a smokey grey line from which radiates the white thread around the eye. Looking at the photo I think it was a mistake to work the white line this way. It will need to be pulled out and stitched so that the stitches run in a more naturally contoured fashion. There are six different colours on bunny's head used to highlight contours and reflection from the implied light source. 
It is interesting how in this extreme close up you can see that I have missed 2 stitches where the brown fur meets the white on his nose. These stitches are really tiny so it can be hard to tell when there are gaps left. I worked a bit of white on the front of the chest, but here it looks like he has a goatee. 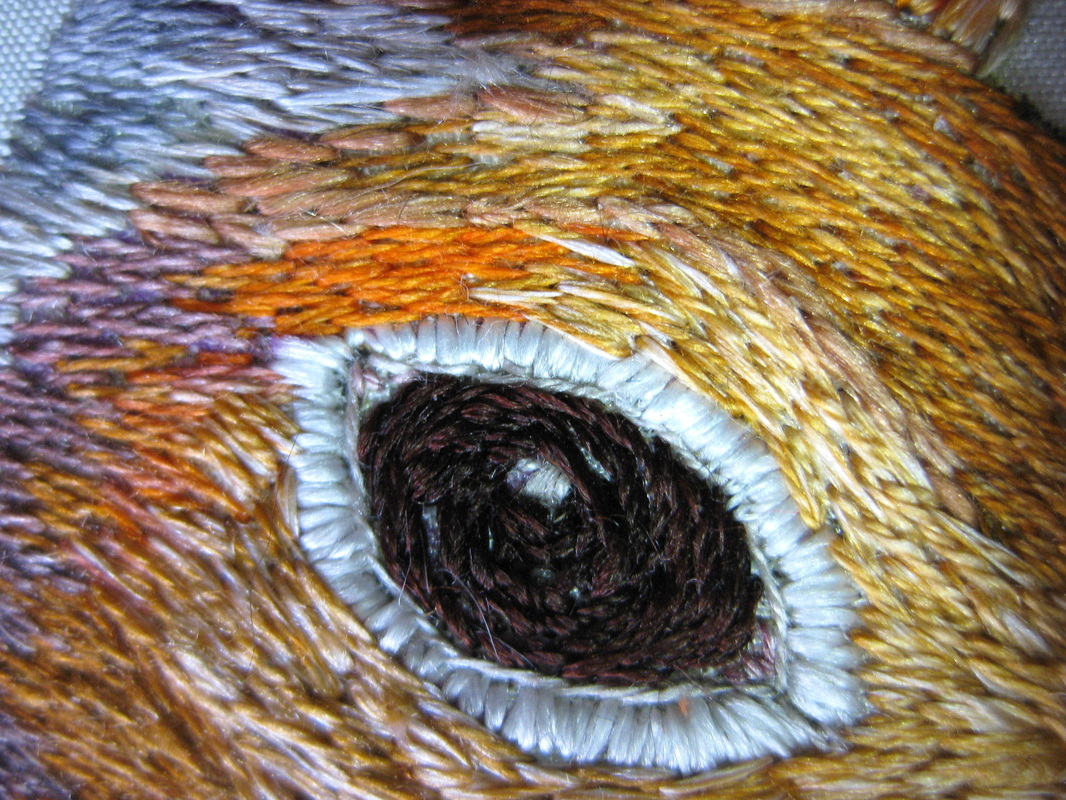
And finally, a close up of bunny's eye. You can see the circular working of the stem stitch on the eye and that the colour progressions make more sense when you don't have the "mask" effect caused by the unstitched portion. END DAY 4
So, that's it so far. About 30 hours of work. I'll post more as the work develops. The first work in my new series is complete! I had a number of new works, some of which I have featured on my previous blog site, professionally photographed earlier this week. You'll see in the photos posted here that they are much sharper with detail much more visible than in the photos that I posted previously. 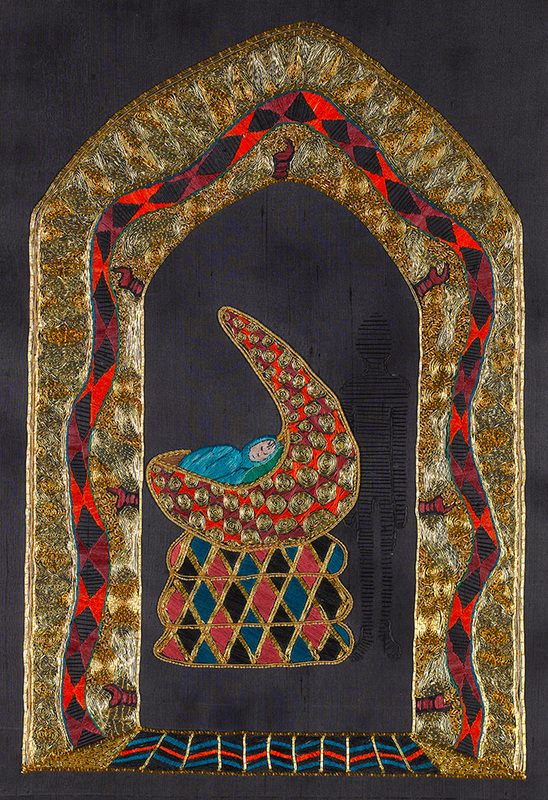
Here's how the whole work looks. The new photographs show the patterns and texture of the gold work beautifully. The colours, however, are not really true. the silk threads appear almost fluorescent in the photos, when in fact the colour is much less intense and cooler in tone. The reflectiveness of both the gold and the silk make it very difficult to get accurate colour. 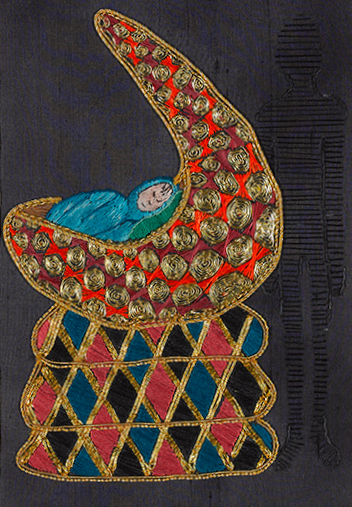
You will notice that the shape of the baby's cradle and the little pink symbols in the gold border are the same. This is the Adinkara symbol, Akoben. It represents vigilance and wariness. 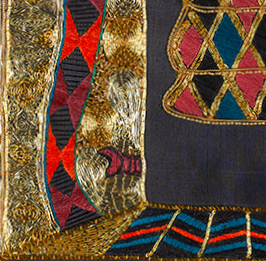
You can see the symbol in the gold border here..... 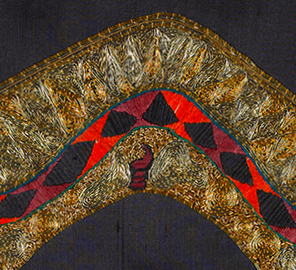
..and again here. 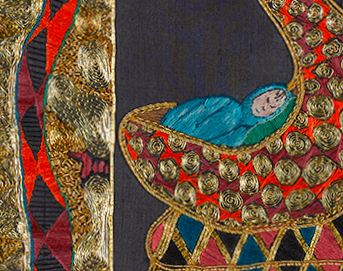
The shadowy figure represents the dangers, real and imagined, to which a young child is vulnerable. He is the bogey man of nightmares, the lurking stranger and the harmful relative. He is there and he is not there and so the question begs, who watches the child?
This cute little creature is my new studio mascot. Her name is "Sunday", named after a sweet cat I knew all too briefly. Her smiling face and joyful eyes bring me cheer every time I look at her. To the right of Sunday are my UFO pens. The orange one is a flying saucer and the pink one a classic "alien". They are on a ratchet and when you spin them they are filled with a strobing light. Best $4 I ever spent! Don't forget that if you want to see larger images in any of my blog posts you only need to click on the image. 
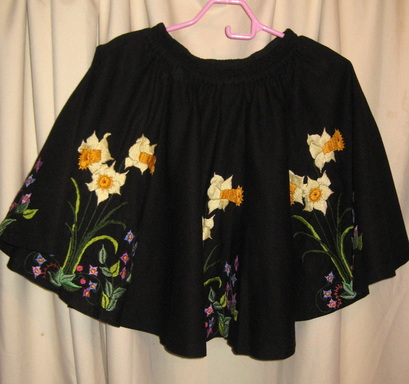
This is the second in a series of posts about my history as an embroiderer. You can read the first post here. My third embroidery was the skirt pictured below. It is a full circle mid thigh skirt with side pockets and an elasticised waist and is made from rami. The daffodil motif is embroidered in DMC Perle cotton (not sure if no. 5 or no. 8 - whichever is the thinner one, that's what I used). The threads were a gift from my mother who was given a huge pile of threads. She is not an embroiderer and so passed them on to me. 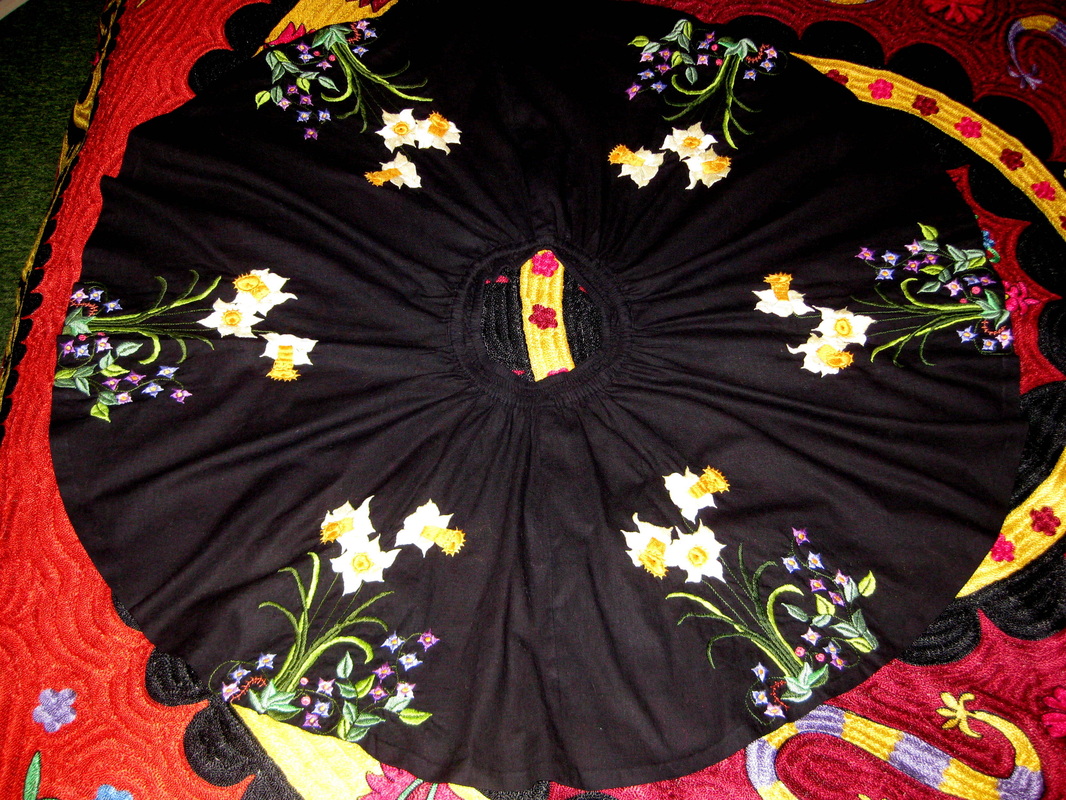
Here you see the skirt laid out flat. There are 6 repeats of the daffodil motif distributed evenly around the circle. 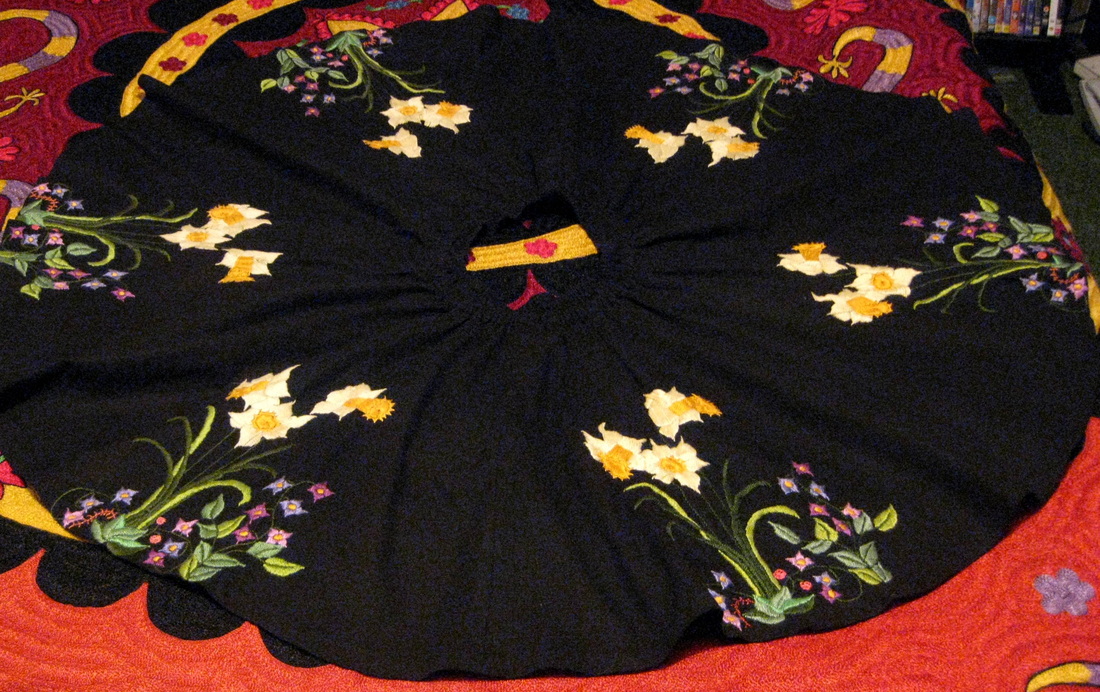
The design (as with all my embroideries) is my own It is worked entirely in stem stitch and satin stitch. 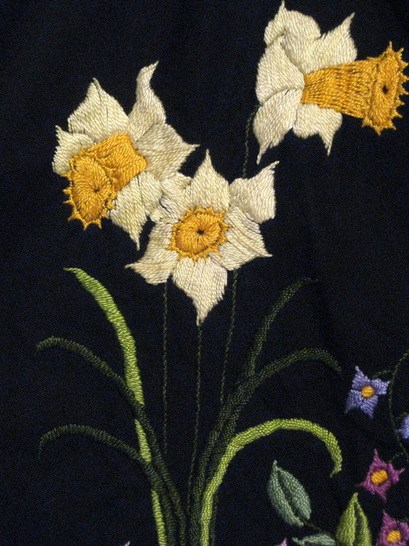
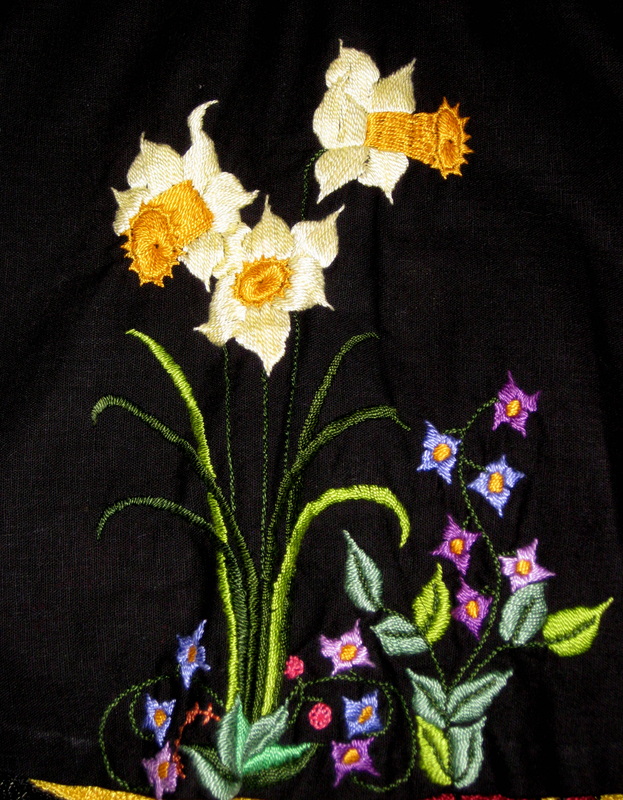
In the closer views of the daffodils you can see that the petals are probably a bit too large to work in satin stitch on an item intended to be work and so there is some slight sagging of some of the longer stitches. 
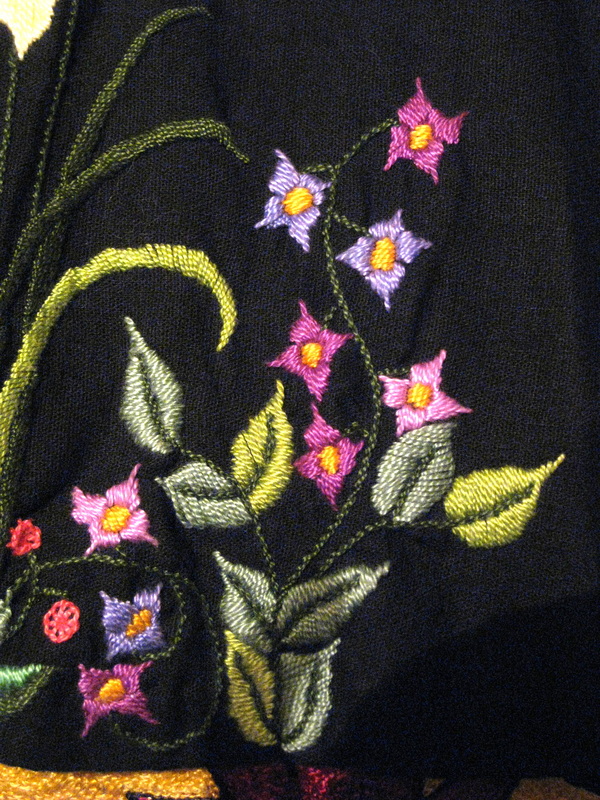
I love the combination of the 3 greens and those little circular warm pink flowers (worked in button hole stitch in the round) really enliven the cool pinks and mauves of the flowers around them. 
This is how the skirt hung when worn. I was in my mid 20s when I made this skirt and I think the design speaks to youthful optimism. I loved wearing it, although I wore it infrequently as I didn't want the embroidery to wear. I always got admiring comments whenever I wore it. It is still in as good condition as it was when it was made and I will always treasure it.
My heater is finally installed! I feel like I have been in exile for years. I have now had 2 days in my studio and I feel centred again. So, here she is. This is my new heater. She looks very pretty and heats the studio well. Sadly, she does not light as easily as my previous one and (although it takes the edge off the cold pretty quickly) takes a full 1.5 hours to reach a cosy room temperature. My old baby ignited like an oil well and had the whole space heated in half an hour. But I knew nothing was going to compare in that respect. 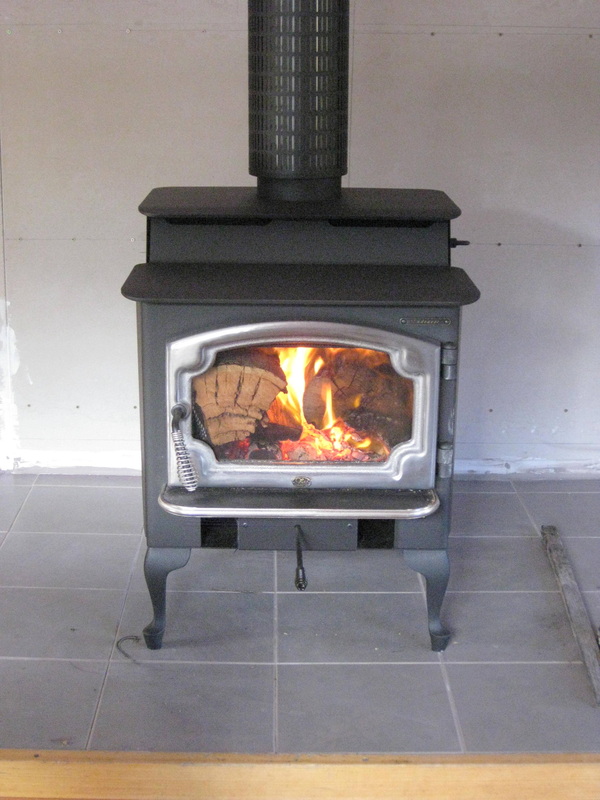
See that ugly grey wall behind the heater? That's cement sheet waiting for wall tiles. I have done an elaborate islamic tile design and intend to paint the tiles myself. It's been more than 2 years since I finished renovating the studio and moved in. Why haven't I done the tiles? Well, at first I was working like crazy to amass the works for my solo show, but the real reason is that I haven't gone into town to buy the tiles! Having the new heater in has made me determined to have the tiles painted and installed over the coming summer. 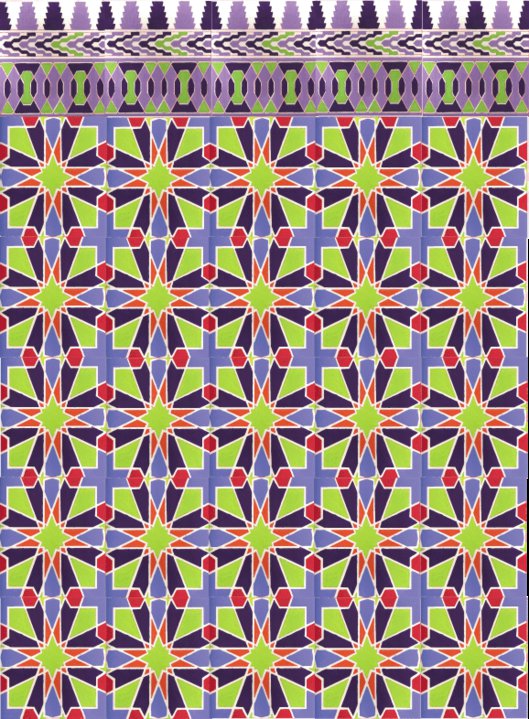
This is the design that I have planned. 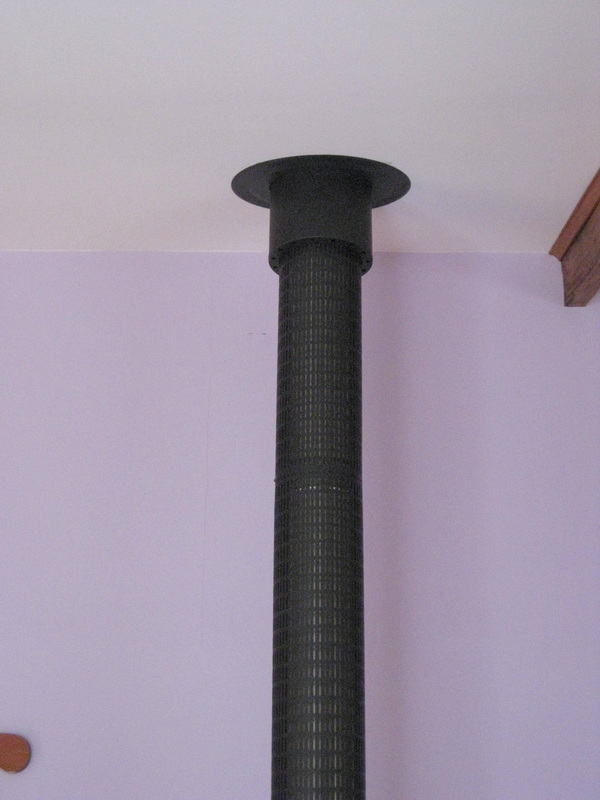
The installers did a lovely job and it is nice to have proper flashing on the ceiling and on the roof. The last flue was a bit home made and didn't have a very nice (or even well fitting) flashing on the ceiling. 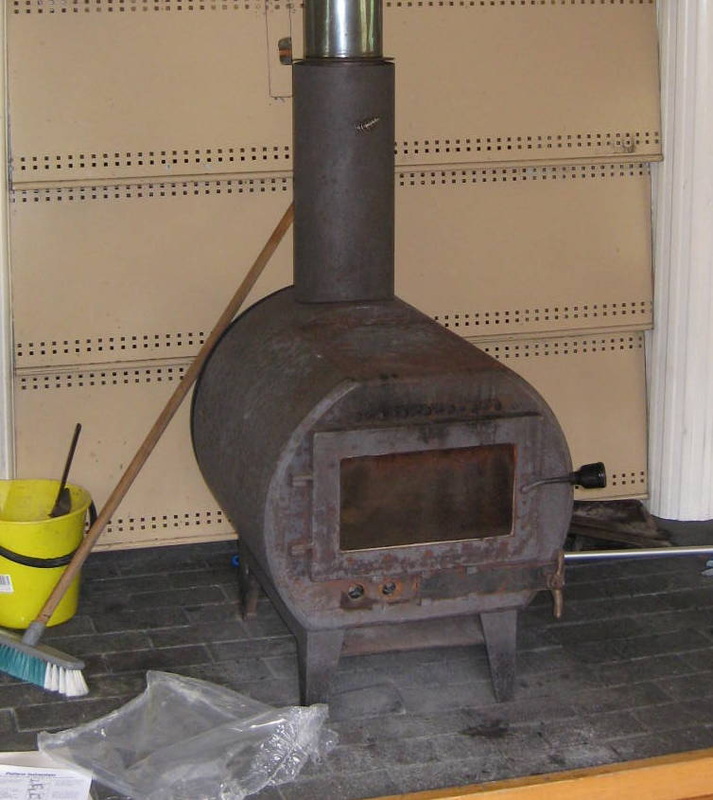
And above is a picture of my old heater. It was hand made from an old cast iron boiler. This photo was taken before I renovated the studio. She cleaned up a bit better than in this photo. I loved her steampunk styling and she worked like a dream. But, I can't get her back and time moves on.
Due to heavy snow and the heater shop sending the installer with the wrong components, I still do not have a heater in my studio (being installed in 2 days, fingers crossed!). Fed up with not being able to work I went to my studio and brought my work back home. Cat's be damned I was going to stitch! (Cat's love textiles and fibre, especially my cats. I anticipated it being hell trying to stitch at my kitchen table, what with curious claws tugging at my threaded needle while I worked and certain felines absconding with my threads. However, my cats have been perfectly well behaved and not once have I left my work to come back to find a cat sitting on it (a common occurrence before I had my studio)). As a result I have made significant progress on the work I started about 9 weeks ago. This work will be the first in a series of 8 to 10 works. I gave a sneak preview on my previous blog, but today I will reveal all. I'm not going to talk about what it means here (that is for another post), but I will show you what I've been up to and how it is being made. 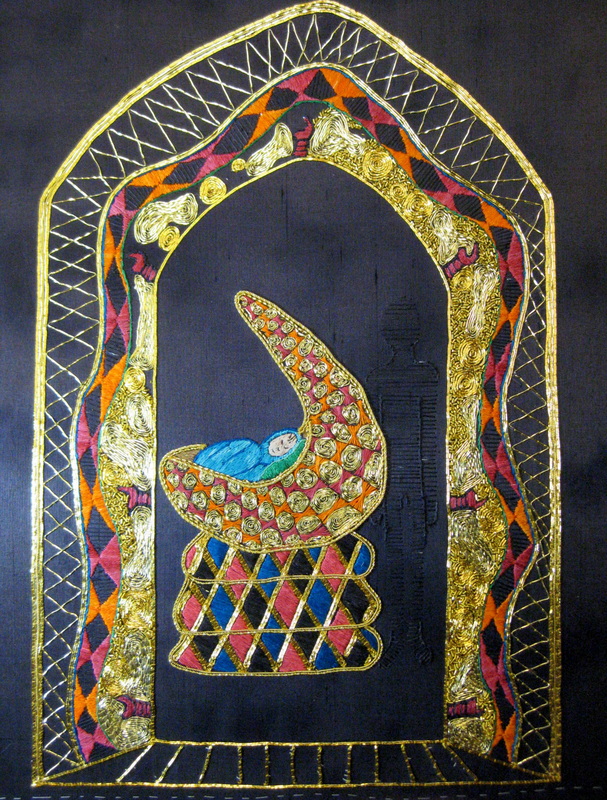
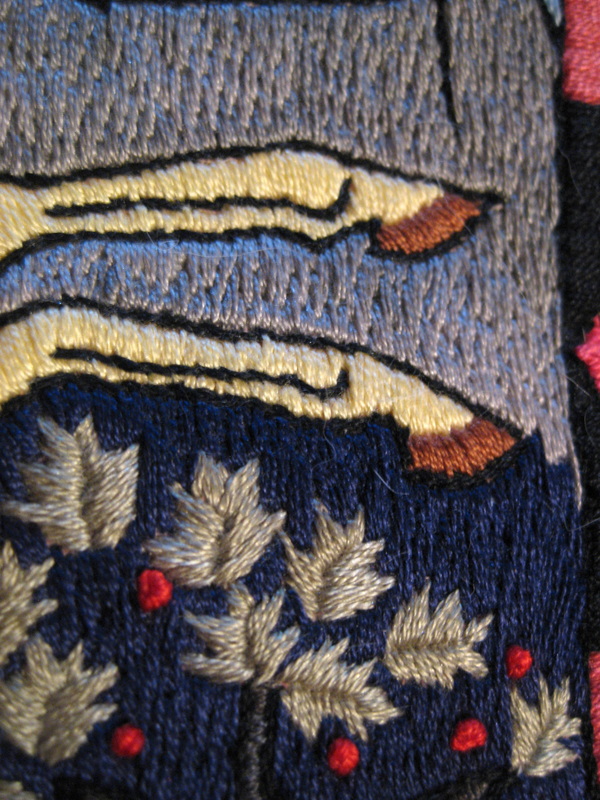
Here's a photo of the whole piece. As you can see it has a central representational element heavily surrounded by abstract gold work. In the centre is a child asleep in her elaborately decorated crib. The crib is viewed through the arch of the doorway and into the room beyond. The inner section of the arch is worked in flatworm, Japanese gold thread, rough and bright bullion and bright check pearl. 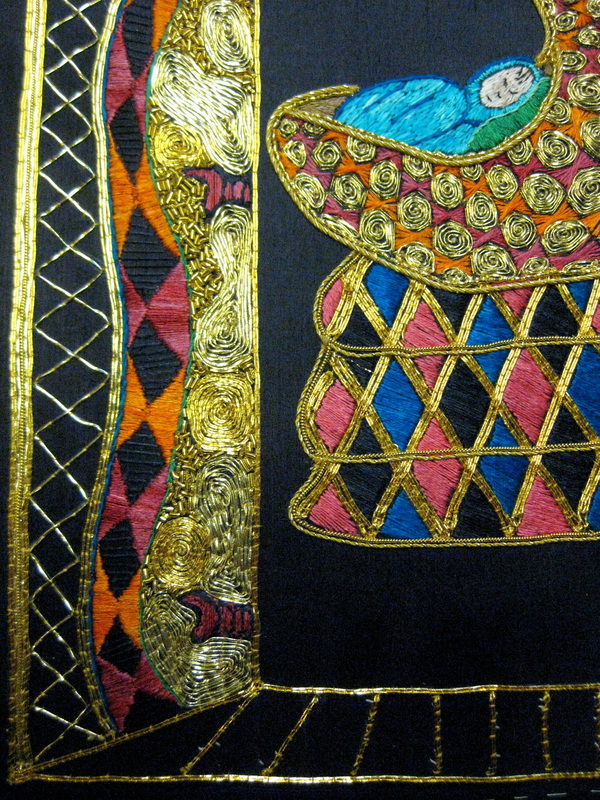
Here you get a closer view of the inner arch. You can see the laid flatworm (irregular shapes) and the laid Jap gold (circular shapes) In between the bullions and the check pearl have been cut into small lengths and couched down like beads. Did you notice the small pink forms amongst the gold work of the inner arch? And did you notice that it is the same shape as the cradle? This is the Adinkara symbol for vigilance and wariness. I will discuss Adinkara cloth, its symbolism and 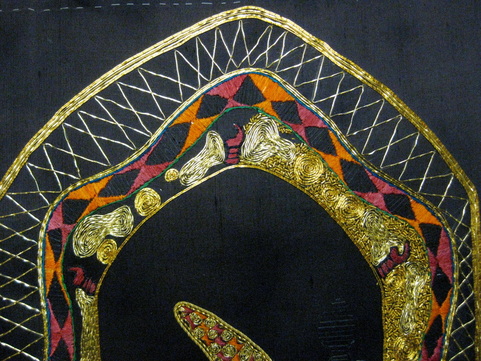
Here is the top of the arch. You can see that the gold work of the inner arch is not finished as I ran out of the bullions and check pearl. Damn! I will have to wait a couple of weeks until my new supplies come from the US to finish it. The satin stitched part of the middle arch mimics the area of the same colours in the cradle. The outer arch will also be heavily worked, although I have yet to decide what I'll do. At the moment all that is there is the skeleton of criss-crossed laid flatworm. 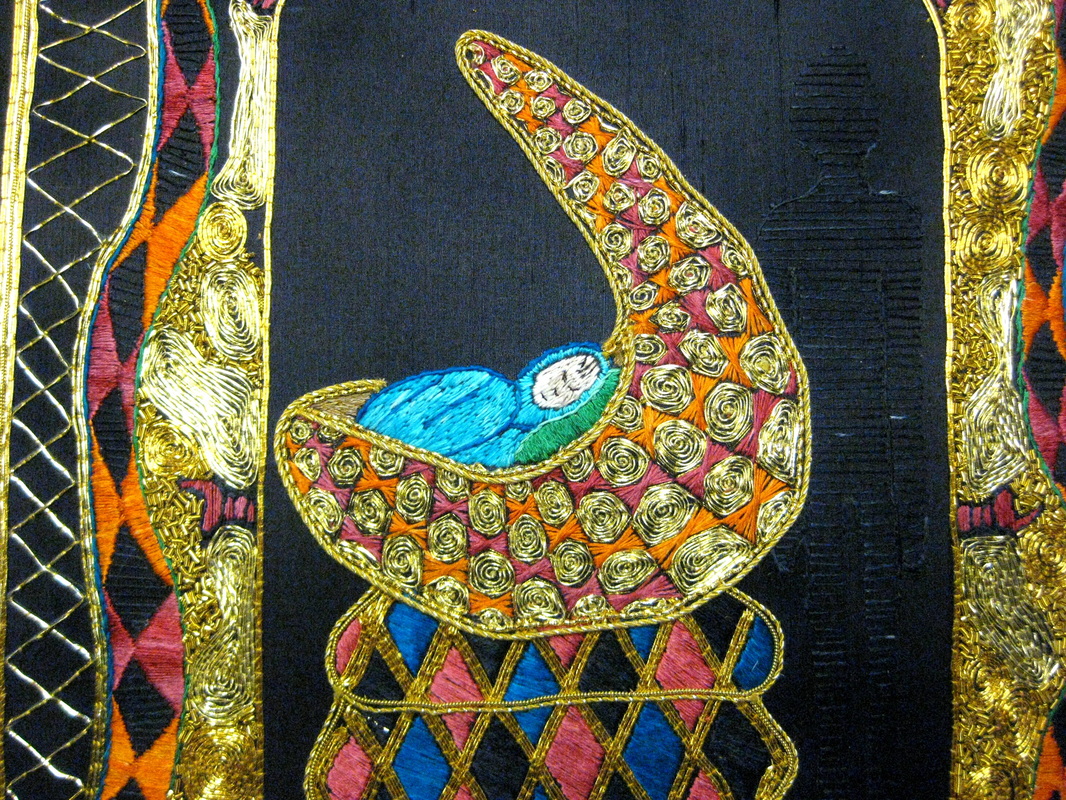
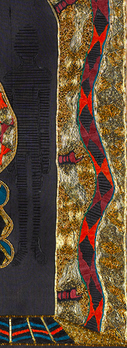
In this closer view you can see a shadowy figure to the right of and behind the cradle. Who is this figure and why is it there? 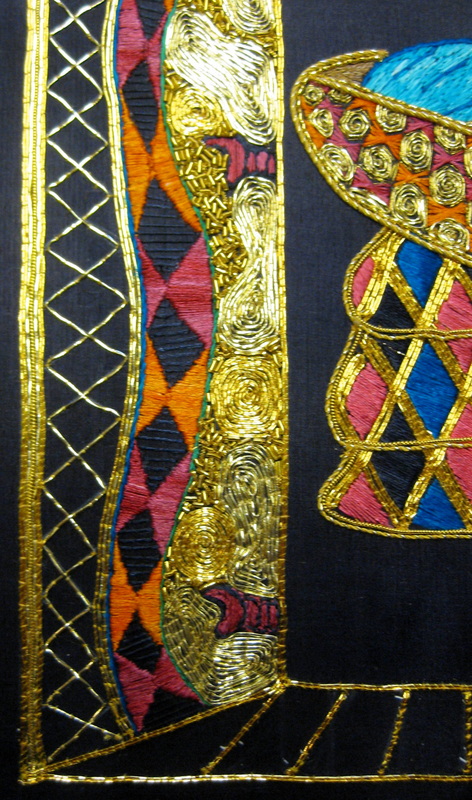
A closer view of the lower left hand corner. 
A closer view of the lower right hand corner. You can see the feet of the dark figure and how he is just hinted at by sparsely spaced horizontal stitches. 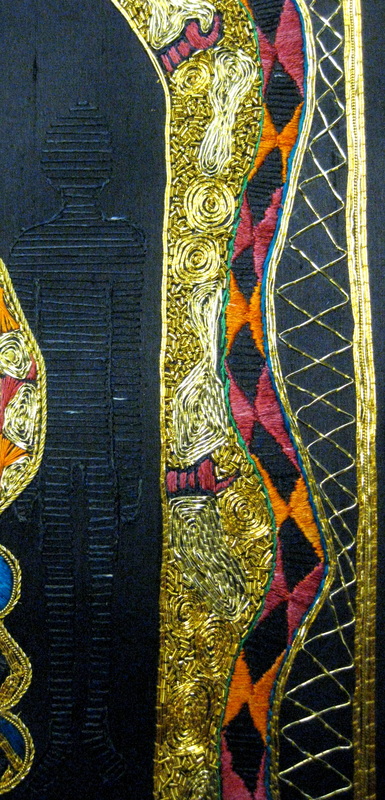
The shadowy figure is there, but is disguised by the dark and diminished in presence care of the opulence of the cradle and the arch way. 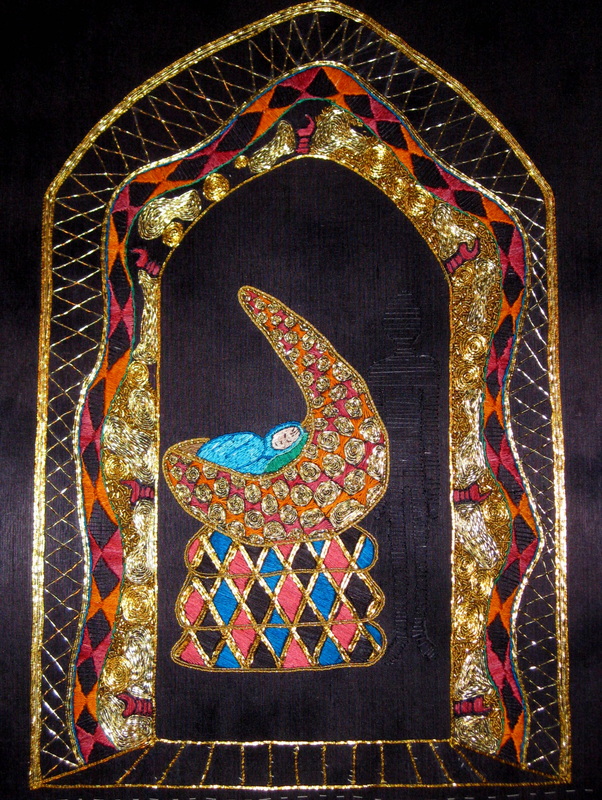
And finally, here's how the work appeared when I packed it away into another room with different light. This photo is a bit more accurate in that it shows the rich colours of the gold and the different shades of the various types of gold threads, however, the silk colours are much more muted and are more accurately represented in the earlier photos.
So, how do you feel about this new direction in my work? It's very different from my previous work. What thoughts come to mind as you look at it? Am I wrong to be attempting something entirely new? Please leave your thoughts in the comments section, I would love to hear them. On my recent trip to Melbourne I made sure that I paid a visit to a glorious shop called L' Uccello. L' Uccello sells all sorts of vintage haberdashery and is a positive Aladin's cave for any textile or thread fanatic. Although the online shop is still in creation, you can visit their blog here to get a feel for what they do. Before I go any further I would like to state that I was not paid or compensated in any way for writing this blog post. I am merely sharing a resource that I love and want to see thrive. 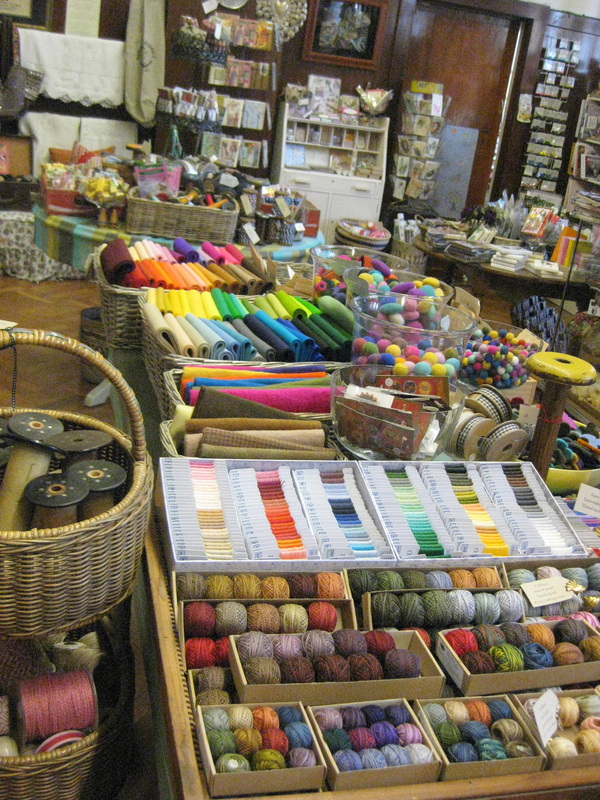
The photo above gives you a glimpse at the first impression on entering the store, a wonderland of colour, thread and fabric. 
The store is located in Shop 5 on the second floor of the Nicholas Building which you enter from the Cathedral Arcade near the corner of Swanston and Collins Streets. The mood is already set as you enter the old world architecture of the arcade. An ancient 2 door manual lift complete with lift driver takes you up to the second floor. (Who wants to take the stairs when you can chat to a lift driver?) . The old world feel continues in the store with its dark wood panelling and lead light windows. The store is furnished with old cabinets and other novel fittings that complete the scene absolutely perfectly. 
The store is packed from floor to ceiling so you need to look up or you will miss things like this fabulous seal lamp......... 
...or pretty boxes piled high and a mini Ferris Wheel.......... 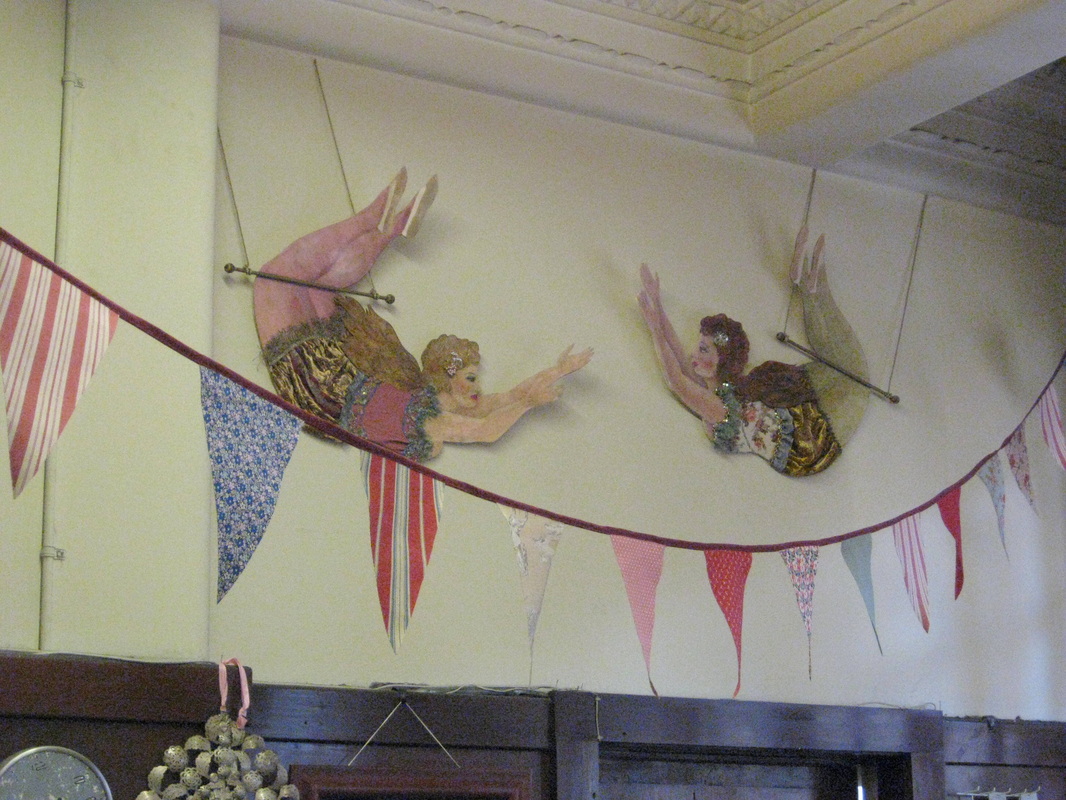
...or even a pair of daring trapeze belles. 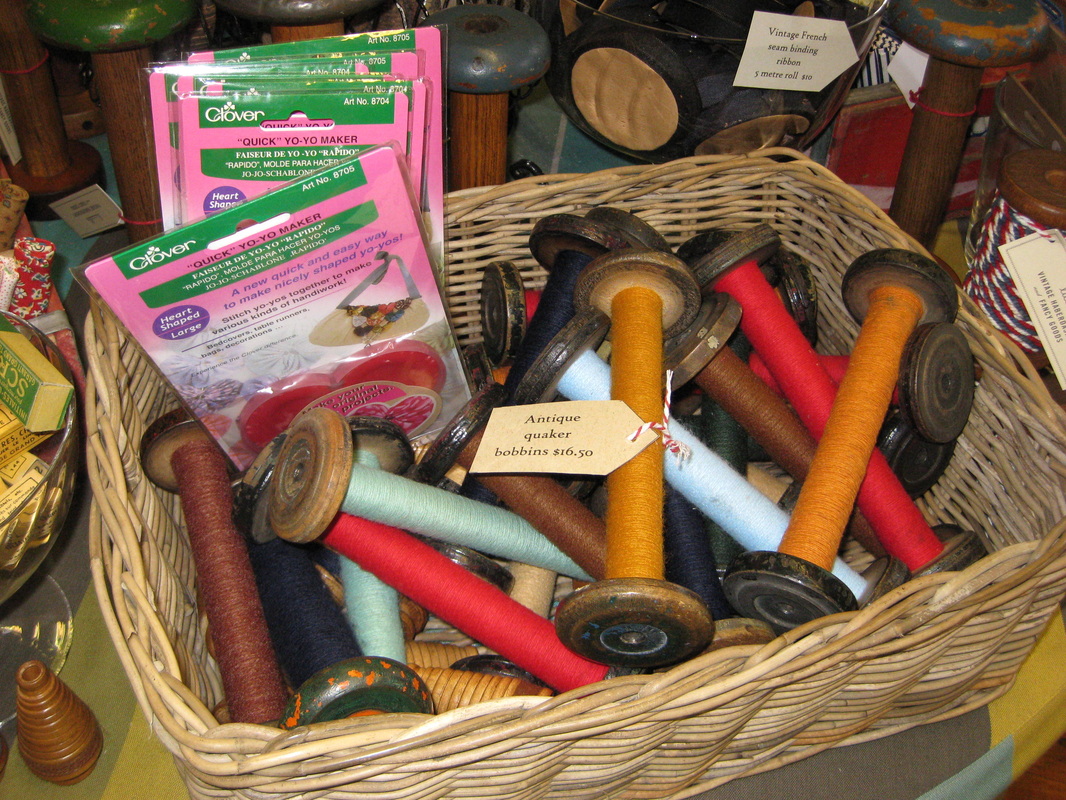
There are baskets everywhere containing lovely things like these old thread spools. 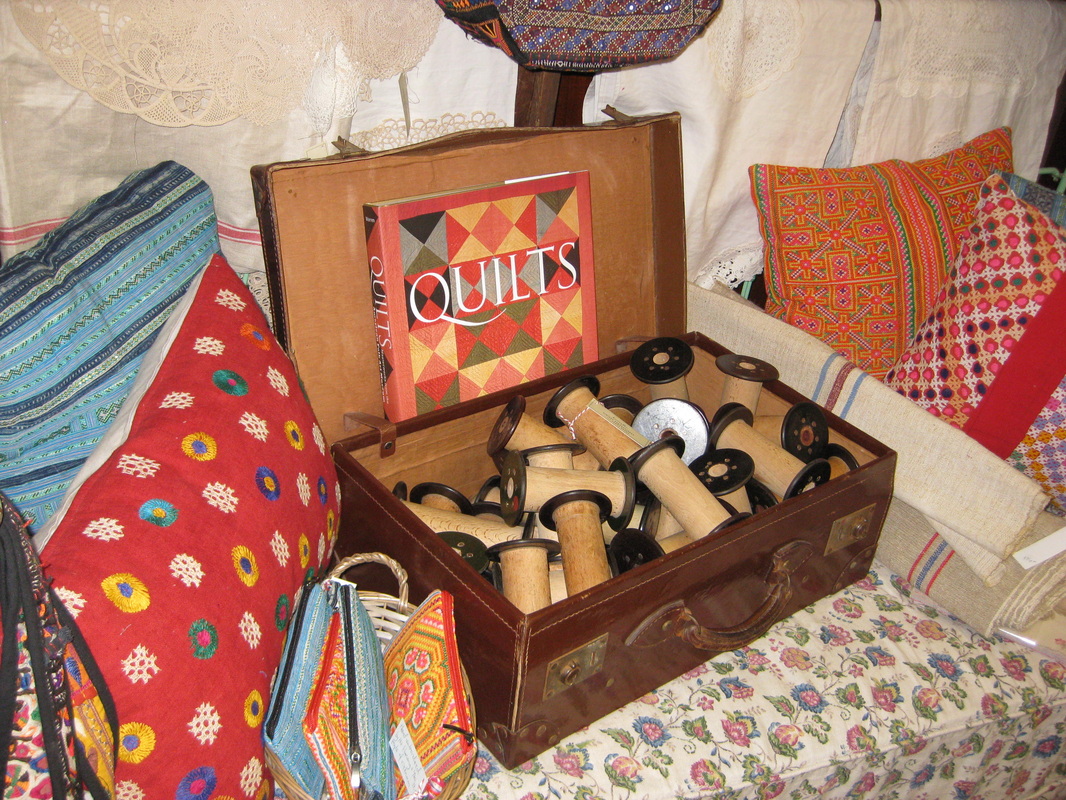
If I could have thought of a use for these empty wooden spools I would have bought some. I'm sure they could make a fabulous sculpture in the right, inspired hands. 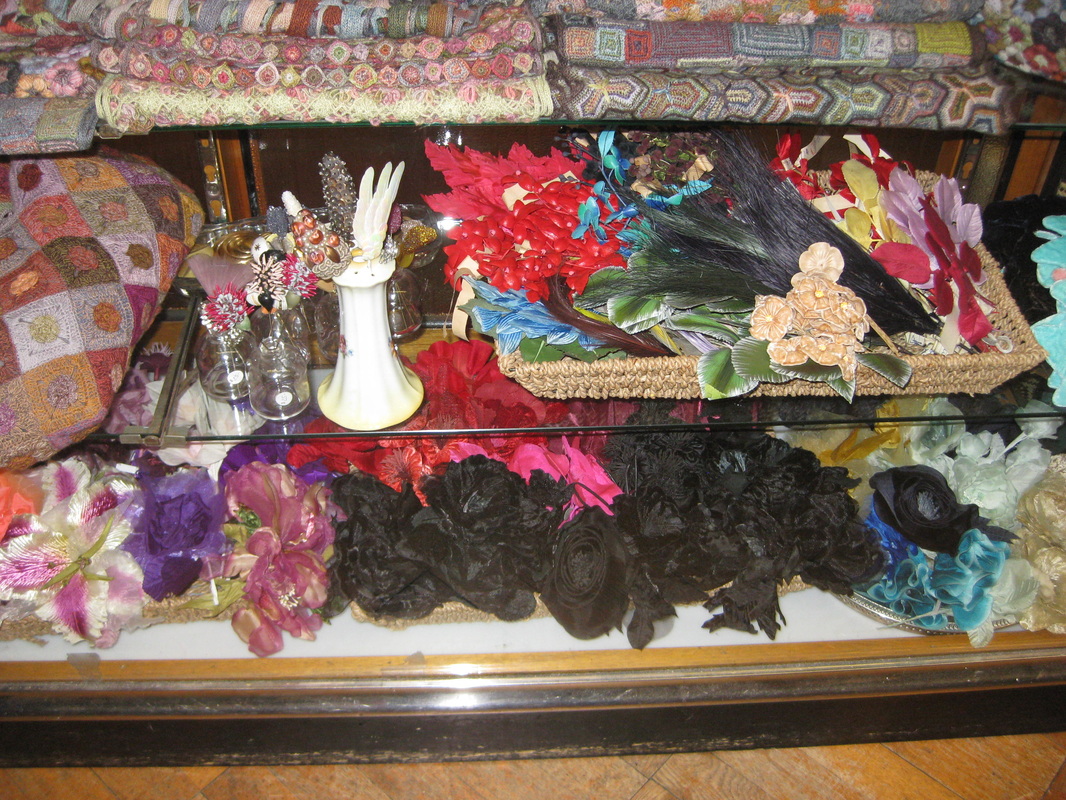
The glass cabinets are so full of treasure that you must look long and carefully to take it all in. 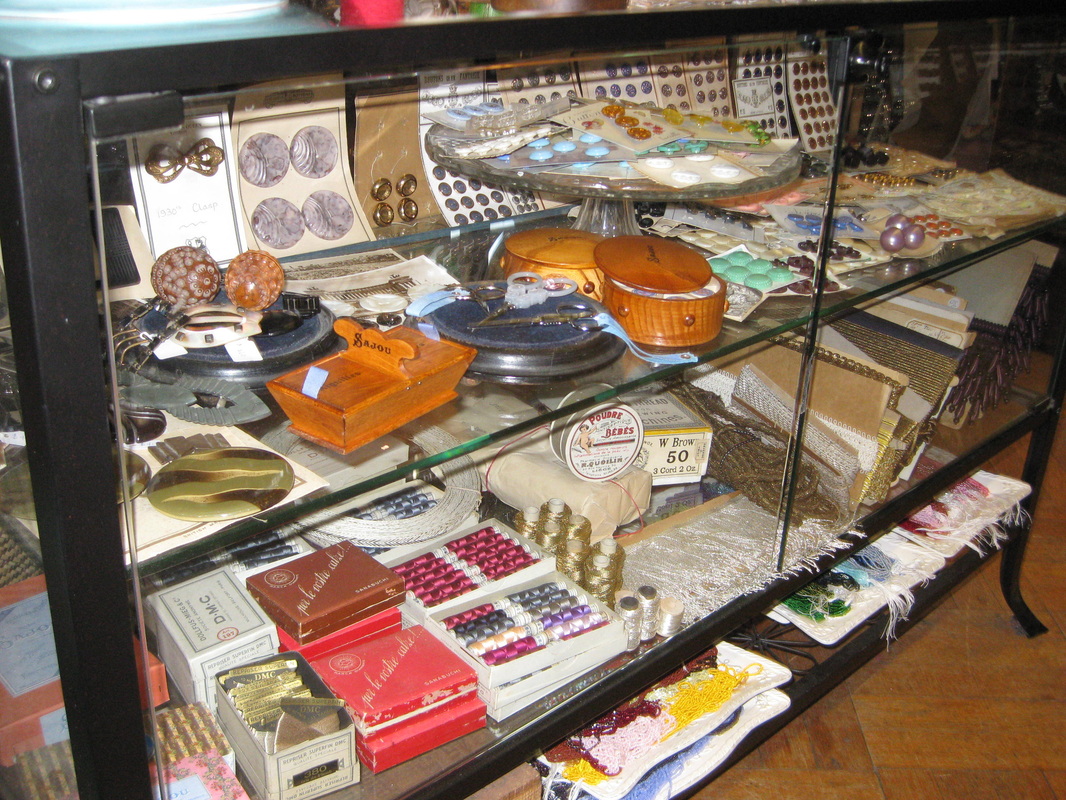
There is a gorgeous variety of vintage buttons. 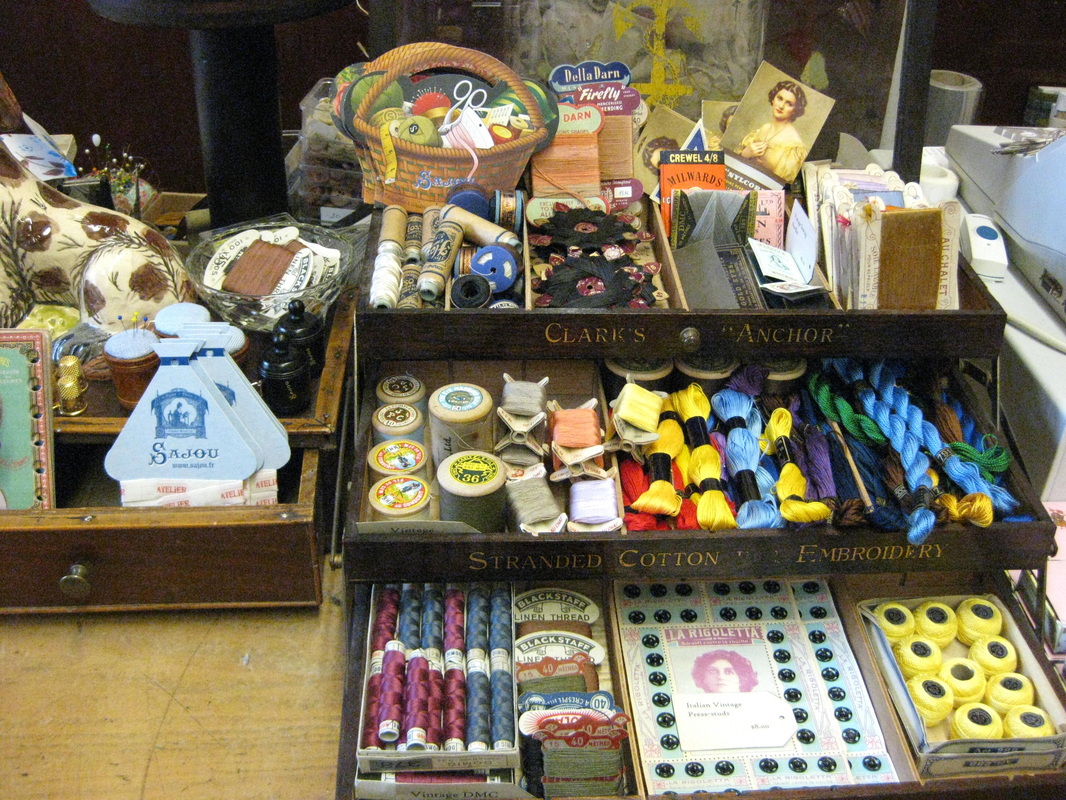
Everywhere you look, another photo opportunity. 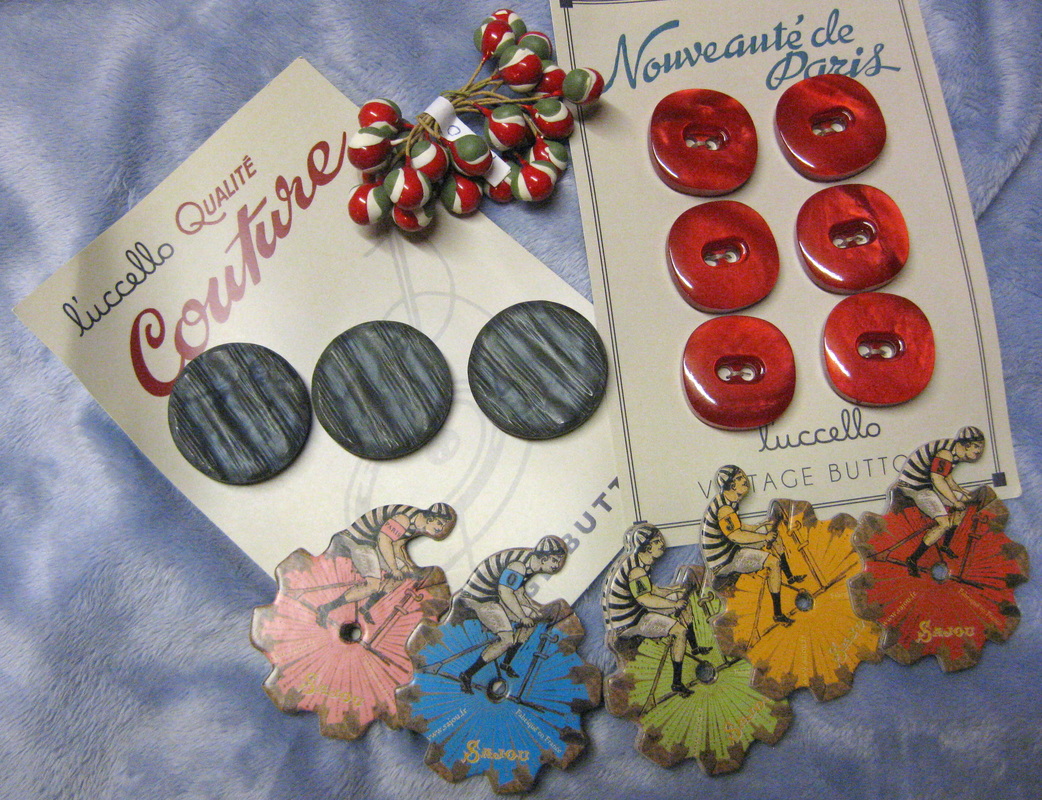
And finally...what I bought there. 2 cards of beautiful buttons, some double ended green, white and red ceramic baubles, the true function of which I have no idea, but that I think would make great ear rings, and 5 Sajou thread cards featuring handsome cyclists (how appropriate, the Tour de France was on while I was there). I won't be using the cycling beauties as thread cards, I plan to make a necklace out of them. 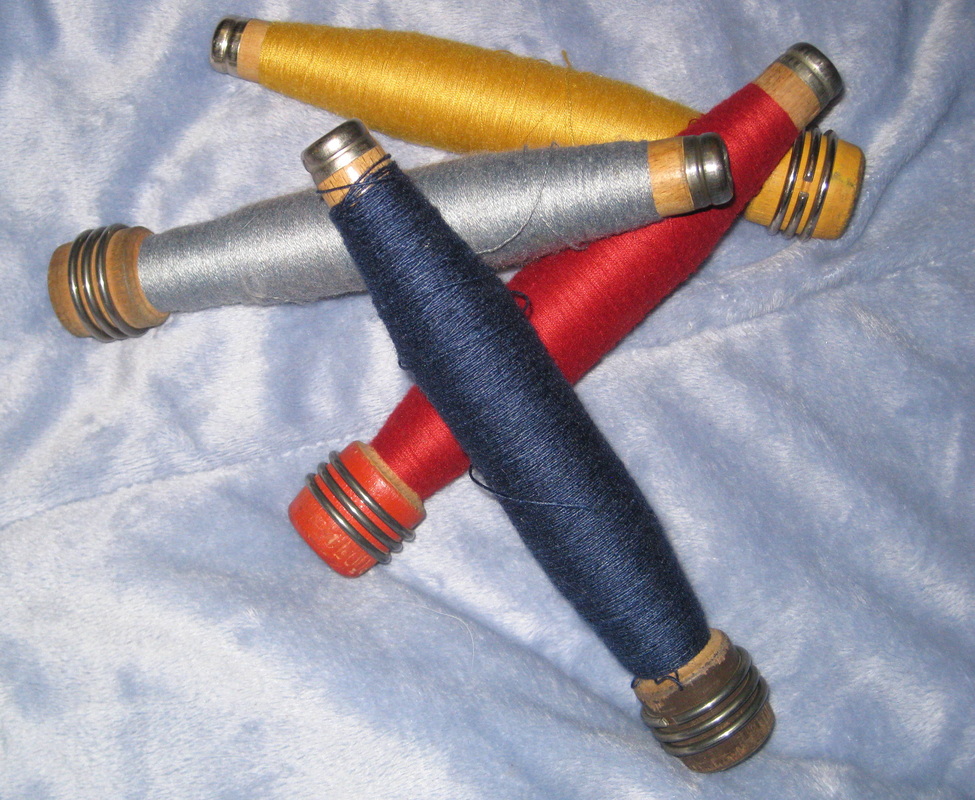
These delicious thread spindles were too lovely to leave behind. They'll look fabulous in a decorative bowl. 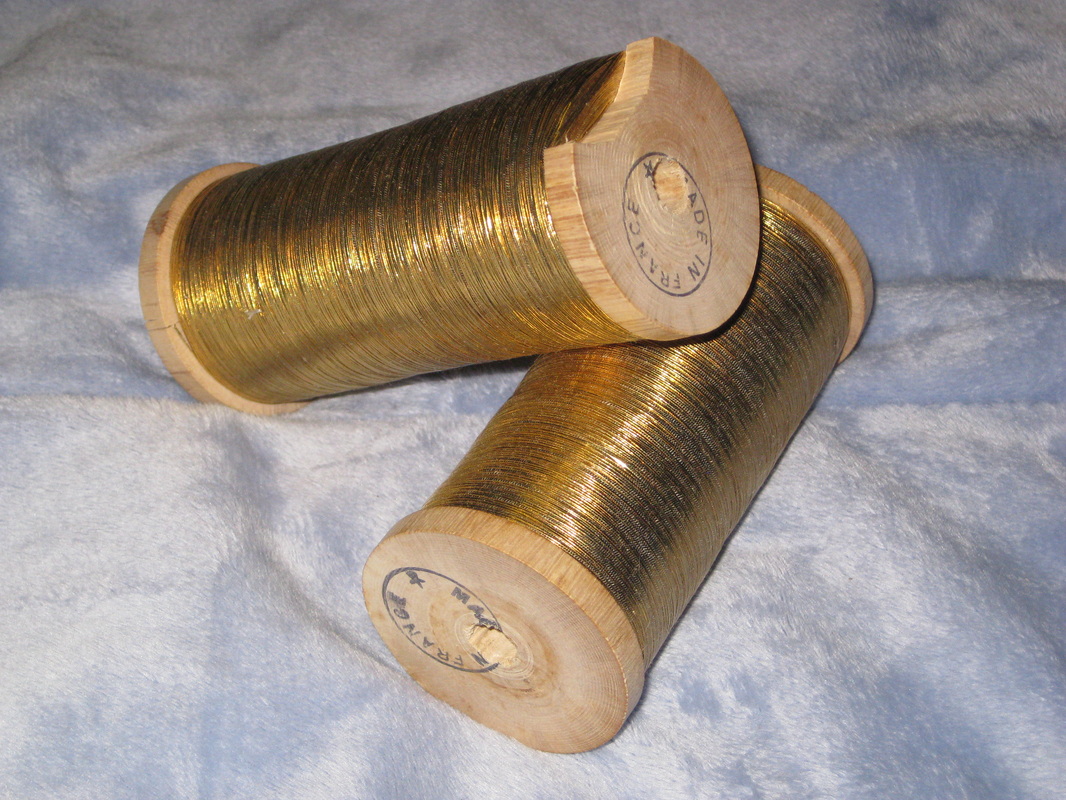
And here was the best buy of the day and the bargain of the century! I spotted 2 spools of gold thread in a glass cabinet. I asked to see them and the shop assistant apologised that one of the spools was broken. I was delighted that it was so........ 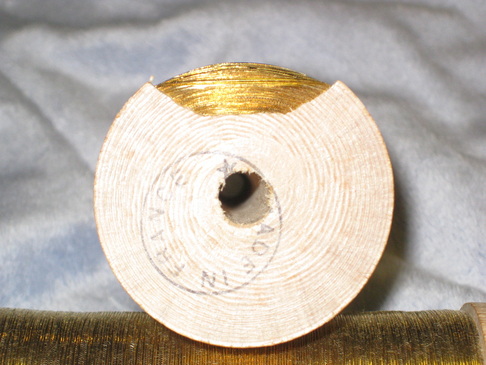
.....because I could see what a huge amount of thread was on them! I snapped up both immediately. These threads will be used in my next art work. I can't wait to play with them. Until then, I just gaze lovingly at them, savouring the anticipation of their use.
I also bought a LOT of embroidery needles as they had Bohin (my favourite) and John James (also good) in a huge variety of packs and sizes that I often find difficult to get down here in Tassie. They also had milliners' needles in a variety of sizes. I often find it hard to find sizes small enough for the threads I use. So, if you are in Melbourne, you must pay a visit to L' Uccello. You'll thank yourself for it. This is the first in a series of blog posts following my development as an embroiderer. In this post you'll see my second embroidery. Actually it is three embroideries but they were conceived and created at the same time and I can't exactly remember the order in which I stitched them. I do have my very first embroidery, somewhere. I know that I discovered it a few years ago, smiling as a mother does when she finds an piece of artwork made by her child many years ago when there was lots of passion, but not much skill! I put it somewhere "safe", so safe that I cannot find it for the life of me even though there are precious few places it could be in my little house. So, what made a 25 year old pick up needle and thread and start making pictures? As a child I was enchanted by my grandmother's embroideries. She lived in the mountains in Croatia where I spent just one week with her. She showed me how to do a couple of stitches and I made a wonky attempt at embroidering a flower. She didn't use a hoop or any sort of frame which I think made it much more difficult for my child's hands. I still remember that the flower was blue. Fourteen years later I visited her mountain home with my husband. My grandmother was long dead, but my uncle and aunt kept the house as a holiday home. I asked if I could see some of Baka's embroideries. There were only a couple of small pieces remaining. They were as beautiful as I remembered. When we returned to England (where we were studying music) I bought some fabric and thread, borrowed a how-to book from the library and made a start. Embroidery has been a constant and integral part of my life ever since. We begin our journey with my second embroidery which depicts two letters in a medieval illuminated style, a "J" and a "D". Because I wanted the Js to bookend the D I worked a second J and reversed it. I made these embroideries for my sister who framed them and has them hanging on the wall in her bedroom. 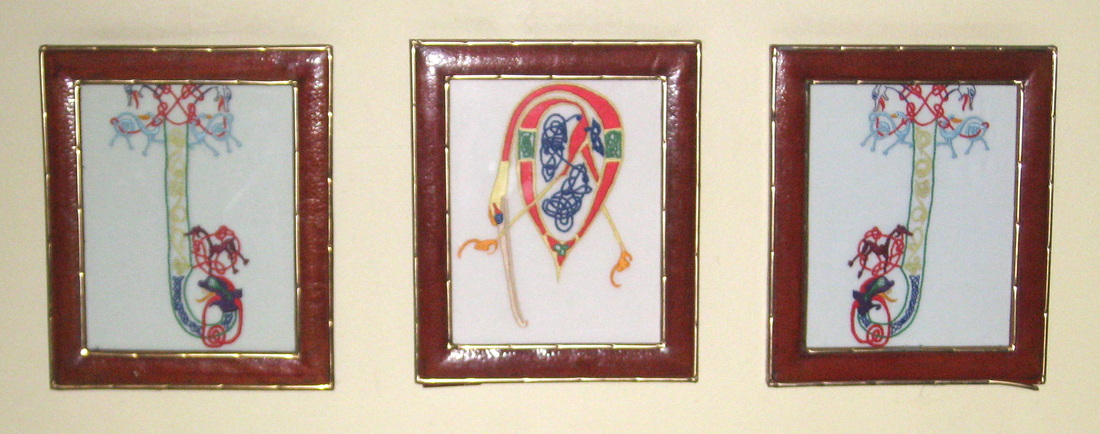 Here's how they look on the wall. Unfortunately the frames cut off a little of the top of the Js and the top edge of the frame casts a bit of a shadow which made photographing them up close a bit difficult. 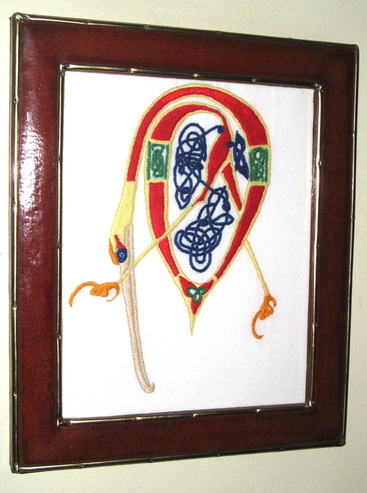 This is the "D" . I had to photograph this piece from the side because there was too much reflection from the glass. I copied these designs from a Medieval Letters Colouring Book that I bought at the Barbican Centre book shop in London. I chose this "D" because I loved the feet and the long beak and thought the body would look good done in satin stitch. 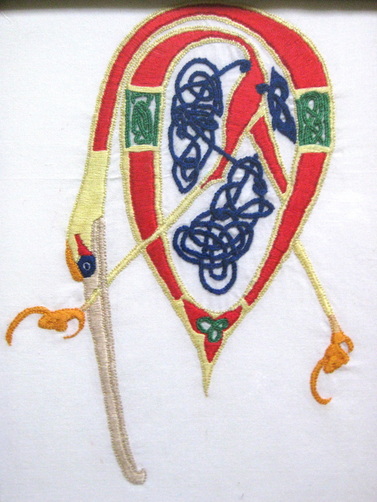 Here's how it looks without the frame. You can see the shadow cast by the upper edge of the frame. 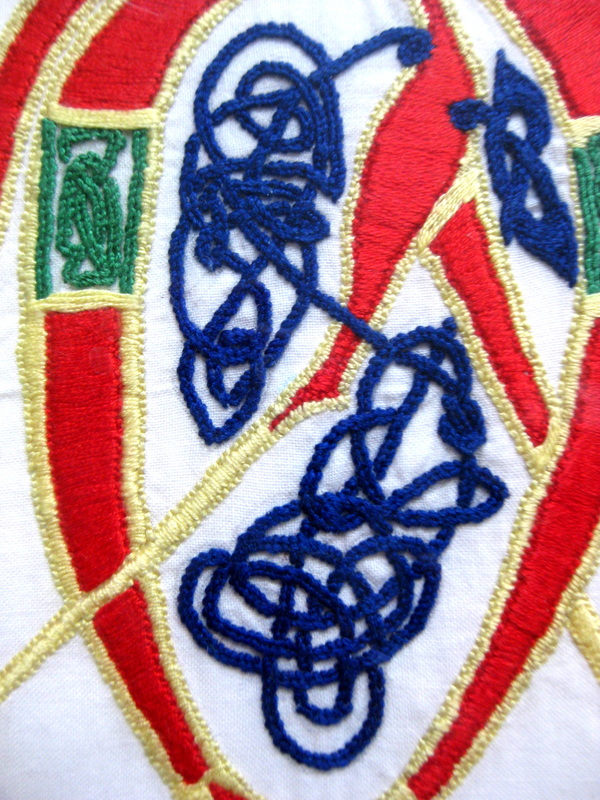 I worked these pieces in 2 strands of Anchor cotton. I outlined the features of the bird with back stitch and then filled in using satin stitch. It was quite difficult stitching the satin stitch filling as I found myself having to pierce the thread on the back of the back stitch to have the satin stitch sit close against the back stitch outline. I remember my hands hurting from having to push the needle through the fabric and the thread. I also remember that it was much worse when I was stitching the Js because the filled areas were so much smaller. The Celtic Knots were worked in 2 rows of stem stitch. 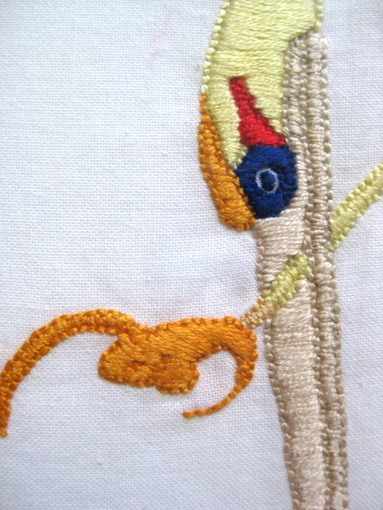 Here you see detail of the head and leg/foot. I actually really like this part. I think "not too bad for a raw beginner".  Knot work in close up: I remember it being a bit of a challenge preserving the over-under pattern of the knot. 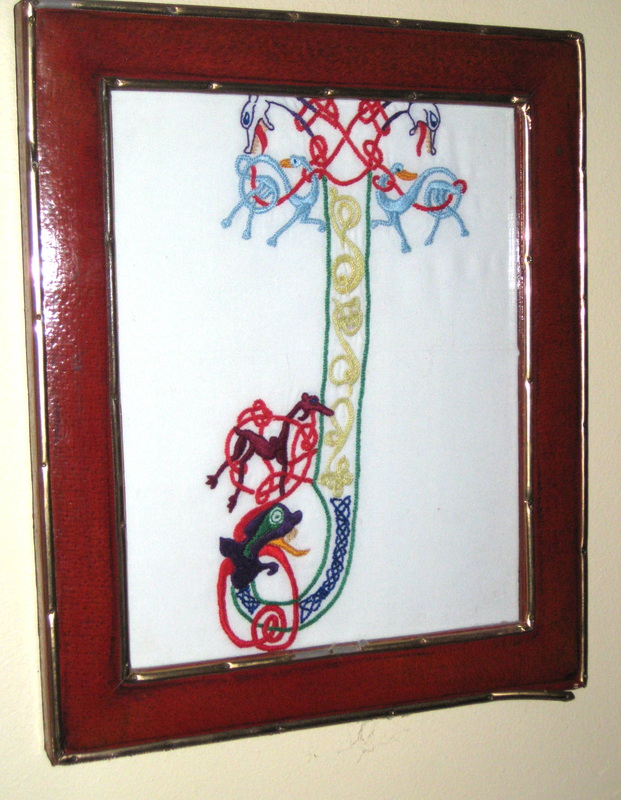 Here's the J in its frame. I had trouble photographing this one so this is the only image I have of the whole thing. 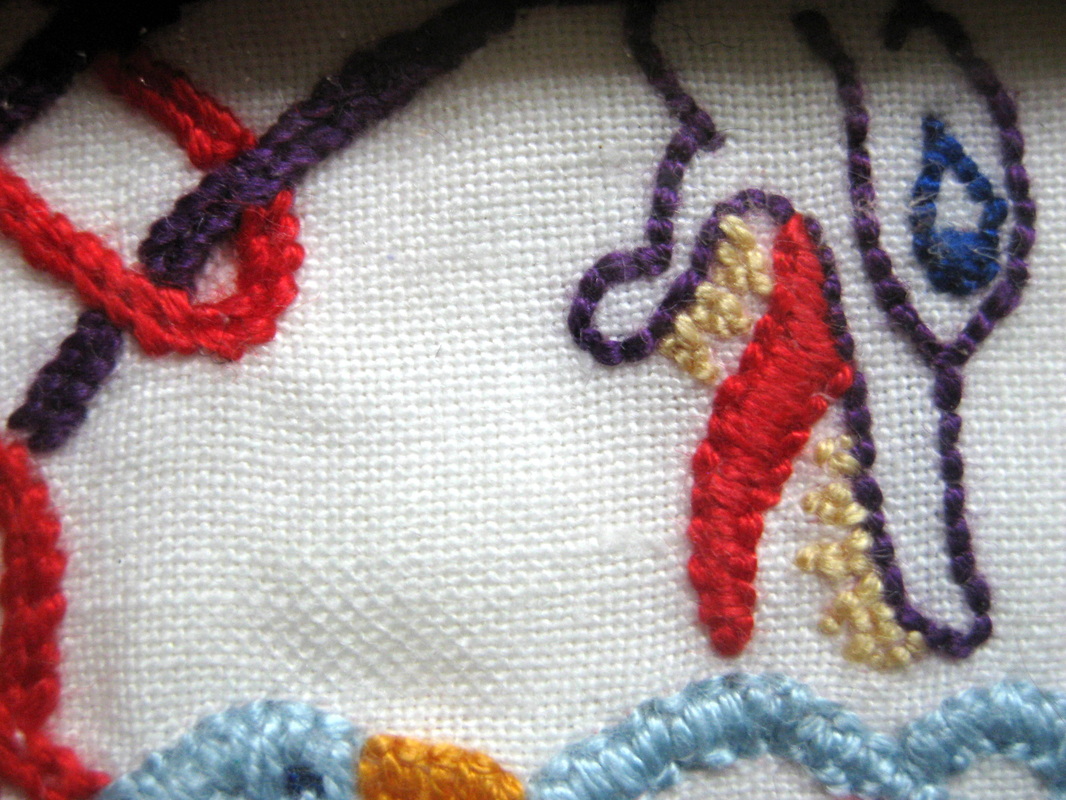 Today it wouldn't occur to me to work the dragons teeth this way, but the teeth worked in back stitch with the 2 strand thick thread makes them look really ominous. I like it. 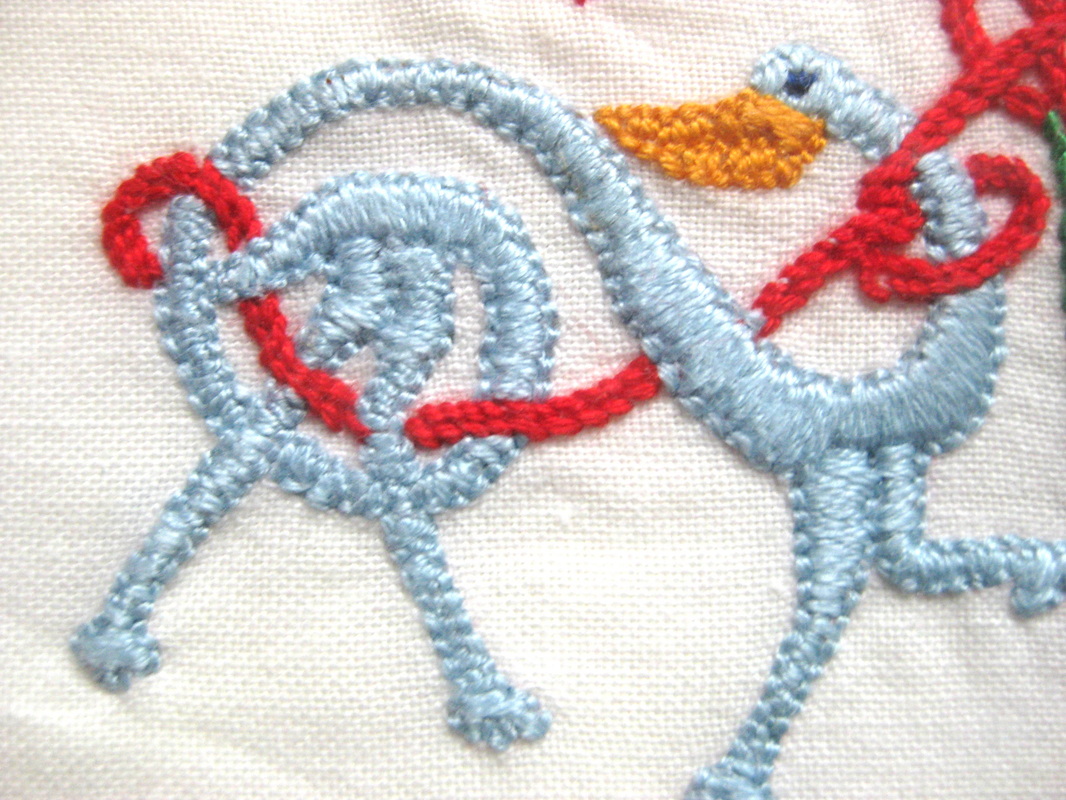 I have no idea what type of creature this guy is or why he reminds me of ducklings and newborn babies.  Celtic knot work on the stem of the J 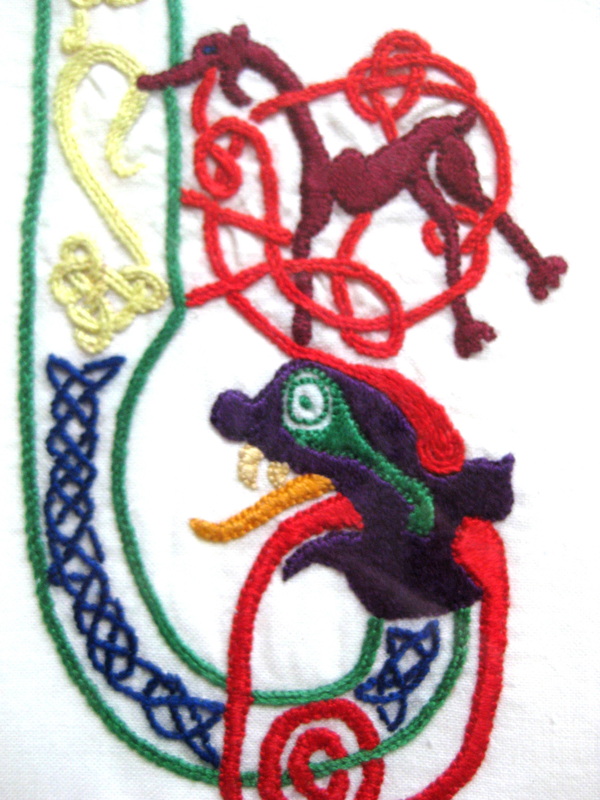 A closer look at the bottom half of the reversed J. 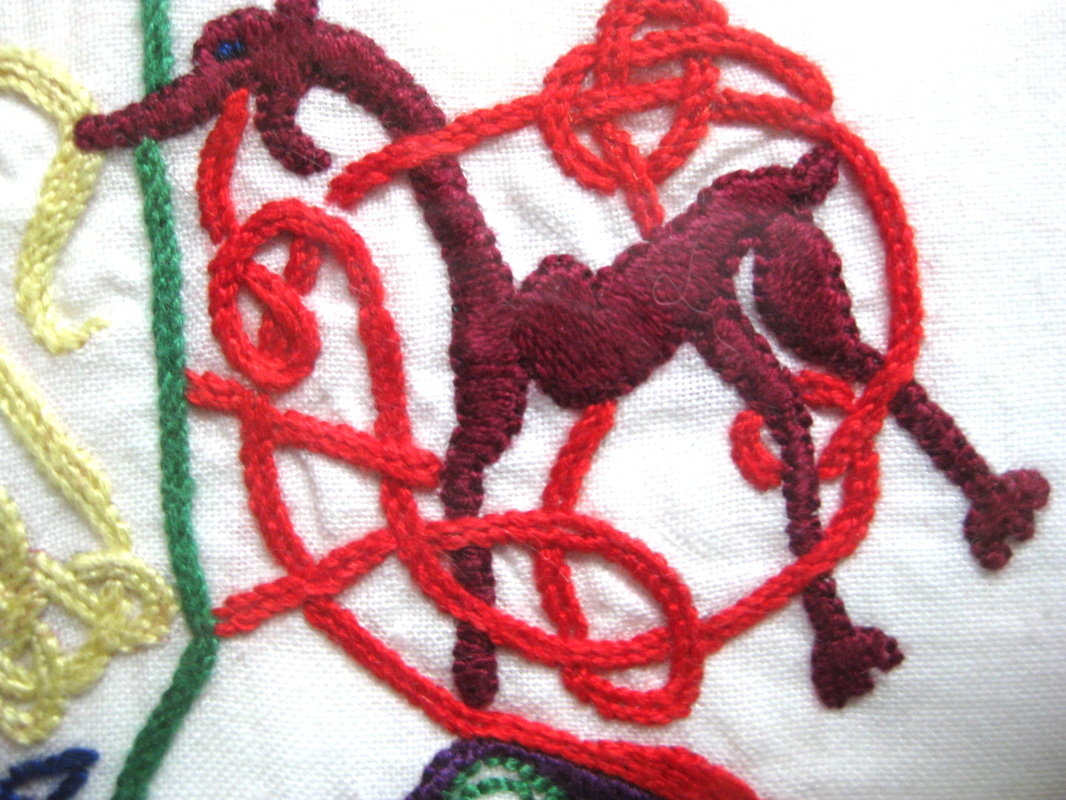 I think this guy might be a dog.  Scary dragon head in close up (sorry for the bluriness). I must say I'm surprised at the neatness of the purple stitching.
So, there you have it. My second embroidery ever, done 22 years ago. 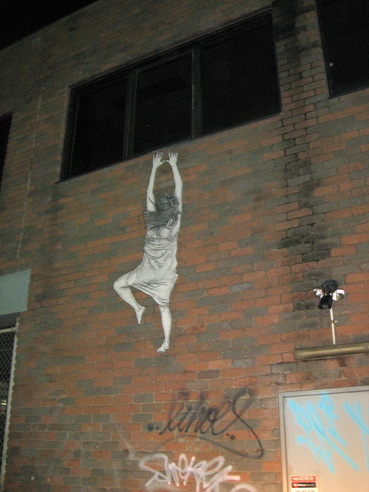
Street Art in Footscray, Malbourne (Actually that's me crawling up the wall after trying, unsuccessfully, to upload photos my Blogger site).
After much frustration with not being able to download images to my blog I have decided to move my blog here with my website. Makes much more sense really to have all your housekeeping in the one place. I'm not sure I like this blocky font, but it really works for my website and as far as I can tell if I change things here it will change it across the entire website (which I definitely don't want). What hasn't changed is my commitment to writing regular blog posts that I hope will continue to peak your interest. I'll be starting off my new blog by doing a series of articles on my origins and progression as an embroiderer. You will see works from (almost) the very beginning to very recently with a few little stories thrown in along the way. Although I could have been doing some drawing or other smaller creative jobs, after having my studio wood heater stolen I just seemed to be lacking the creative drive. My new wood heater should be installed next week and I will be back in my studio and working like fury! I am so excited that I'll finally be back in my studio after 11 weeks in exile! Expect to see some work in progress posts in the next couple of weeks. 
|
This blog was previously at another site. To view older blog posts please click here.
AuthorI am a hand embroidery artist living and working in the rugged and wild Central HIghlands of Tasmania. Archives
October 2014
Categories
All
|
 RSS Feed